How to Perfectly Season and Pan Sear Steak!

Overhead shot of a sliced ribeye steak on a cutting board with garlic and spinach

Whether you’re a well done steak eater, or you like yours with a quick sear, I’ve got some universal tips to get you that perfectly seasoned, seared, and sliced steak!

So you need help to pan sear steak at home. Well, everyone’s definition of perfect is definitely different. Especially when it comes to cooking meat that can be consumed at various temperatures. 

So many different cuts of steak exist in this meat-eater world, so the amount of time it cooks varies greatly. For this lesson, I’m using a bone-in ribeye.
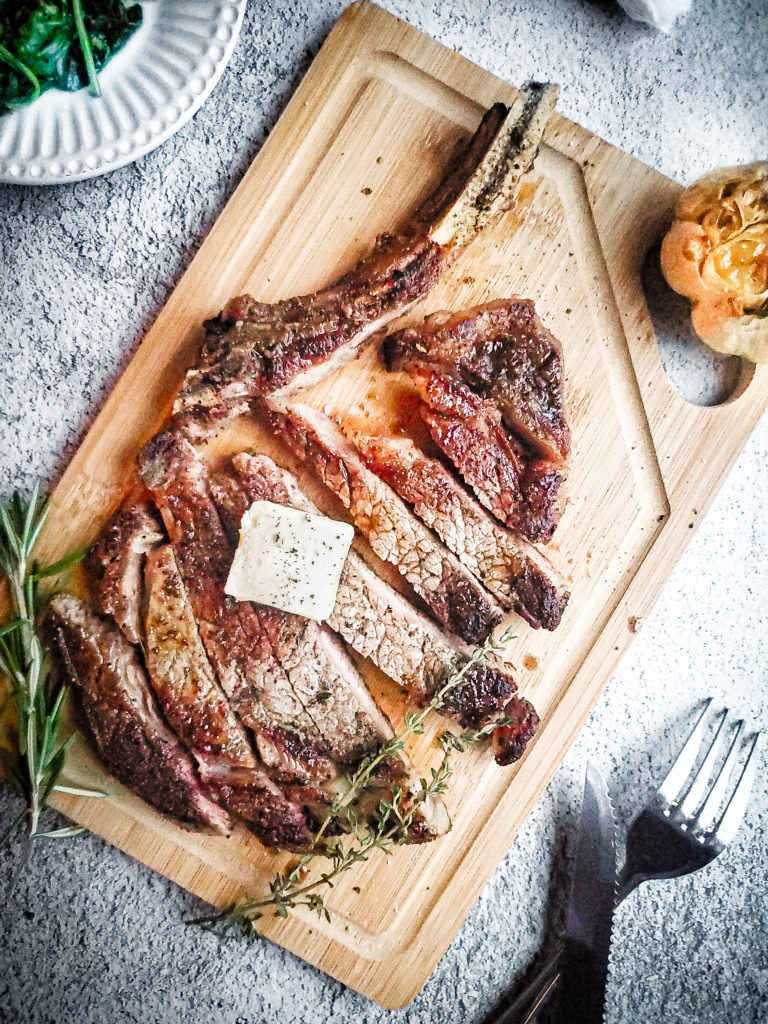
Overhead shot of a sliced ribeye steak on a cutting board with garlic and spinach

There are 2 main points (with sub points)  that involve your steak coming out delicious: the prep done to the steak before cooking, and the actual cooking process. All the steps are covered below!

Steps to take when prepping a steak to be cooked:

Slice off a little of the fat cap 

Depending on the cut of steak you purchase, you’ll find a thick layer of fat on one side, which is called the fat cap. First let me say that fat means flavor! So you don’t want to remove this whole piece, but trimming off some of it is perfectly fine. Don’t worry though, that fat will get cooked, which will be brought up later.

Pat the steak dry 

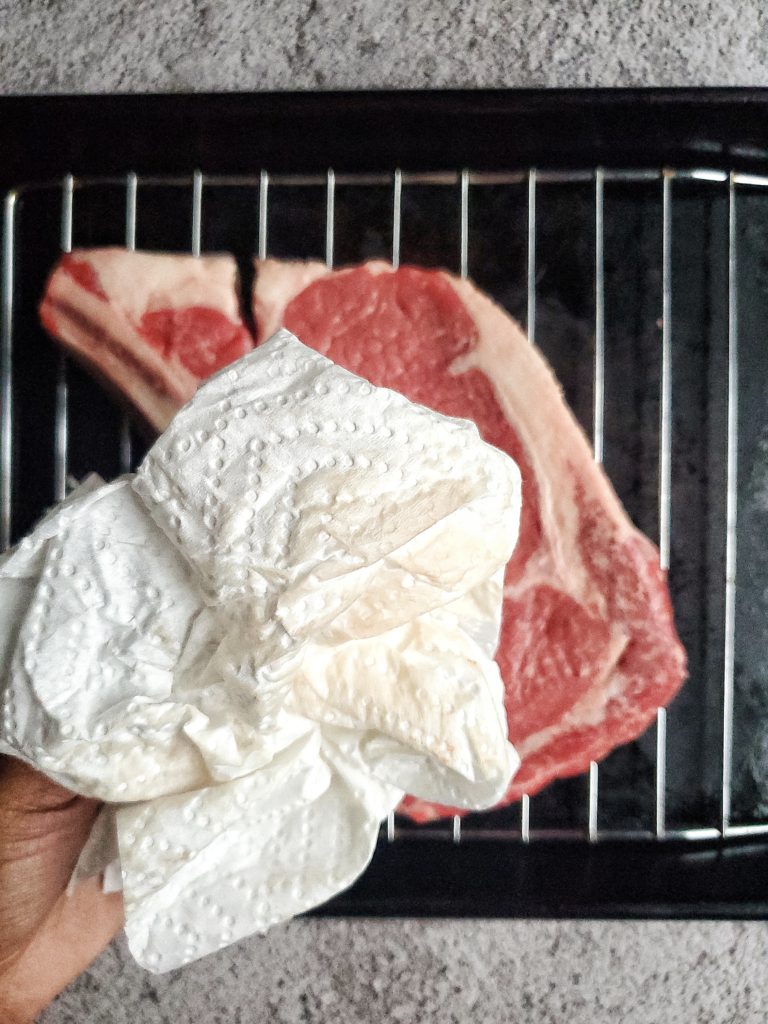
Like with any protein you’re searing, you want the skin to be free of excess water. This is natural and nothing to stress over, but you’re gonna want that perfect sear for this. Grab a paper towel and pat both sides to remove the extra moisture.
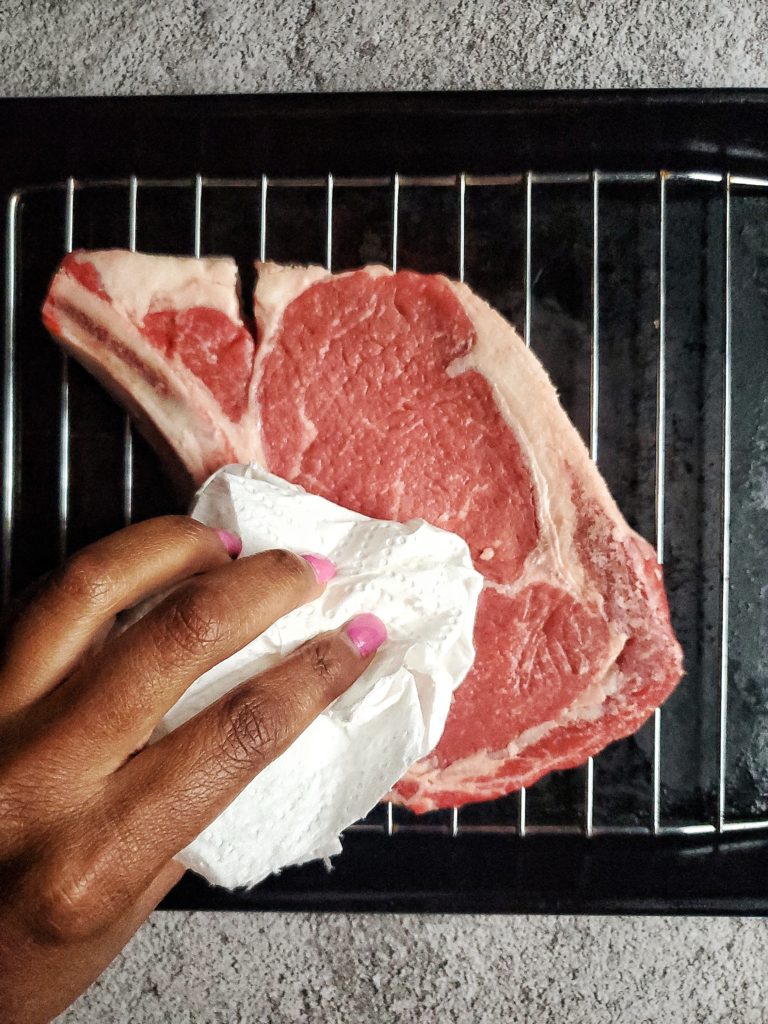
Ribeye steak being pat dry
Pat your steak dry when removing from it’s packaging
Ribeye steak being pat dry
Excess moisture from patting the steak dry

Sit the steak on a wire rack, if possible

If you have a wire rack, it’s the perfect time to use it! 

Wanna know where I got this mini rack from? My toaster oven! It fits perfectly on my smaller cookie tray too. If you don’t have either one of these, no worries. A tray or plate is just fine. 

Sprinkle liberally with kosher salt

Now, this is some science-y sh*t about to happen. The salt will draw out additional moisture from the outside of the steak. While it’s doing this, the salt flavor will also penetrate into the steak itself. 

Please note that when doing this, you should be using kosher salt. Do NOT use iodized!!!! The salt granules for iodized salt are very small, and will  make your steak overly salty and that is NOT why we’re here. However, kosher salt granules are bigger, making less salt needed to season. More science-y sh*t. 

Season that steak liberally on all sides, including that fat cap. You’re essentially marinating the steak.
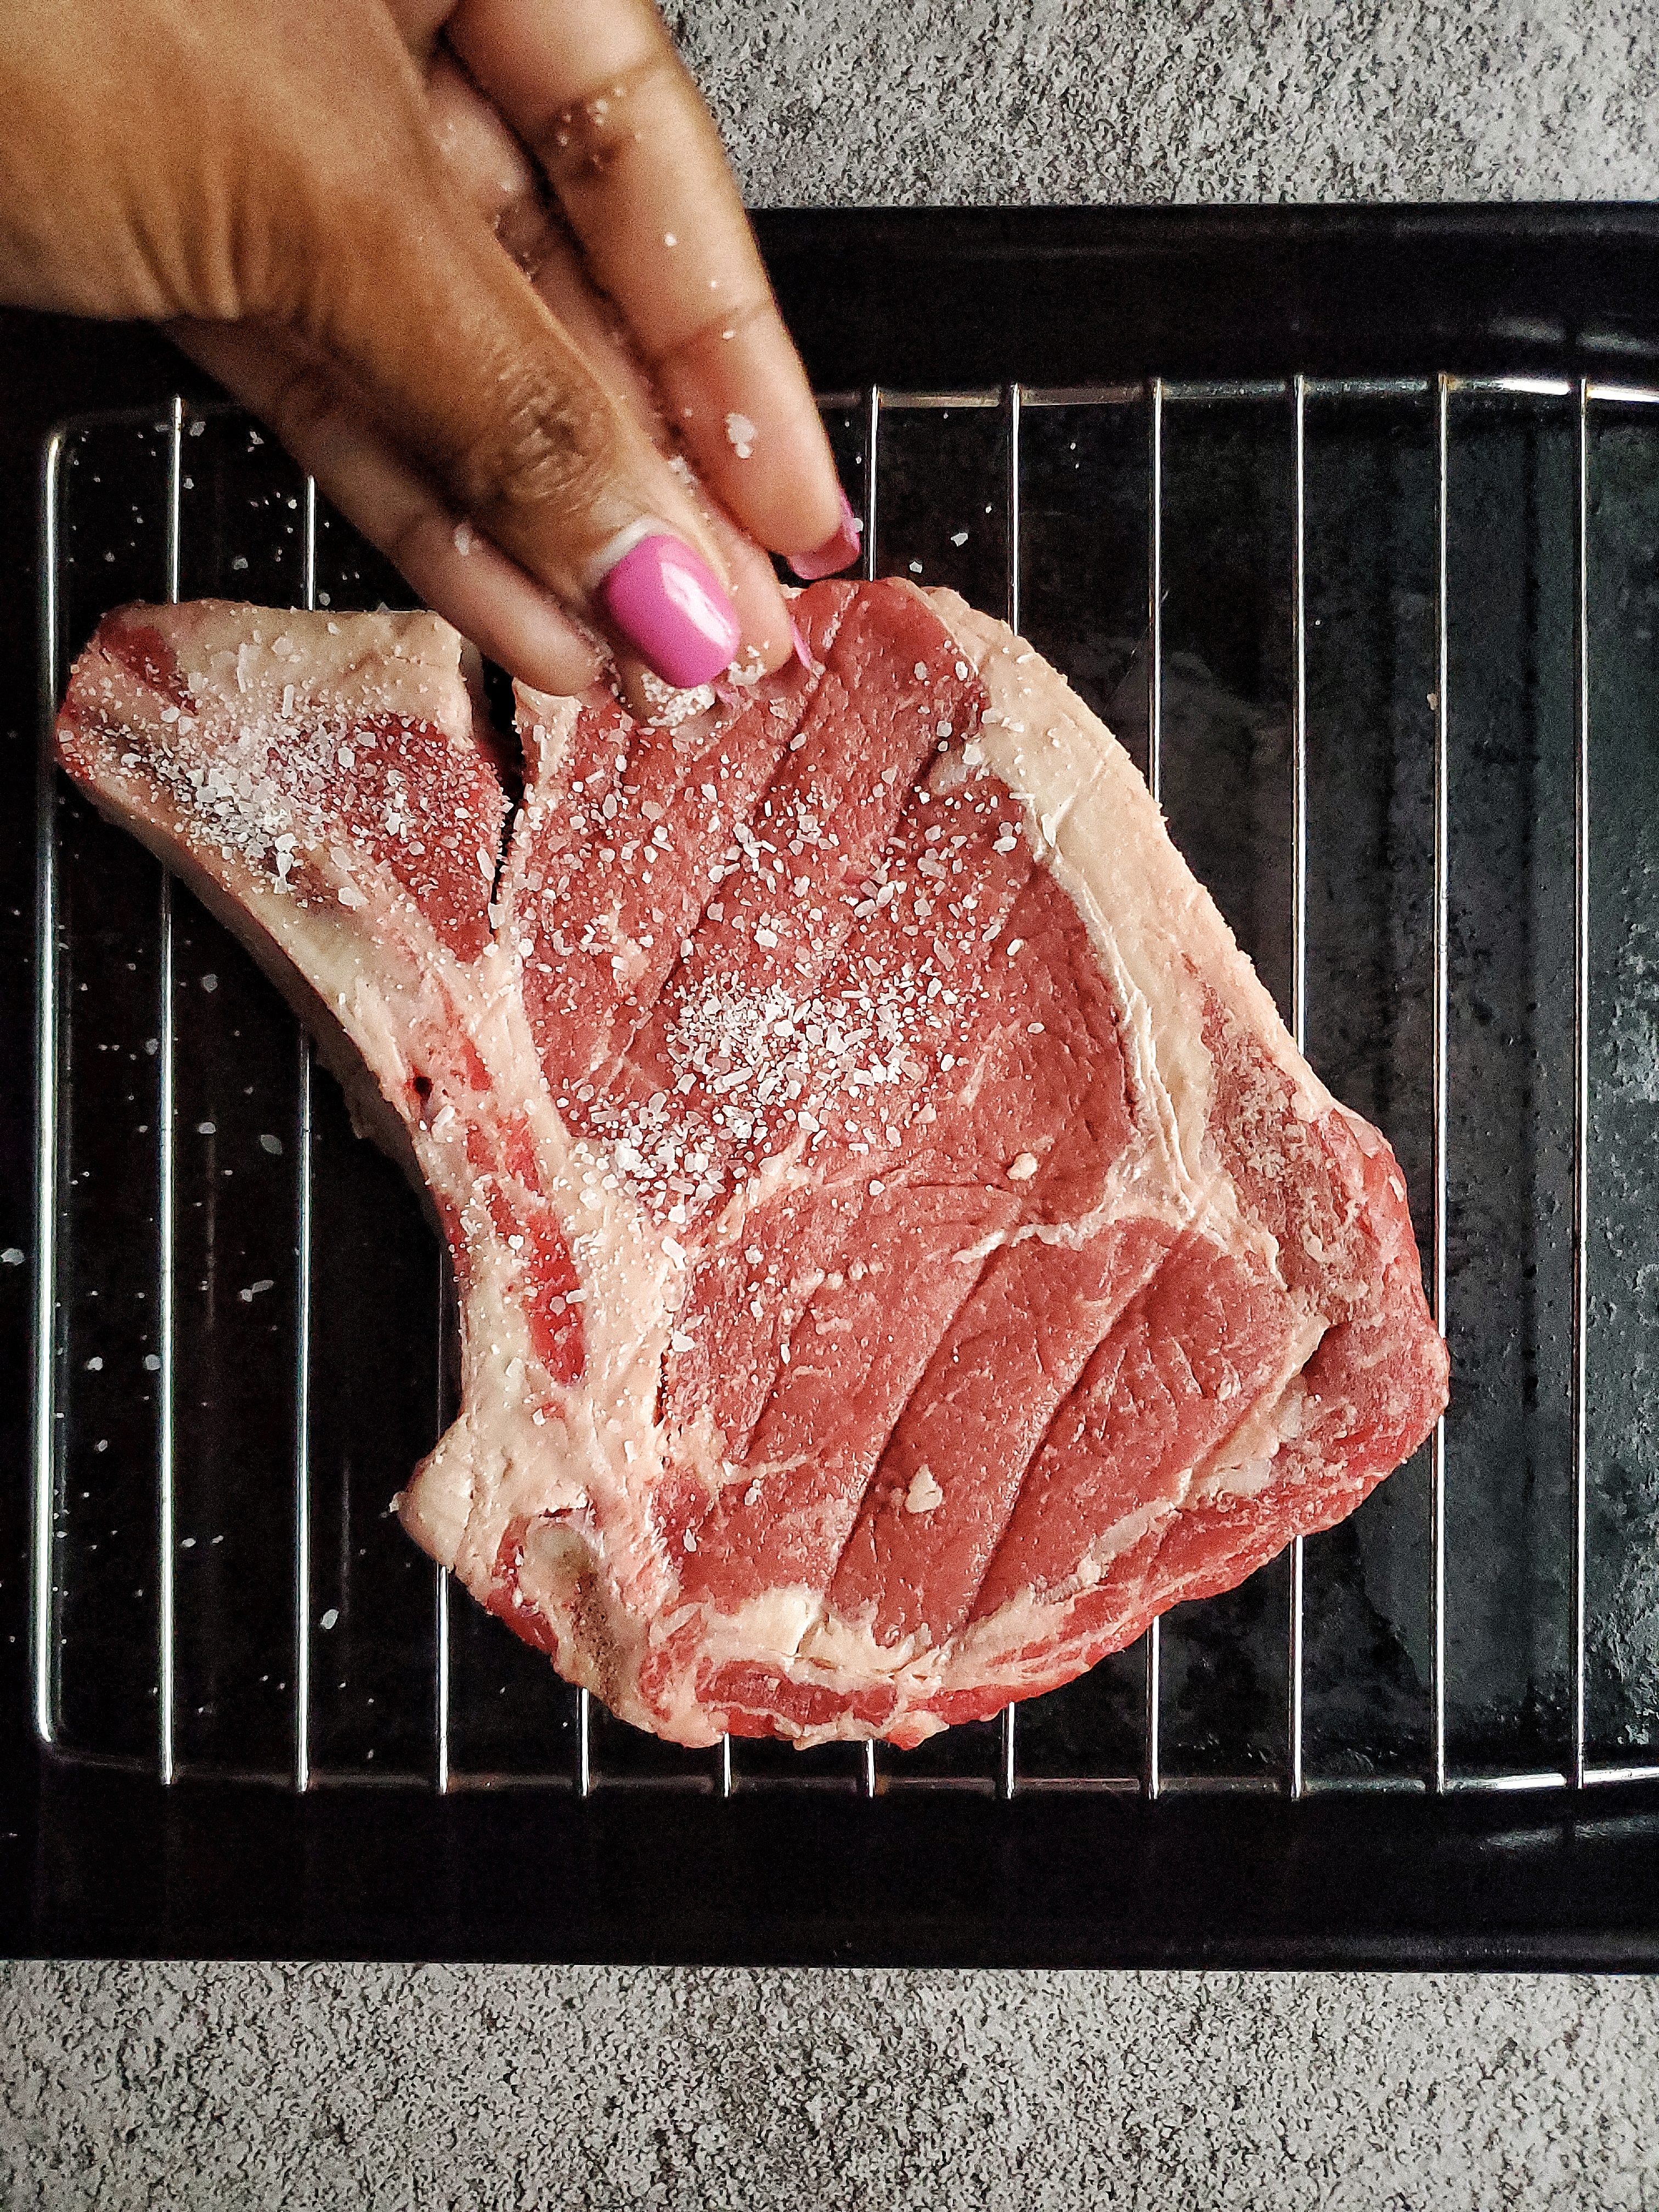
Ribeye steak being seasoned
Liberally sprinkle both sides of the steak with kosher salt

Let rest 30 minutes per inch

Next, let the steak sit with the salt for 30 minutes per inch of thickness. Try not to go any longer than this, as the steak will be overly seasoned with the salt/science that I mentioned above, and will also pull out too much moisture. Again, we don’t want that. If you get side tracked (cuz life happens)  an hour with the salt is fine. But pleeaasssse avoid going any further than that!

Let the steak sit at room temperature 

Don’t put the steak back in the fridge. It’s better to cook meat when it’s not cold. The steak will cook more evenly when it’s closer to it’s ideal cooked temperature. 

Believe it or not, you can let a raw steak sit out for a couple of hours, and it’ll still be safe to eat (as long as it’s straight from the fridge.)
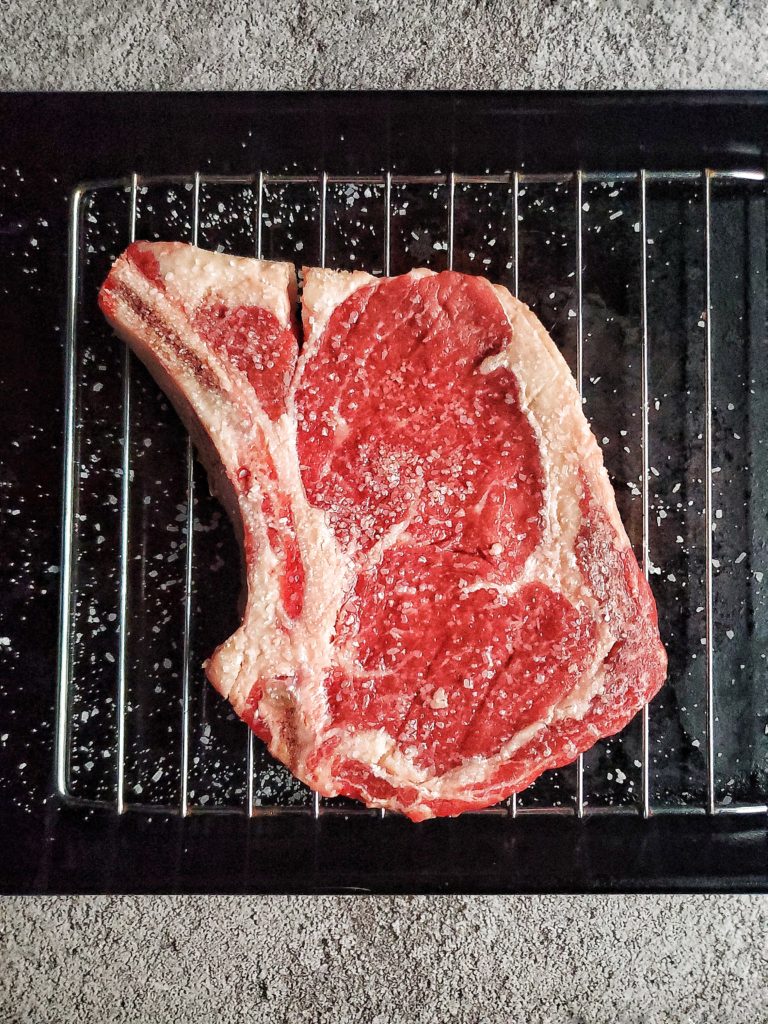
Seasoned ribeye steak
Excess moisture after salting the steak for 30 minutes

Pat steak dry again 

After the allotted time that your steak has sat out with the salt, you’ll notice a bit more moisture! That’s the science I mentioned earlier. Pat the steak dry like you did in the beginning. Make sure you aren’t wiping the steak, so that the salt isn’t being removed.

Patting the steak with a paper towel will keep the salt on the steak while still removing that excess moisture. Also, getting rid of that excess moisture creates a better crust on the steak, helping it to sear in the pan instead of creating steam.
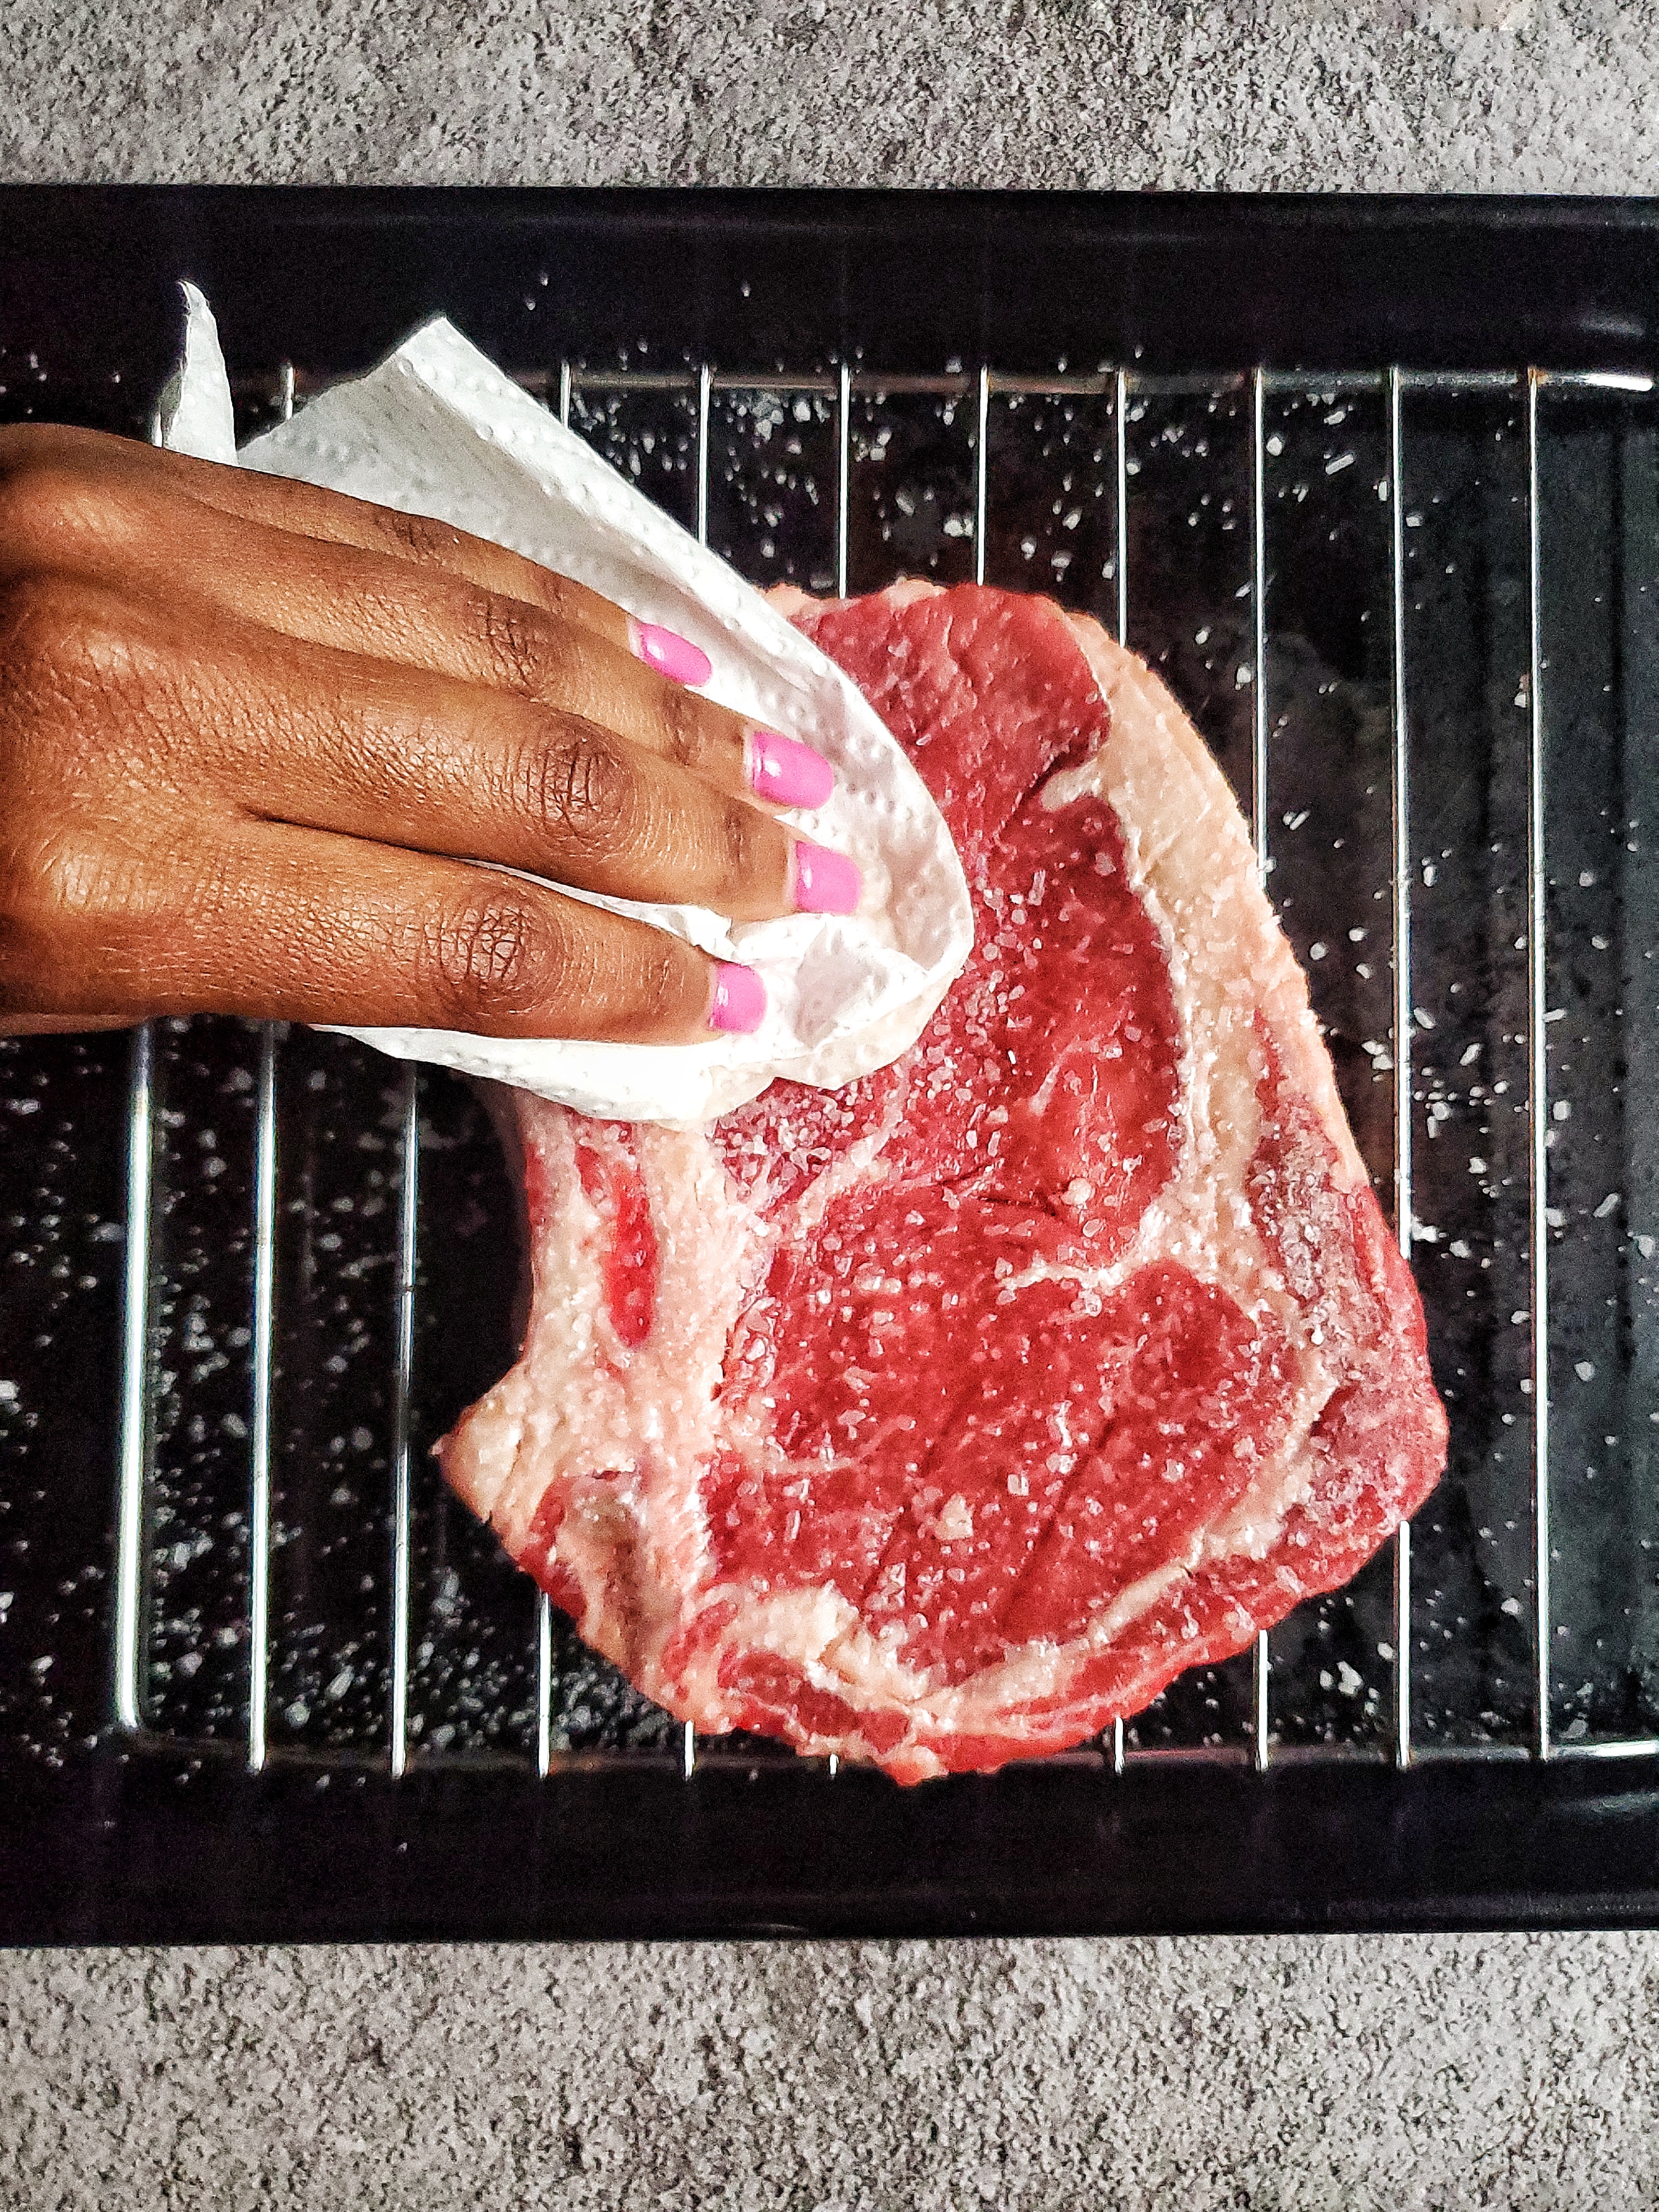
Ribeye steak being pat dry
Pat the steak dry a second time, to remove that additional moisture from using salt
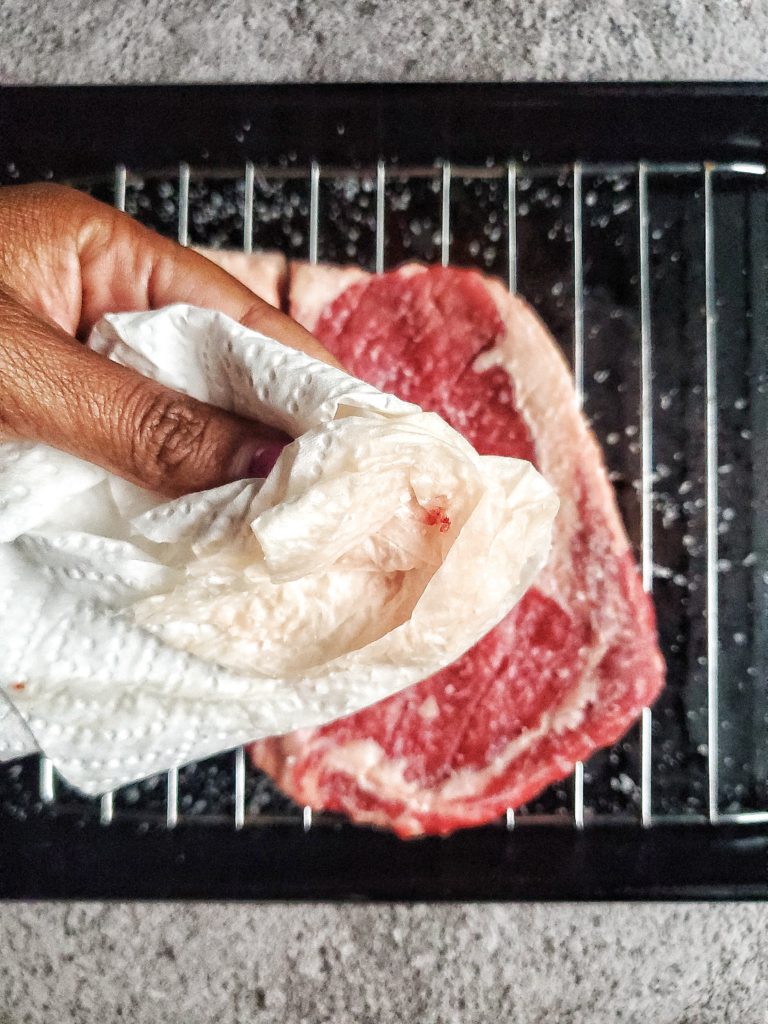
Ribeye steak being pat dry
Moisture from patting the steak dry a second time

Season with pepper 

This is optional since letting the salt sit with the steak helps to improve the flavor. But take it up a notch with some pepper. You do not need any other seasonings at this point. 

Now that the steak has been seasoned to perfection, it’s time to cook that bad boy!

First, I must tell you to invest in a cast iron skillet. Not only is it perfect to pan sear steak, it’s basically a griddle, oven safe dish, and saute pan in one! A cast iron is definitely a kitchen staple, and my favorite kitchen tool! But anyways, on to the cooking part…

How to pan sear steak:

Medium-high heat with canola or blended oil 

Heat your pan on medium-high heat. It’s best to get your pan on the stove to heat up when you pat your steak dry the second time. Once it starts to give off a little smoke, add in enough canola or blended oil to coat the pan. 

Put your steak in the pan, and just look at it for a bit 

Next, carefully place your seasoned steak into the hot pan. And don’t move it. The only times you’ll touch this steak again is to flip it over and remove it from the pan. Moving the steak around will prevent the steak from getting that perfect sear. (FYI – this method counts for ANY protein or veggie you’re cooking on the stove that you want to have some color.) So just let it hang out.
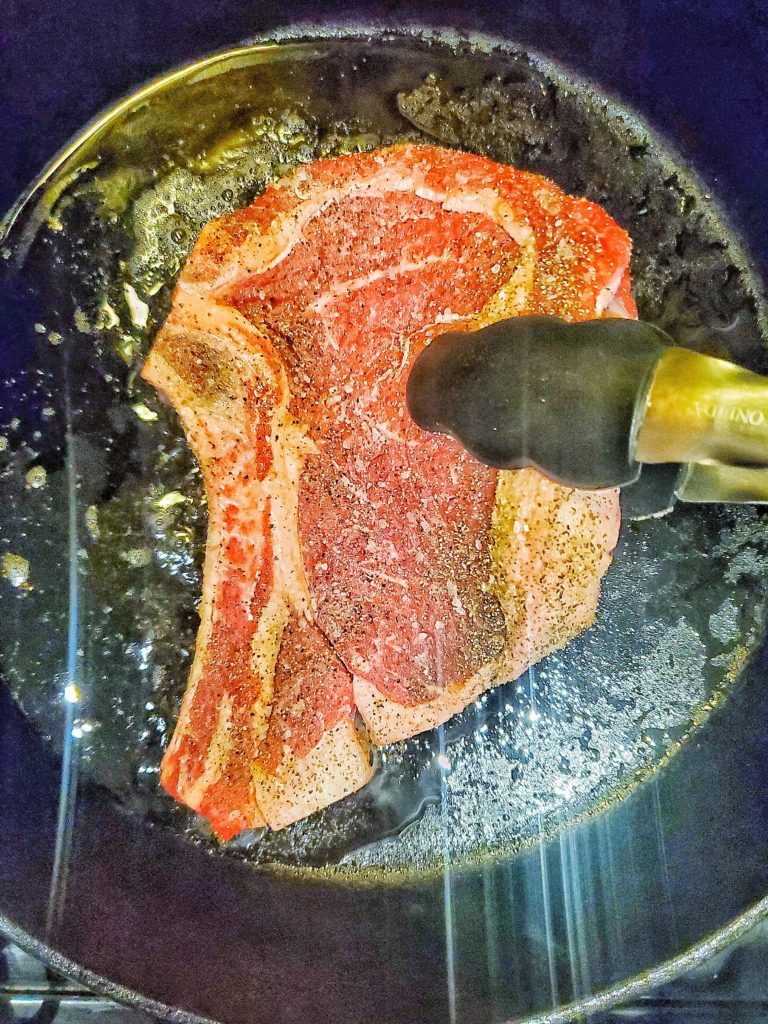
Seasoned rib eye steak in a cast iron pan
Season your steak and gently place in a preheated pan with oil

Don’t use a fork or knife to flip your steak!!! Seriously!!!

Use either a spatula or silicone tongs. When using anything other than those, you’ll be stabbing into the steak, piercing a hole for the juices to come out. And we don’t want that! Also avoid using metal tongs for this. More info on this topic a few points down. 
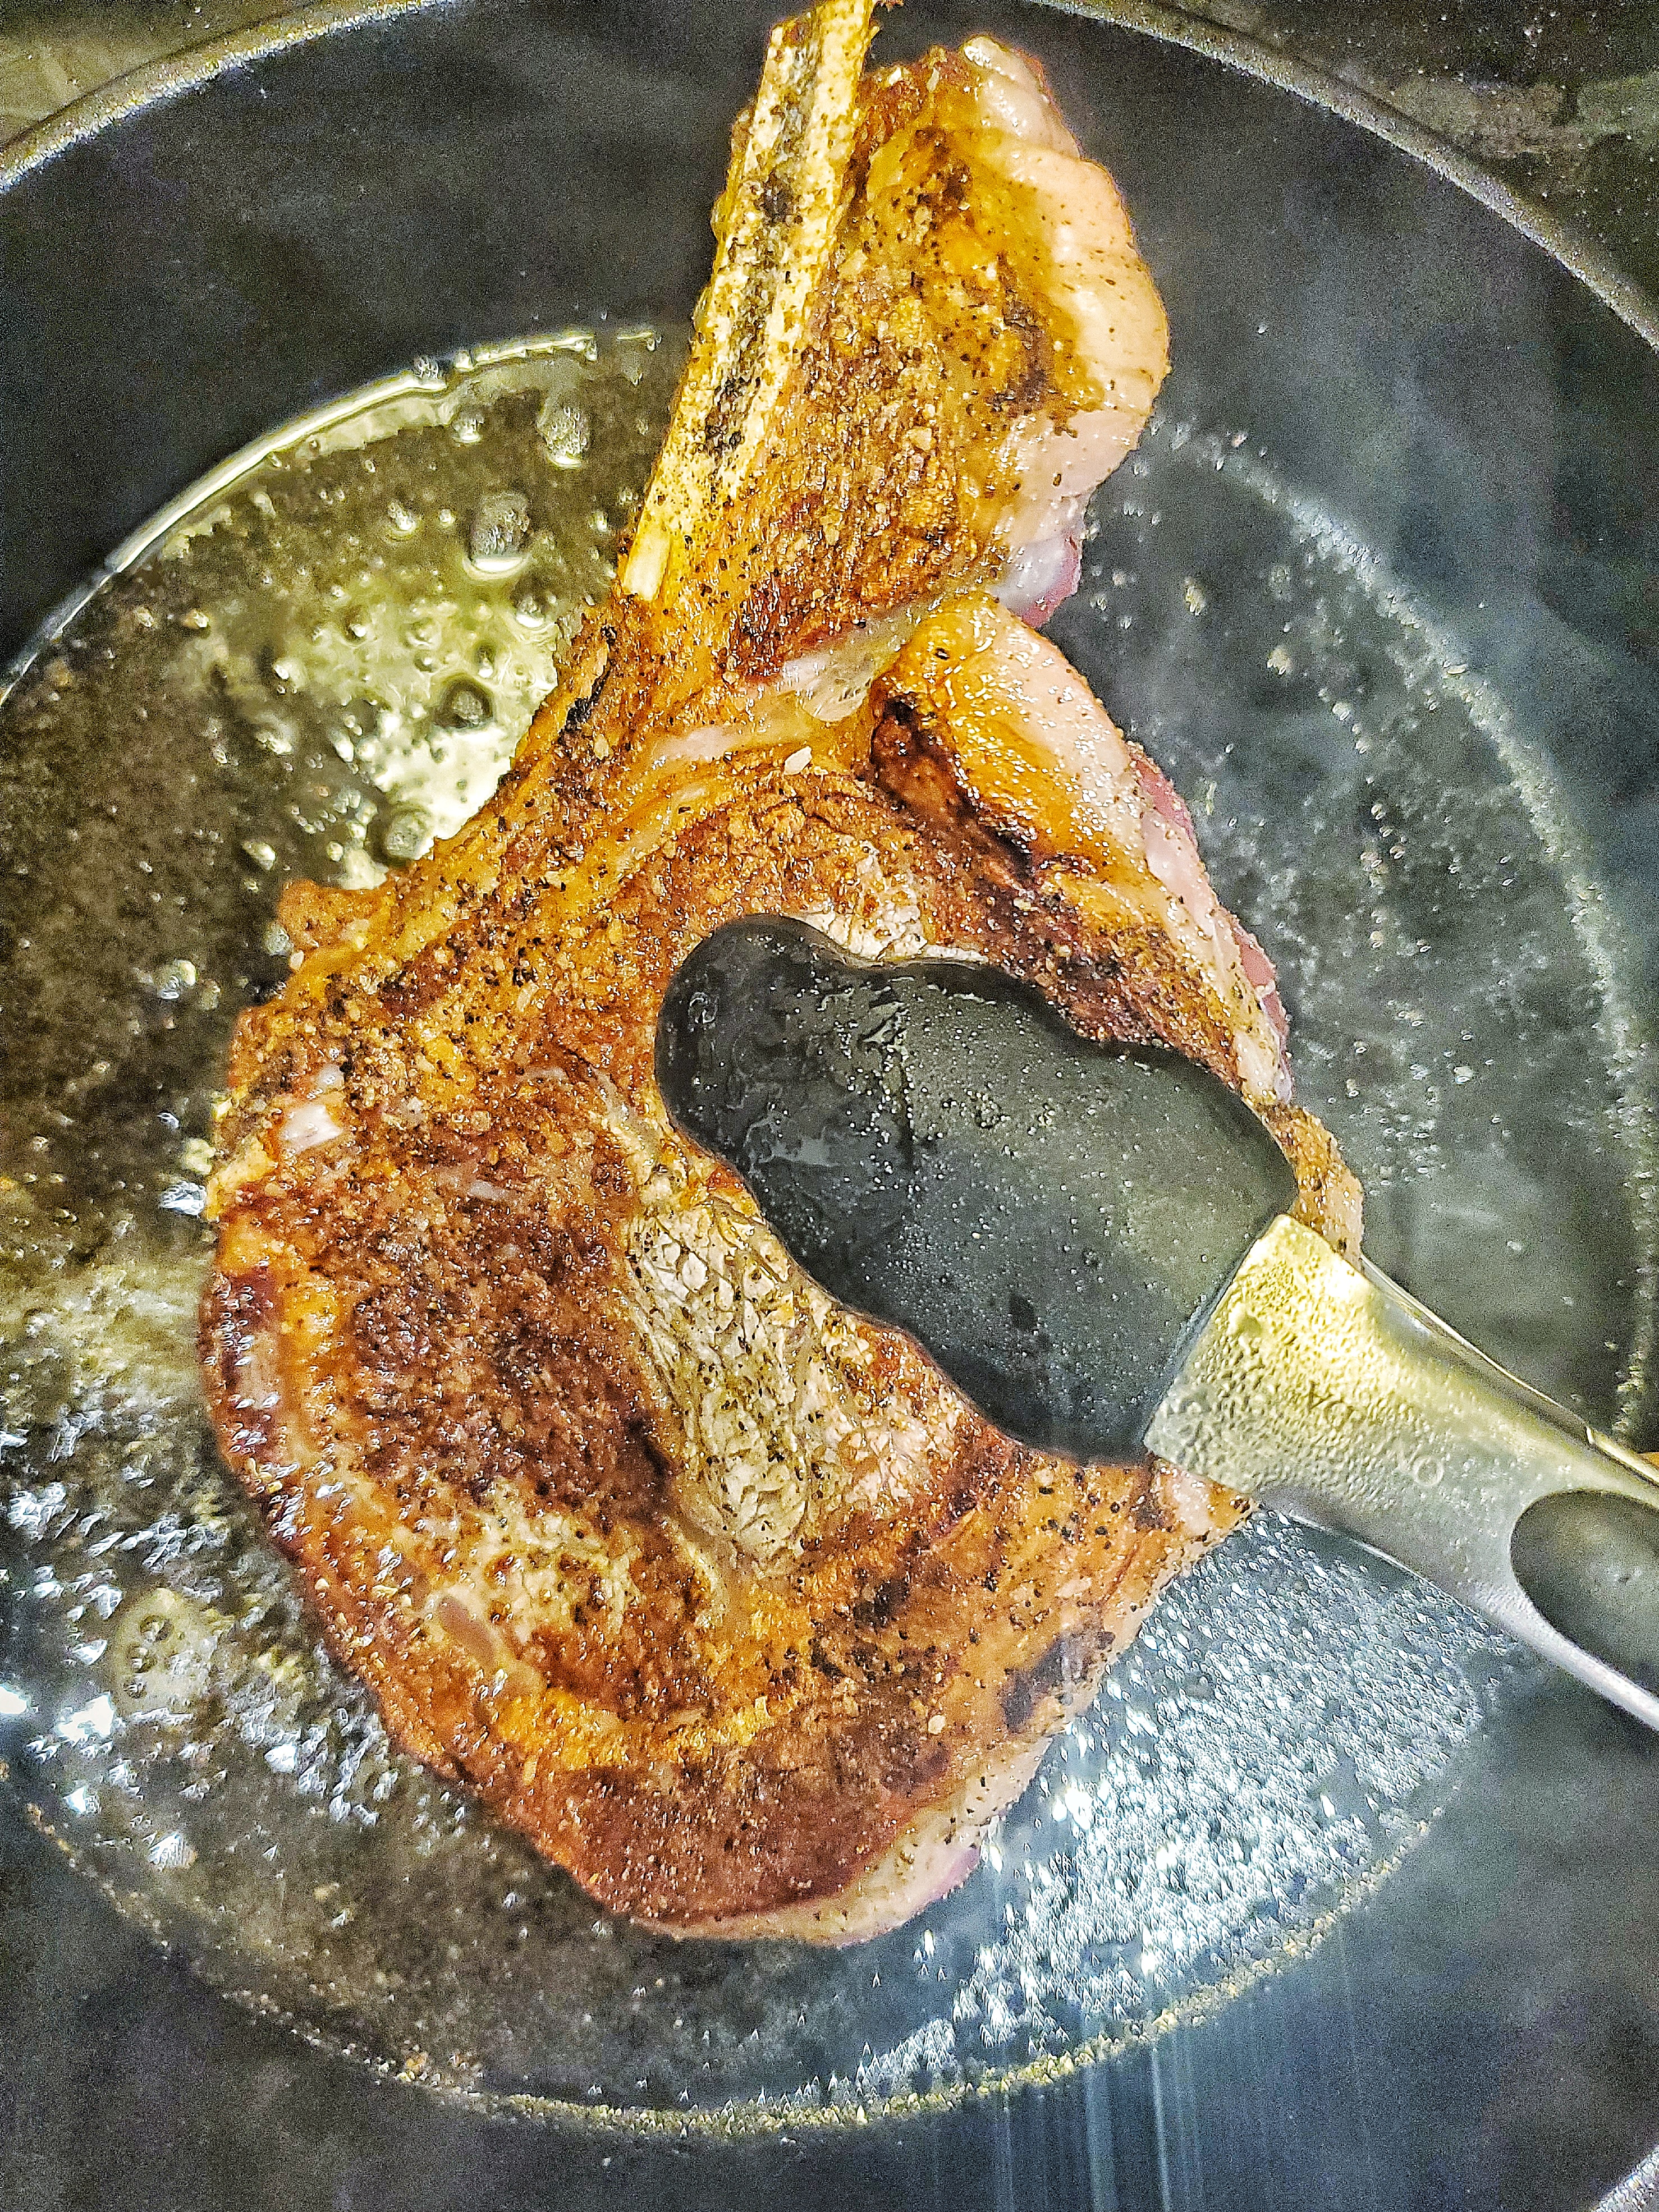
Ribeye being seared in a cast iron pan
Use silicone tongs or a spatula to flip. Do not use a fork or knife!!!

How long to pan sear steak

I prefer my steaks cooked to medium. So this steak, which is 1 inch in thickness, was cooked on each side for 2 ½ – 3 minutes. If you’re a medium steak person like me but you have a thicker steak, add a minute per inch per side (so a 2 inch steak will cook for 3 ½ – 4 minutes each side)  In turn if you have a thinner steak, subtract a minute per side.  Same deal if you prefer your steaks cooked a degree more or less than medium.

For reference, I’ve added steak temperatures and their names below, along with my suggested cooking time for a 1 inch pan sear steak. 

  • Rare – 125 F, cool red center (1 minute per side)
  • Medium rare – 135 F, warm red center (2 minutes per side)
  • Medium – 145 F, warm pink center. (3 minutes per side)
  • Medium well – 155 F, warm gray center with a little pink (4 minutes per side)
  • Well done – 165 F, gray AF (5 minutes per side)

If you want to check the temperature of your steak with a thermometer to play it safe, wait until after the steak has rested, since we aren’t trying to pierce the steak and lose it’s juices. 

Baste it baby! 

Again, fat means flavor. After you sear the first side of your steak and flip it, throw  a big chunk of butter into the pan. This should be added in the last 2 minutes of completely cooking your steak. If you have it, also throw in a couple of crushed garlic cloves and a small handful of herbs. 

Once the butter melts, spoon it onto the top of the steak. This is called basting (think of basting a turkey). Keep in mind that this basting does account for some of the cooking time, so you only need to do this for about 30 seconds.
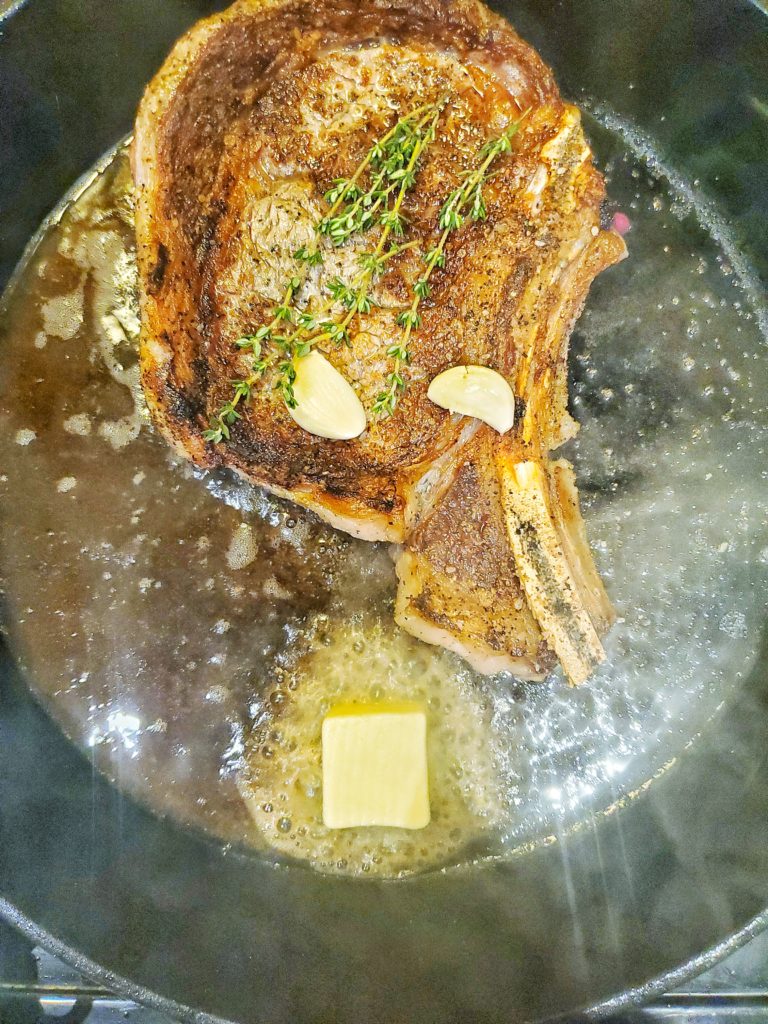
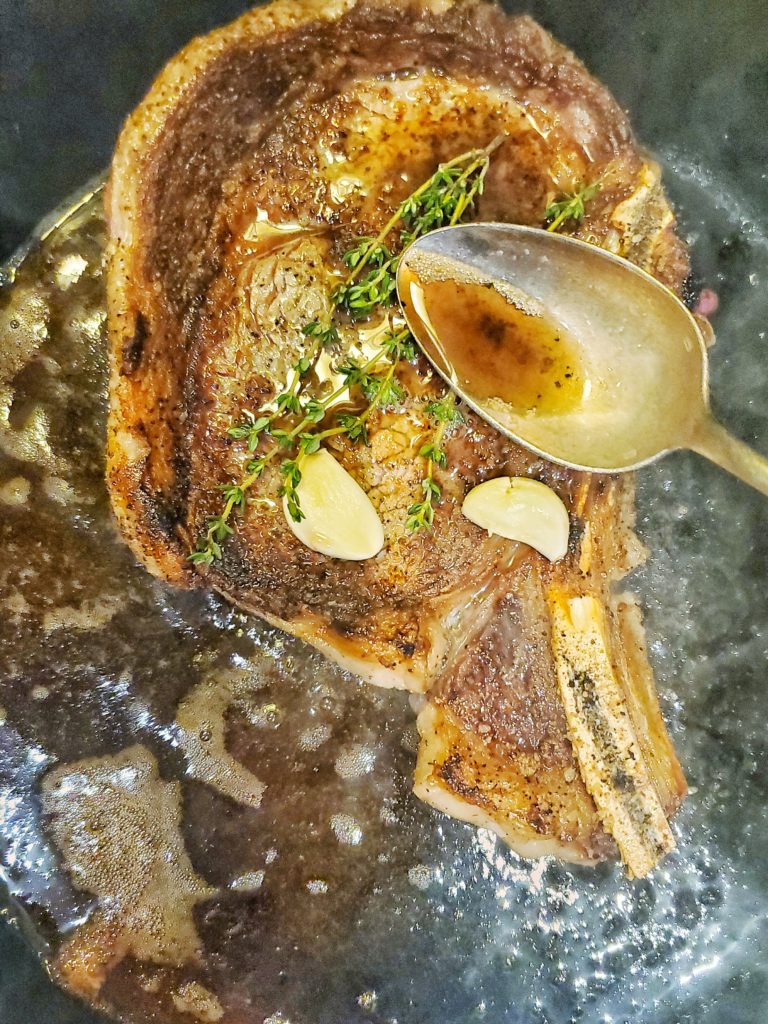
Ribeye steak in a cast iron pan with butter, garlic, and herbs
Add unsalted butter, crushed garlic cloves, and herb of choice into the pan near the end of searing your steak
Ribeye in a cast iron pan basting with herb garlic butter
Once the butter has melted, baste the steak using a large spoon

Sear the fat cap on your steak

We don’t want to chew on that raw fat! So grab your tongs, hold that steak on its side, and let the fat cap sit in that garlicky herb butter for 20-30 seconds. If your steak does not have a fat cap, you will skip this step.
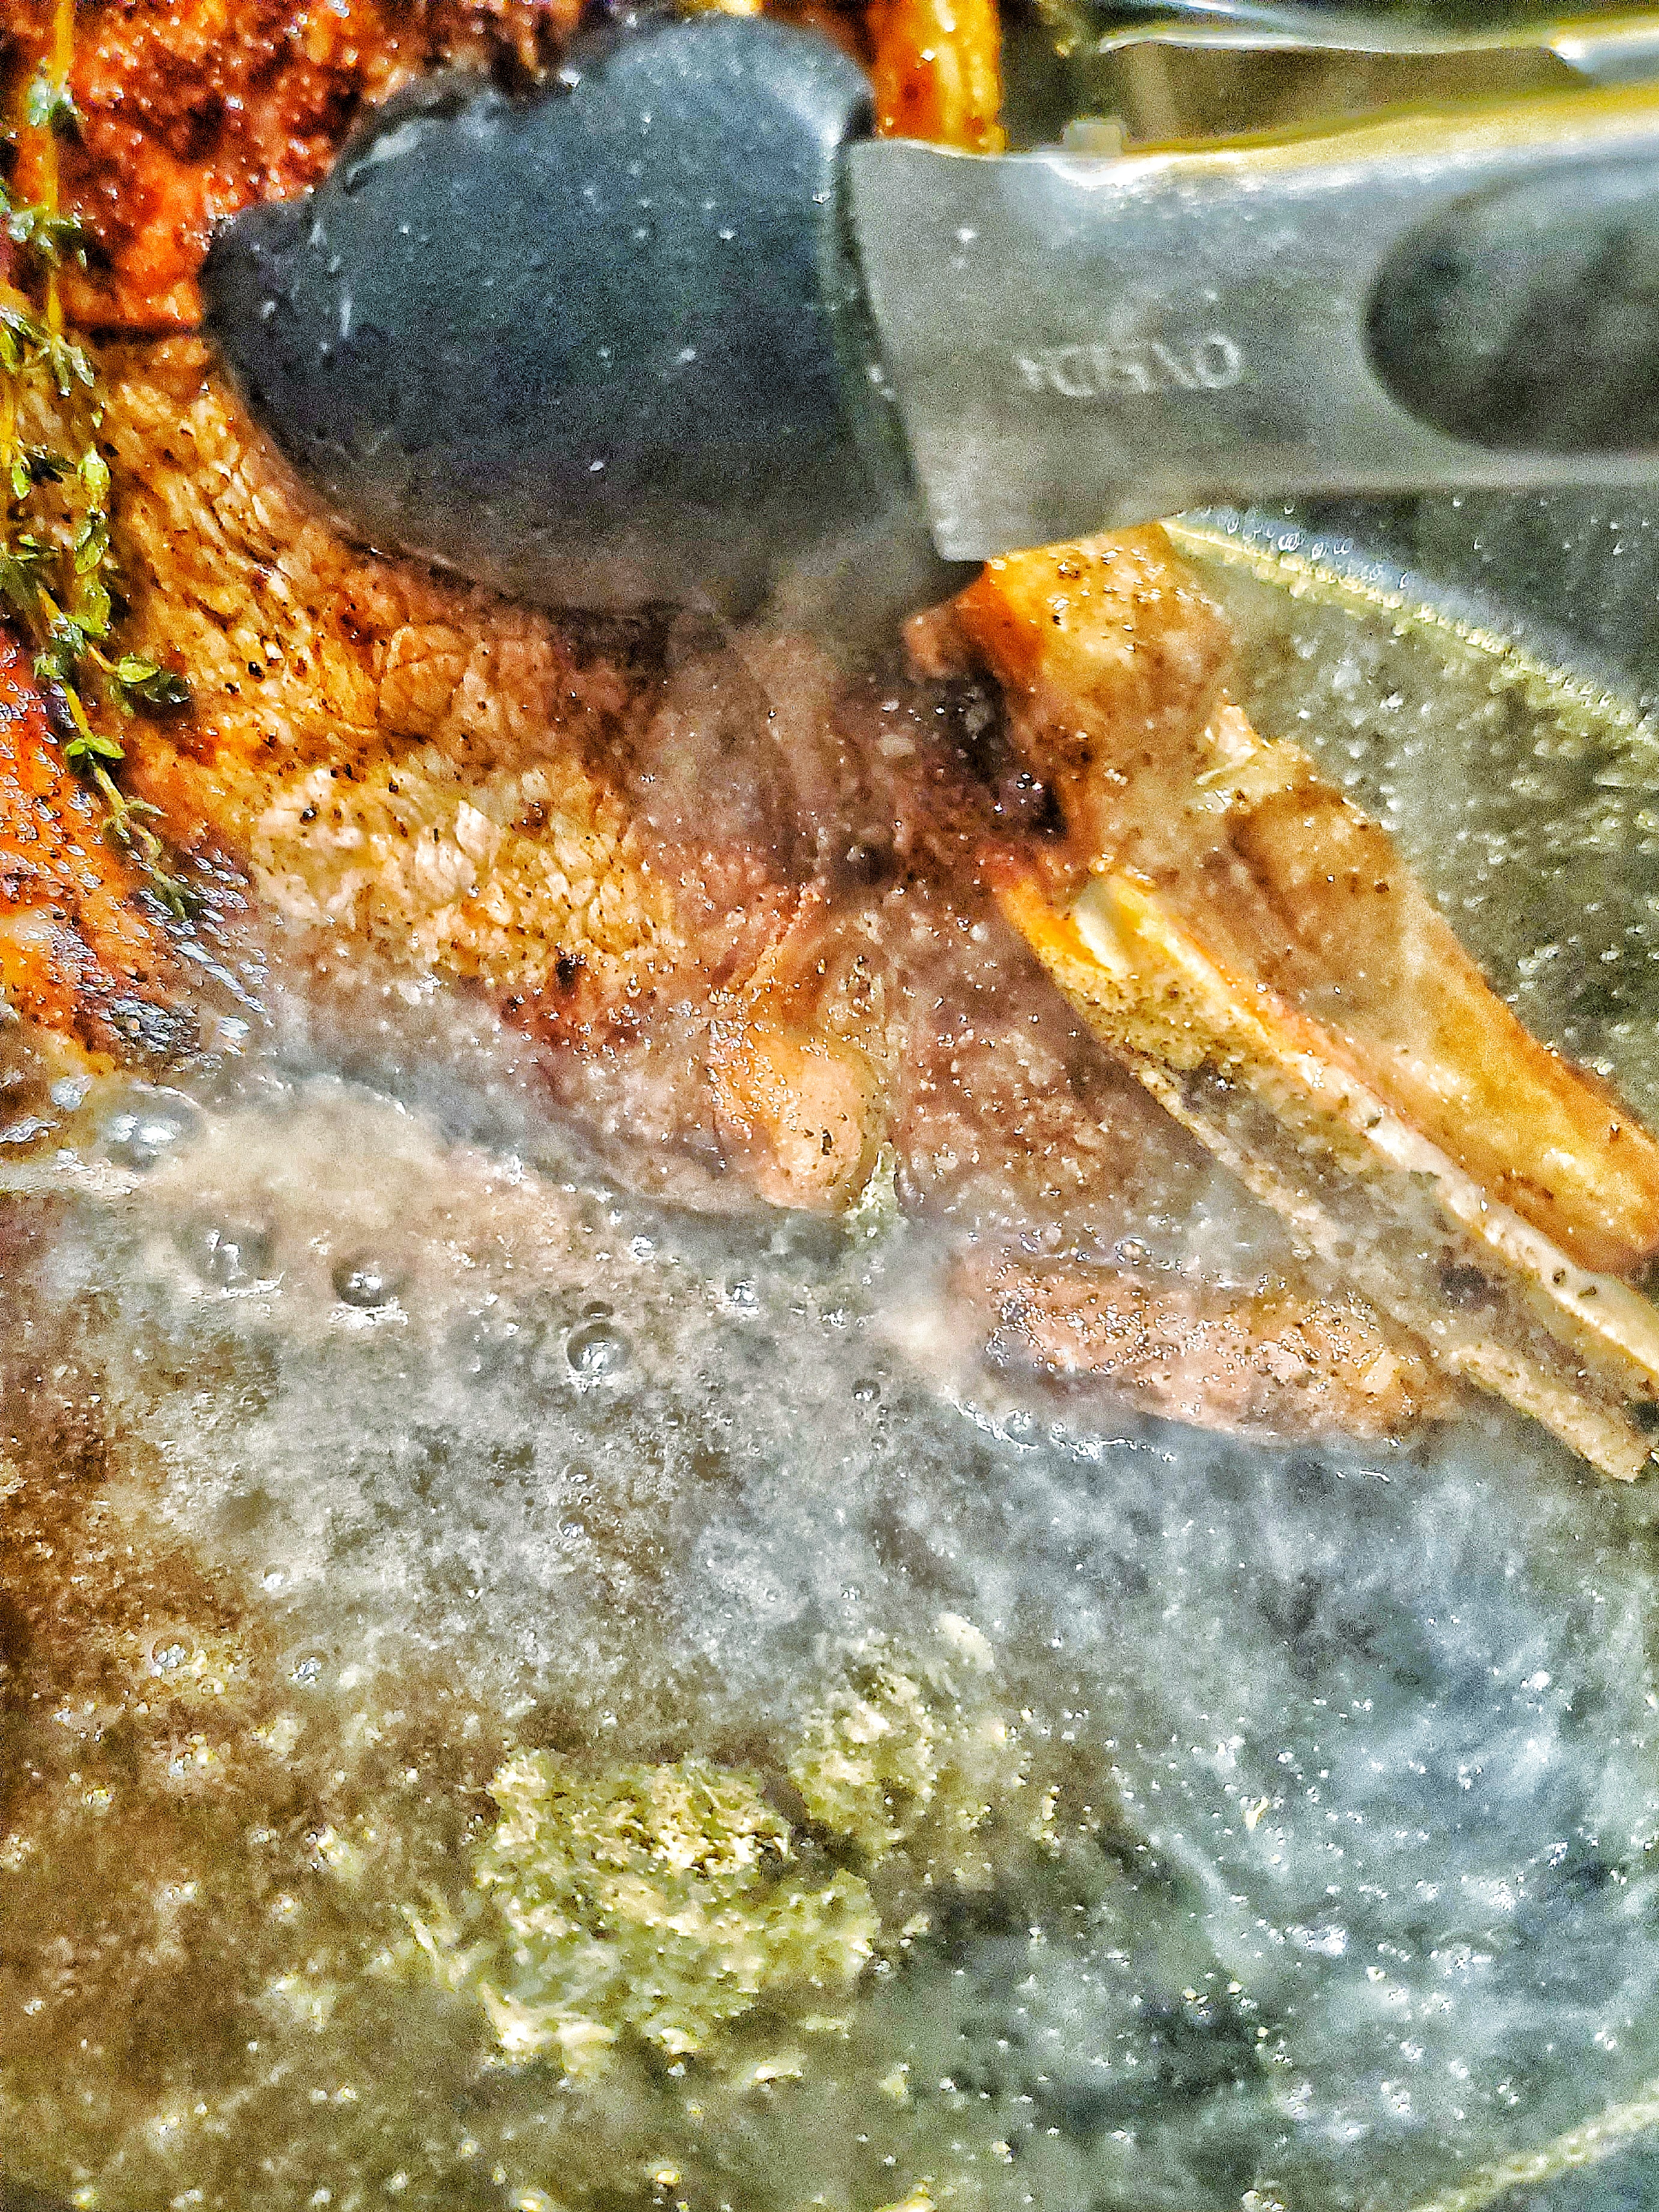
Ribeye being seared in a cast iron pan
Sear the fat cap by holding it sideways in the pan

Rest for 3-5 minutes before slicing 

After you pan sear steak, please don’t cut into your steak right away. I know you’re tempted to with the work you put into it, but just wait. 

There’s some more science-y sh*t happening where the moisture in the steak is still moving around from cooking (think boiling water, but in the steak). Cutting the steak right when you remove it from the heat will cause the moisture to immediately seap out. That’ll then cause your steak to dry out, which would make all that hard (but still easy) work a waste of time. So let that steak sit on a cutting board or plate for at least 2 minutes, a couple more minutes if you can. 

The thicker the steak, the longer the wait. Best number to set as your rest time is the amount of time you let your steak cook on 1 side. This is the absolute minimum amount of time (like if you’re rushing and hangry.) After it’s rested, you’re safe to stab it with a thermometer to make sure it’s doneness is to your liking before slicing.
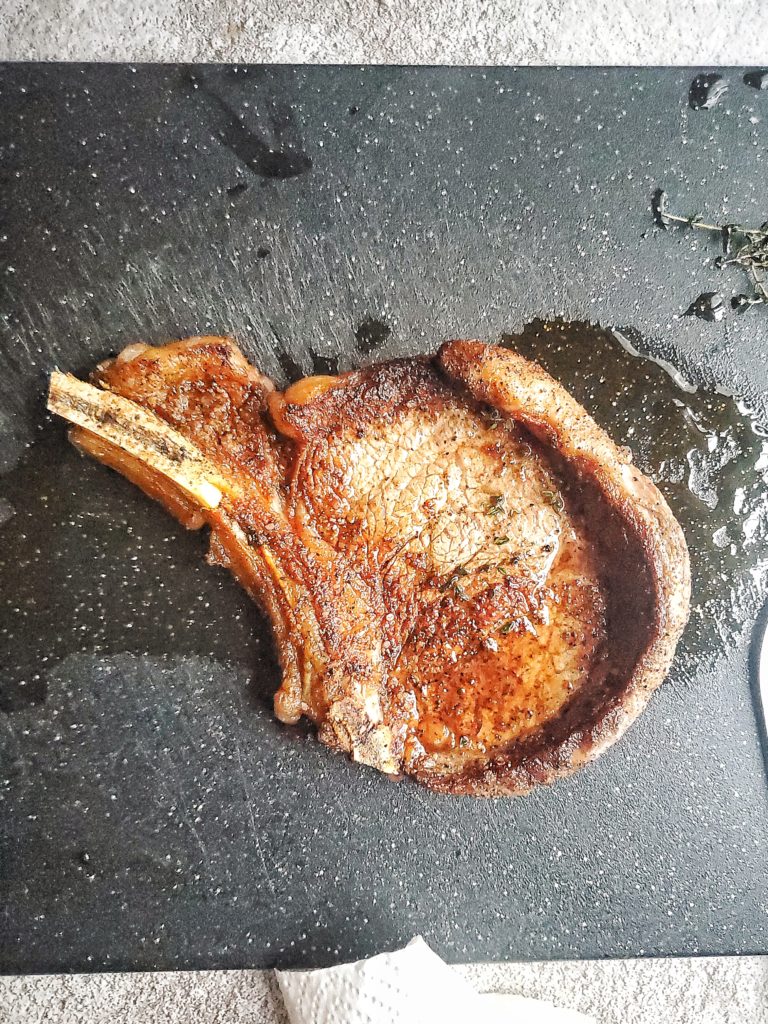
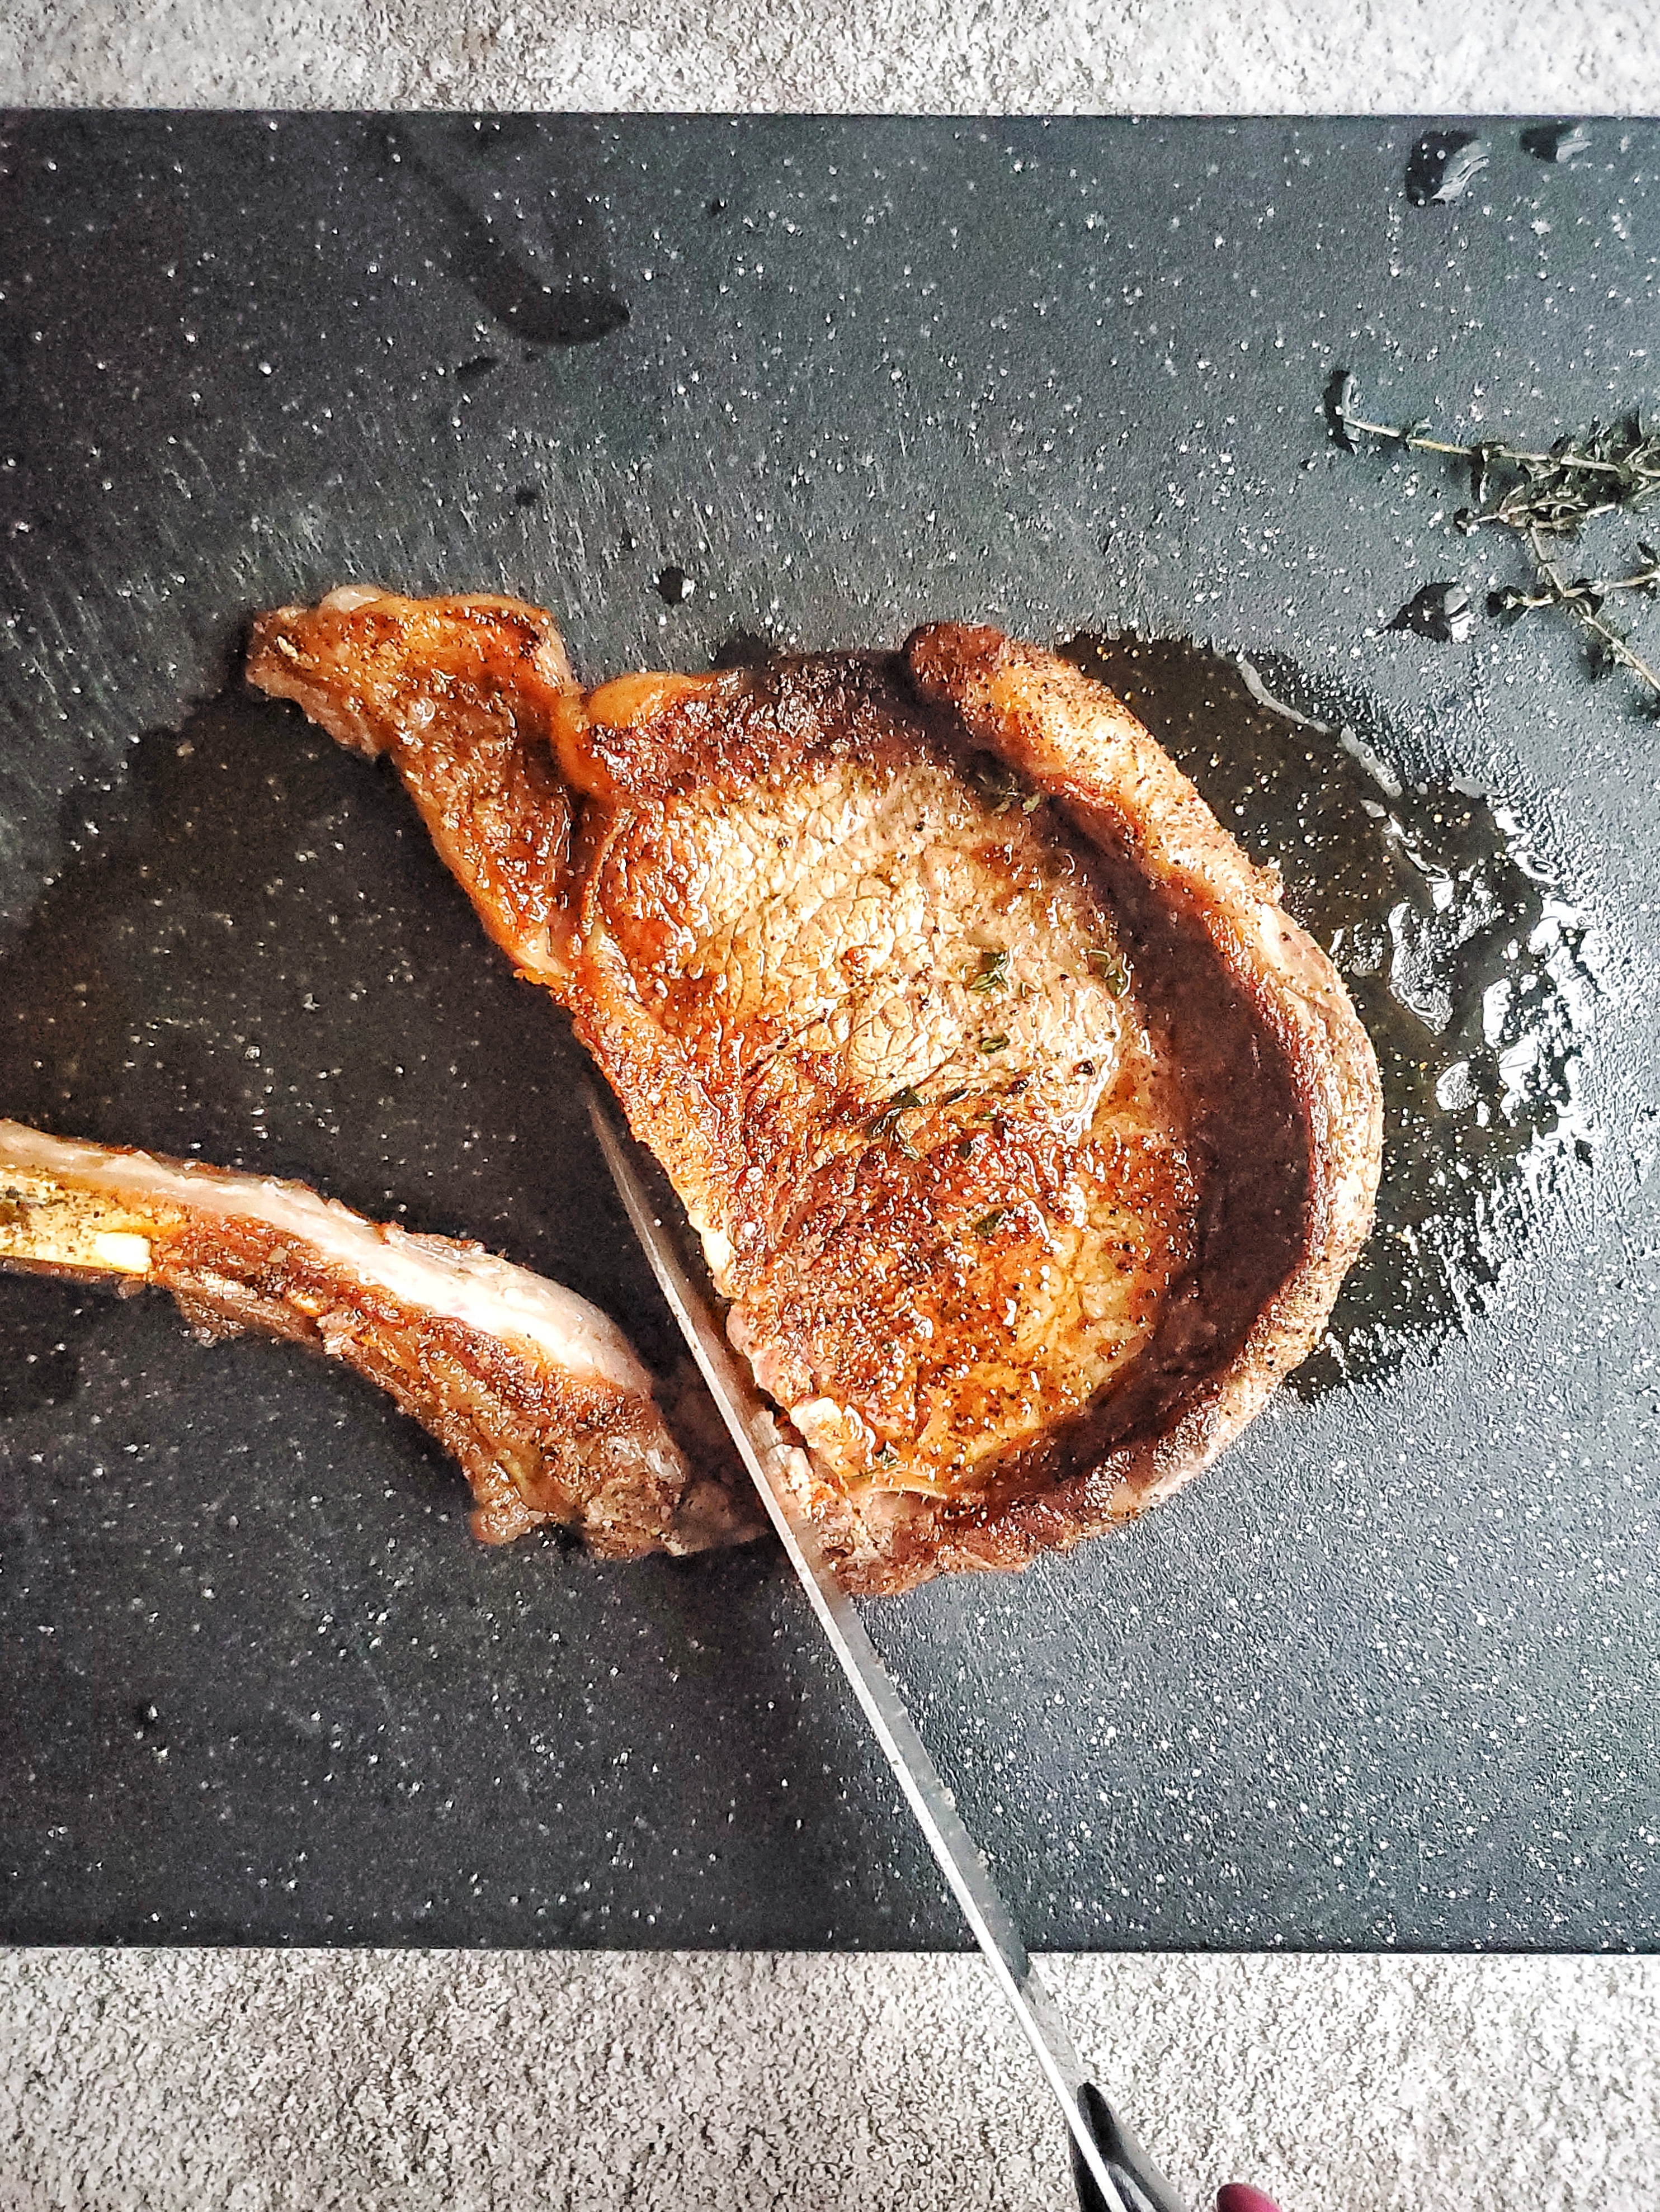
Ribeye steak on a cutting board
Rest your cooked steak before slicing
Bone being sliced off of a cooked ribeye steak
After the she steak has rested, slice around the bone

Cut against the grain 

This is a very important step. Probably more important than everything else I’ve mentioned. Cutting a steak against the grain helps to make the bite of steak less chewy.  

The grain of a steak are those natural lines you see. You can also see this when the steak is raw. Best way to find the grain is to hold up one end so the steak kinda bends. There, you’ll see lines where it looks like the steak separates a little bit.

Now that you’ve found the grain, you want to slice your steak in a different direction from it. You want to place your knife so that it makes an X with the grain that you found. Make sure that this grain-knife X you’re making doesn’t look like a plus symbol or a lowercase t. 

If you cut along the grain vs against it, that perfectly cooked steak will be tougher to chew. It’ll still be edible, but it won’t be as fun to eat compared to it being sliced properly.
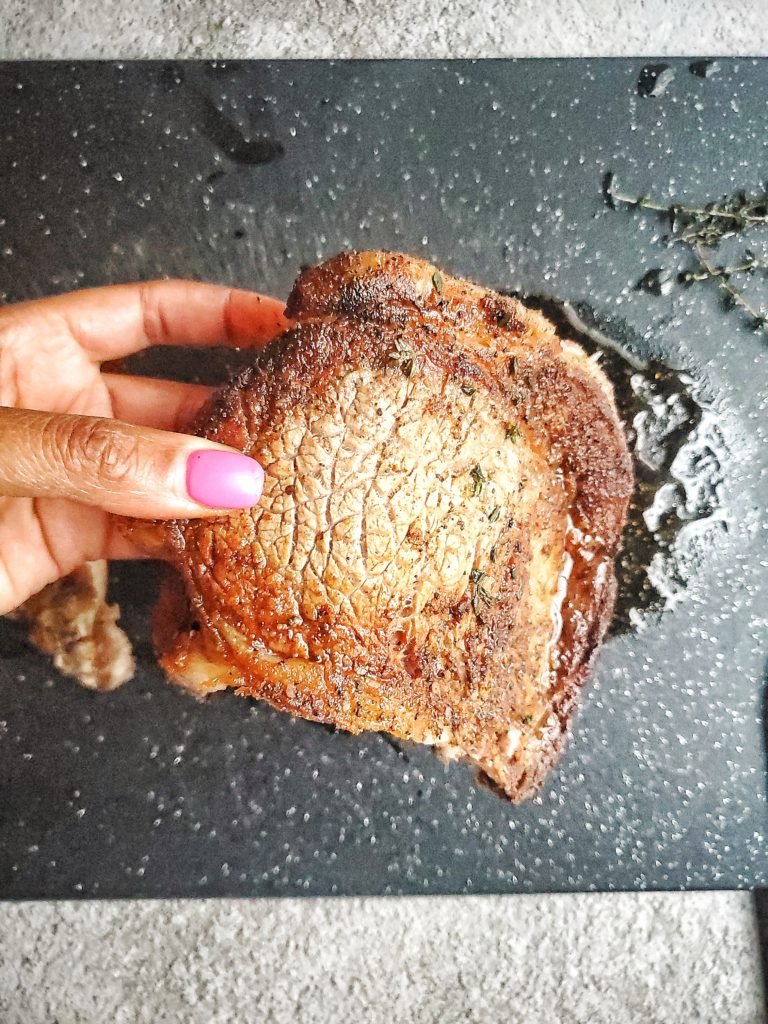
Close up of a cooked ribeye steak
The grain is the natural lines you see before slicing. Place you knife so the grain and your knife form the shape of an “X”

Slice, don’t saw! 

What am I talking about? Well, when you’re slicing your steak, move the knife in one direction. Don’t move it back and forth while pressing down to cut the steak. It’s best to slice downward in one direction so that you aren’t shredding this perfect steak you just cooked. Now, this is clearly for presentation purposes. But, you’ve made it this far, so you should go all the way in!
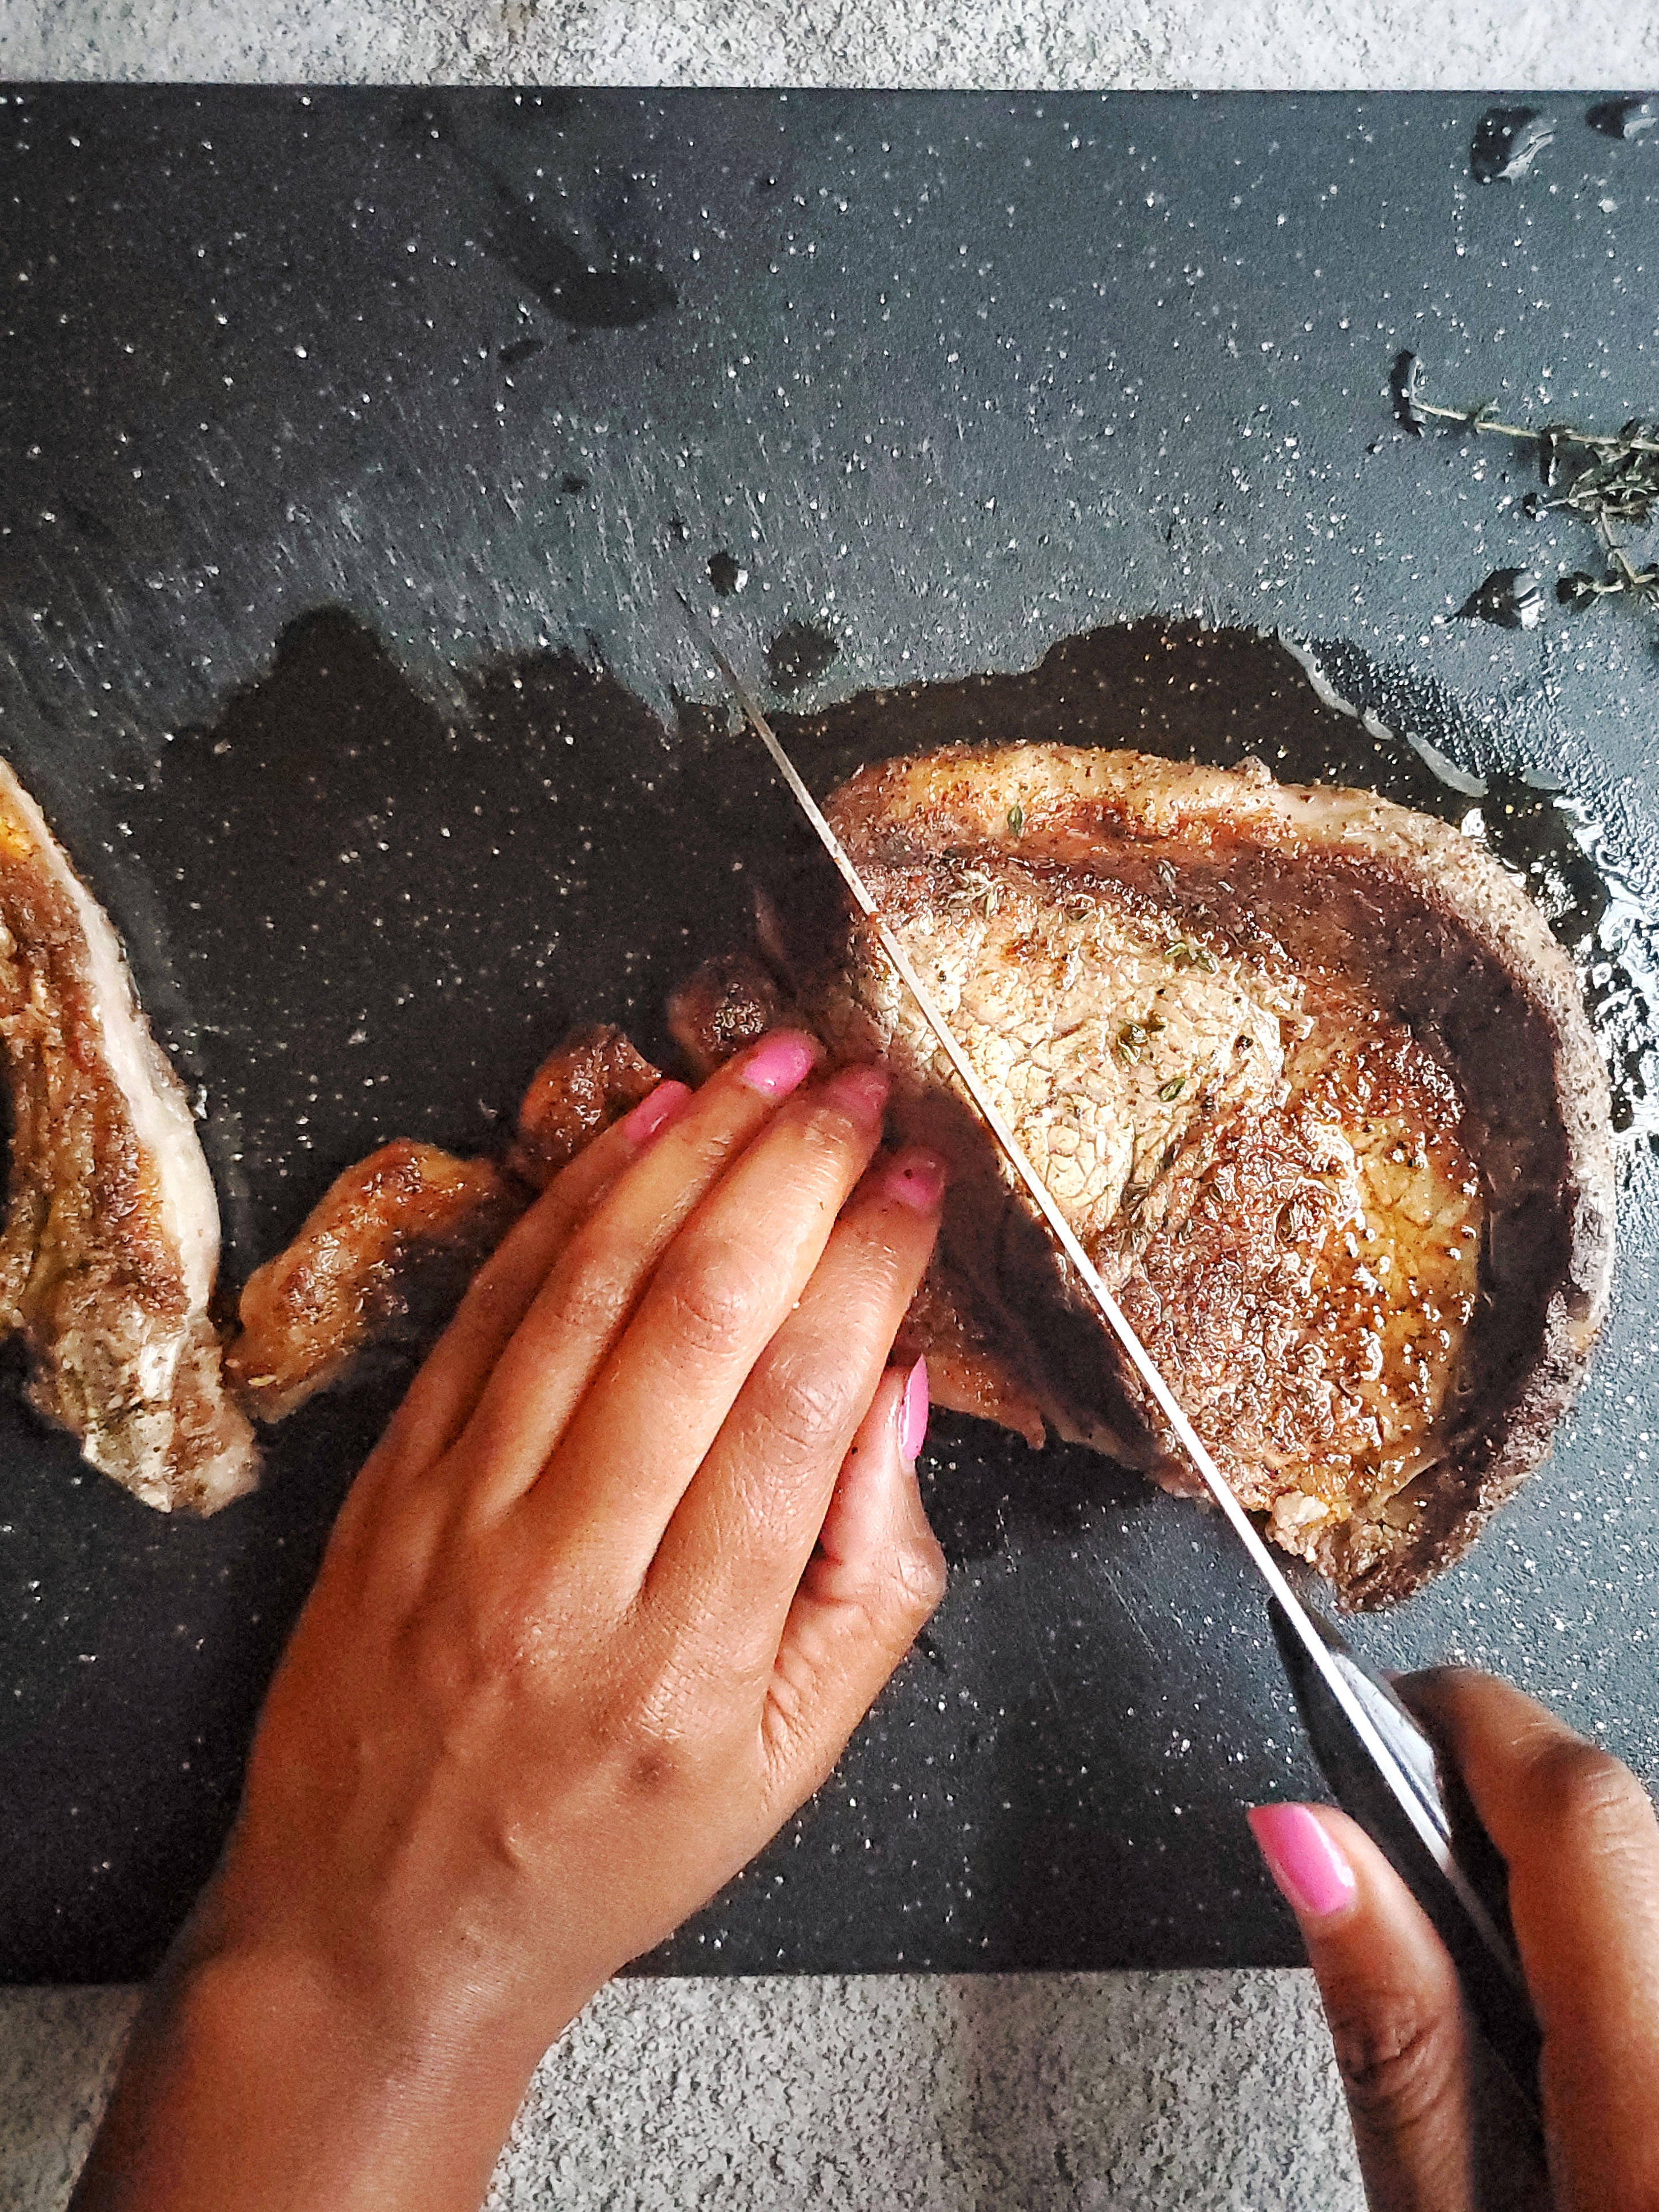
Ribeye steak being sliced thin
When slicing against the grain, and slice in on motion. Slice, don’t saw!

One last seasoning!!!

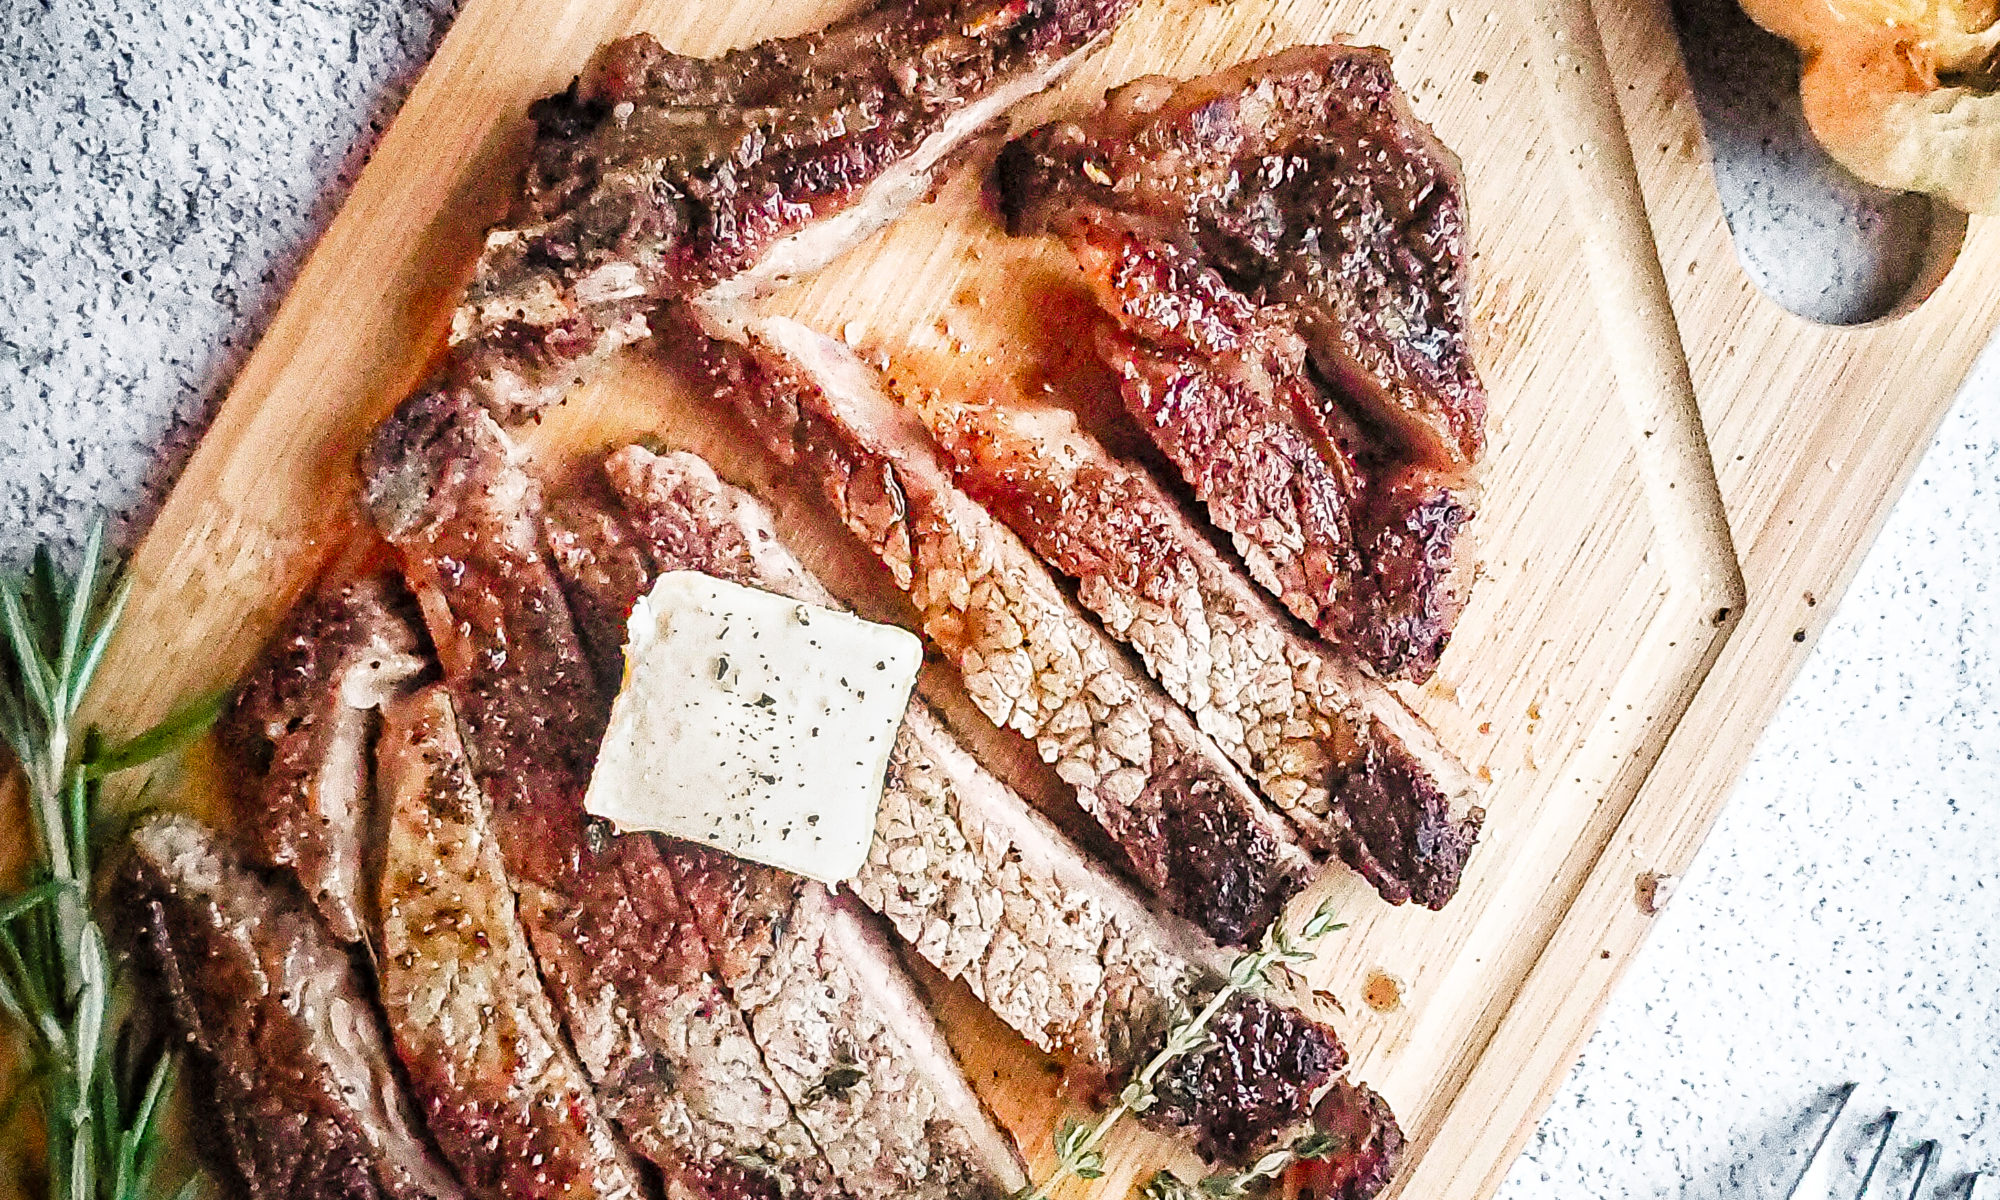
If you have an herb butter or herb sauce this is the perfect time to use it. Put a dollop of the butter or sauce on your steak to be super fancy. I will say though that if you follow the steps above, it will not be a big deal if you don’t have either of these. 

A light sprinkle of fresh ground pepper and sea salt is also the perfect addition once your steak has been sliced!

Now that you have the rundown on prepping and cooking the perfect steak, it’s time for you to execute it! If you use my tips, make sure to tag me on Instagram so I can see the awesomeness!
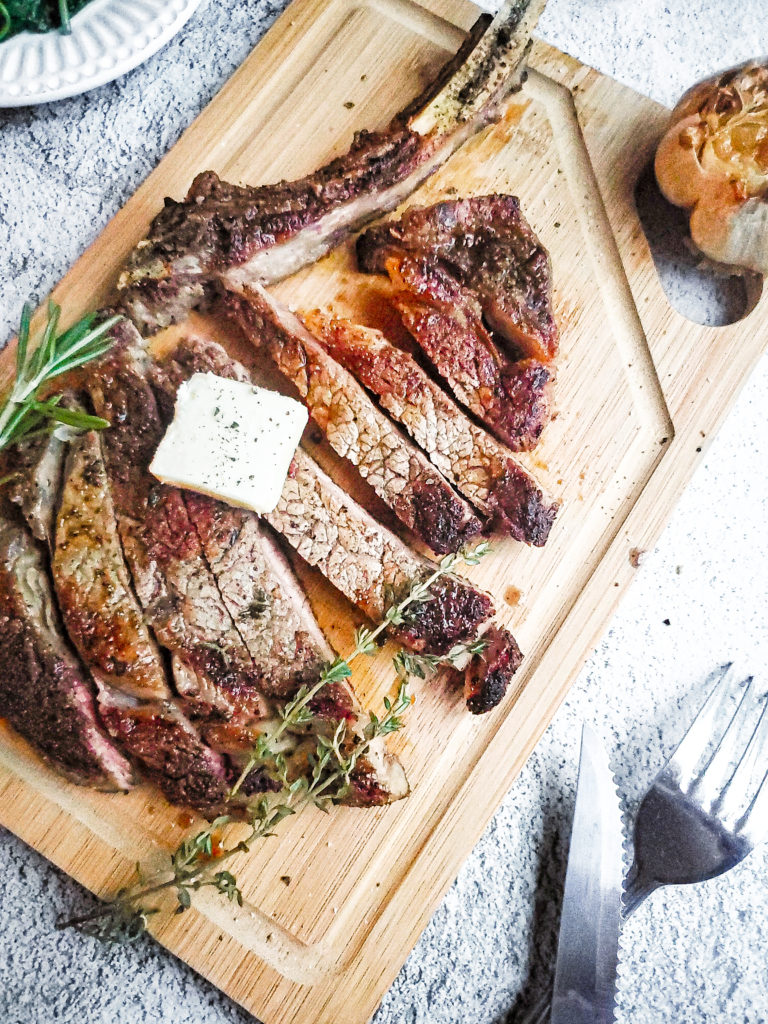
Overhead shot of a sliced ribeye steak with butter and herbs
Sexy steak!!!!!

If you’re looking for sides to go with your sexy steak, check out my herb garlic roasted potatoes. I’ve got a yummy creamed spinach recipe coming soon!
Cheesy Chicken Parmesan with Spicy Marinara Sauce

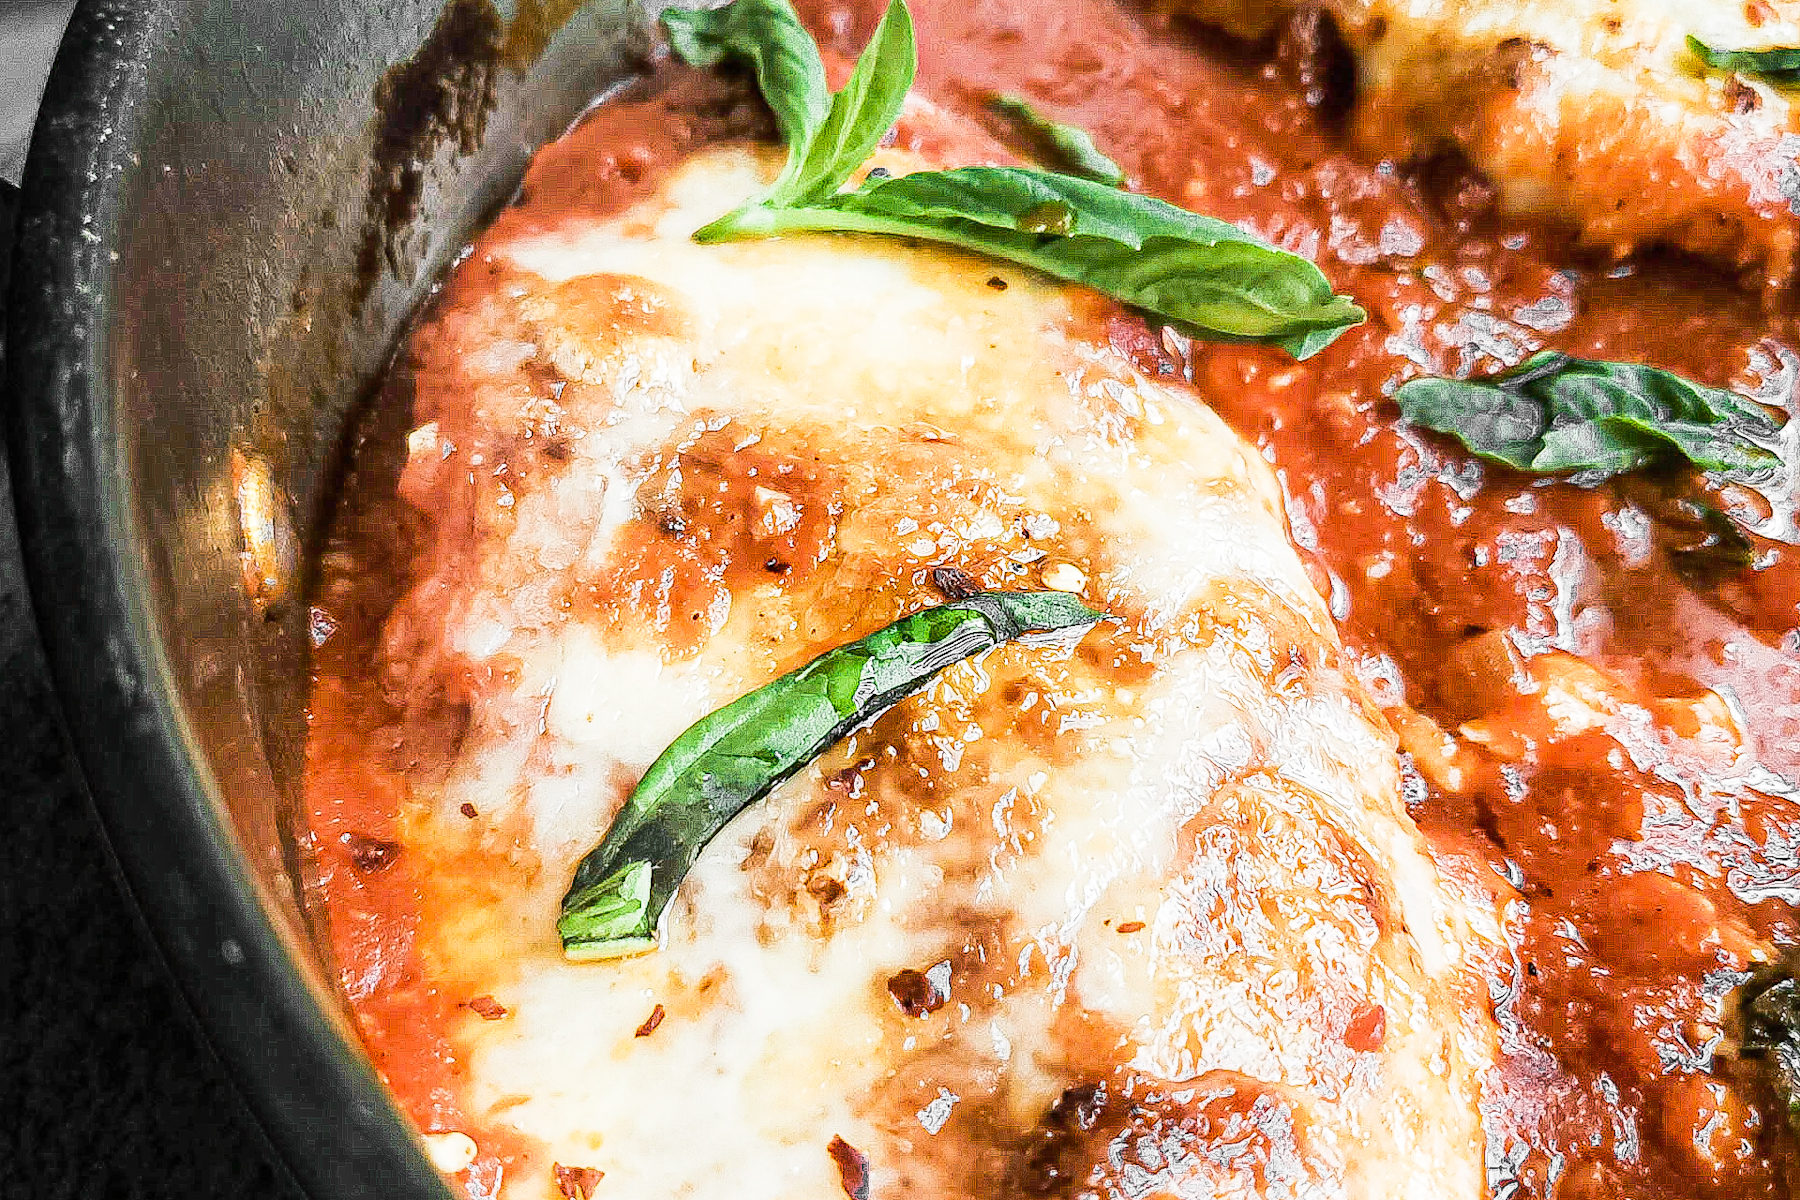
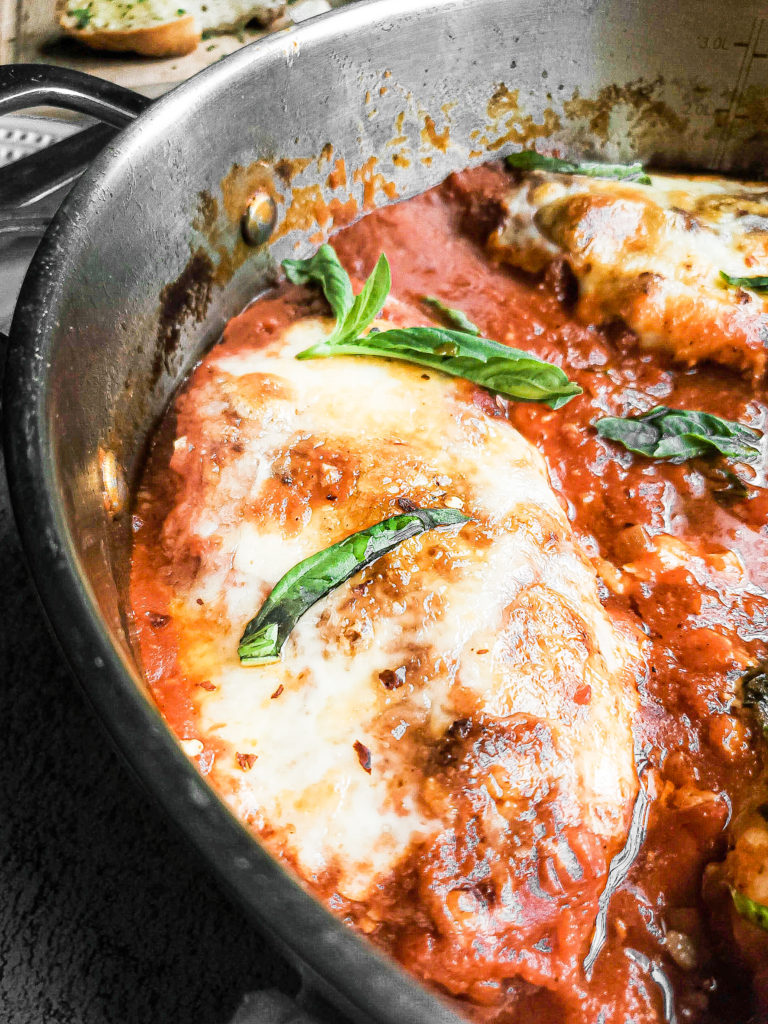
Close up of chicken parmesan in a skillet

Chicken parmesan is a perfect weeknight dinner option. You can really never go wrong with cheesy breaded chicken breasts cooked with a garlic infused tomato sauce!

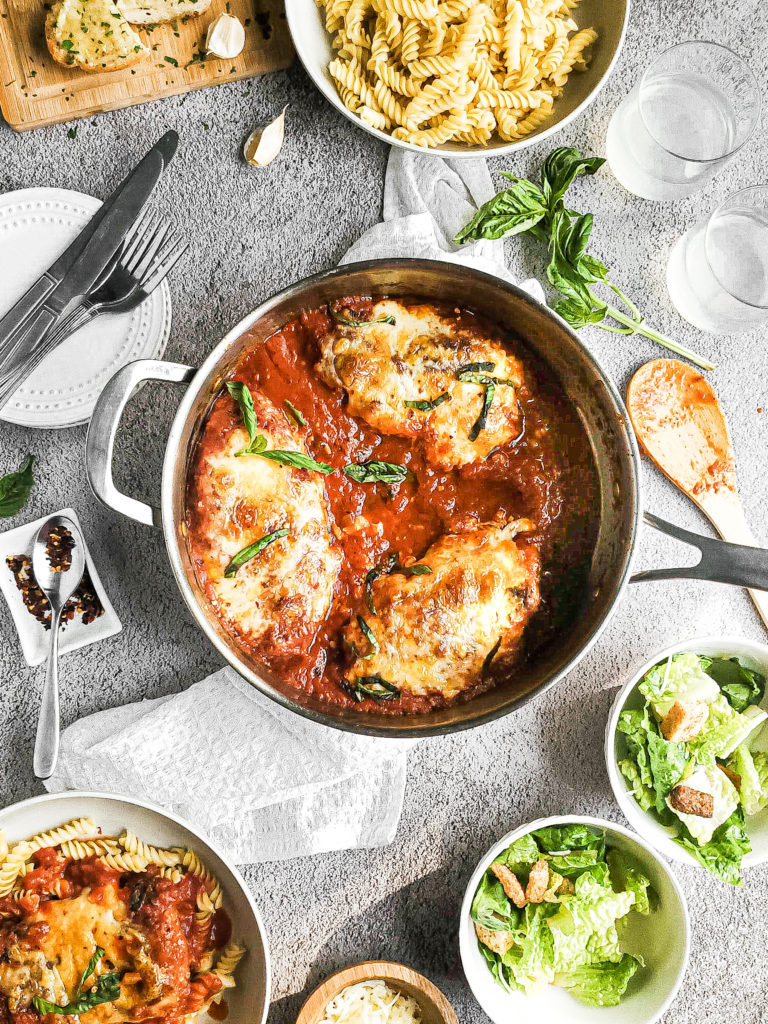
Overhead shot of chicken parmesan in a pan with a salad and bread on the side

I’d have to say that chicken parmesan is one of my favorite dishes to both cook and eat. It’s also one of my go-to recipes when I can’t decide on what to make for dinner during the week. While it’s such a simple dish, the flavors make me a very happy woman.

Chicken parmesan is also one of the recipes I frequently get asked how to make. It really is a simple recipe though yall! Nothing to be intimidated about. In about 30 minutes you can have this delicious meal on your table!

Close up of chicken parmesan in a skillet

How to make chicken parmesan


Chicken parmesan consists of 2 easy recipes: breaded chicken breasts and marinara sauce.

Thin chicken breasts are breaded and cooked most of the way through. The marinara sauce is cooked separately. Then, the chicken will finish cooking in the sauce, helping to also make the chicken a little more tender. Top it with cheese and pop in in the broiler to get it all melty and fun!

I’ve adapted the same steps, but to be made in a shorter amount of time. While marinara sauce tastes better when slow cooked, I’ve found a way to make it taste like it cooked for an extended time versus several minutes.

How to make a good marinara sauce for chicken parm


While marinara sauce is a fool proof recipe, there are a couple of things you can do to elevate the flavor.

Marinara sauce starts out by sauteing minced garlic in olive oil. This needs to be done on low heat, while constantly stirring the garlic around. This will prevent the garlic from cooking too fast and burning. It will also create a nice garlic infused oil to help build up the flavor of the marinara.

Type of canned tomatoes to use for marinara sauce


The canned tomatoes used also make a difference in a great marinara sauce. If you can find it, go with San Marzano tomatoes.

San Marzano is a type of tomato that originated in Italy. They’re similar to the shape of plum tomatoes, but have fewer seeds. Compared to other canned tomatoes, San Marzanos are slightly sweeter and have a bit more of an intense tomato flavor. Imagine the flavor of a fresh tomato at its peak, then elevate it a lil bit.

If you can not find canned San Marzano in the stores, don’t worry! Regular crushed tomatoes will work just fine!

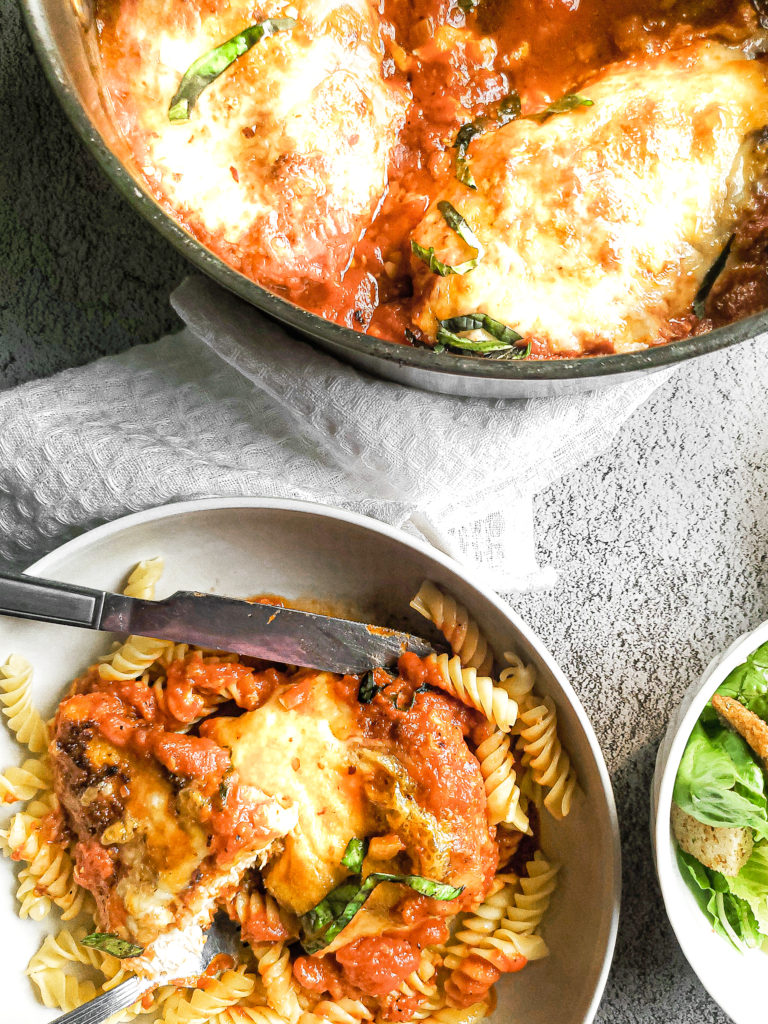
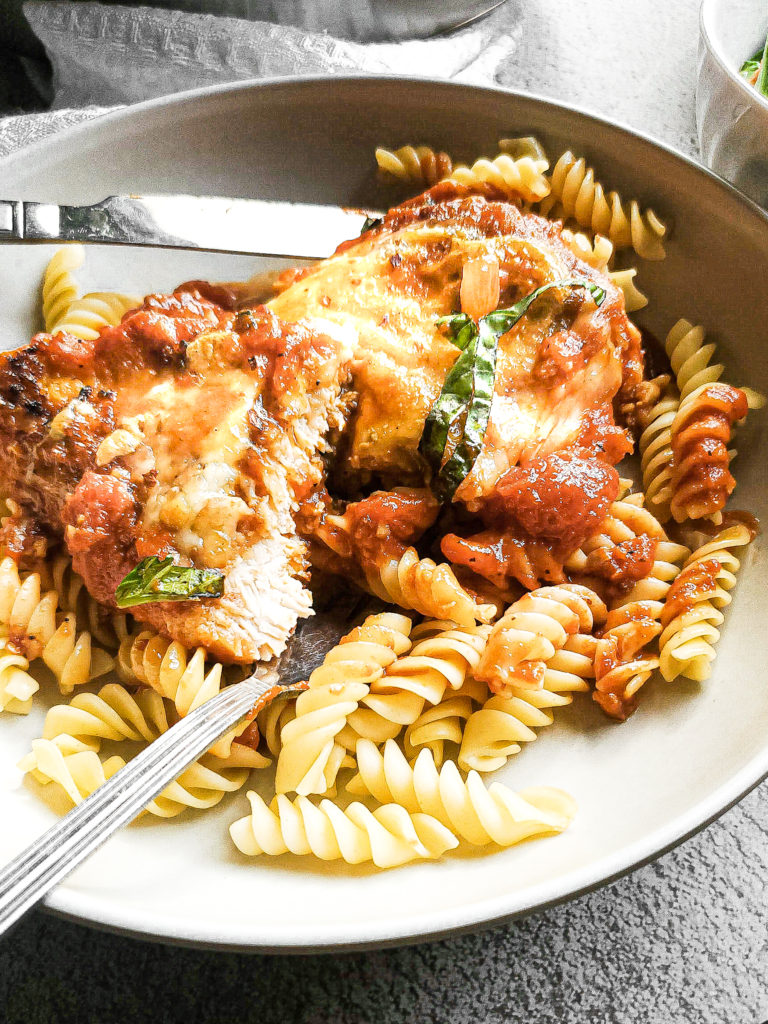
Chicken parmesan in a skillet with a serving in a bowl with pasta

How to bread chicken for chicken parmesan


Another easy but intimidating thing is properly breading chicken for chicken parmesan. Again, don’t be scared. It’s so easy!

The breading happens in 3 stages:

  1. tossing the chicken in seasoned flour
  2. dipping the floured chicken into an egg wash
  3. dredging the egg washed chicken into breadcrumbs

The key to making sure there’s the right amount of breading on each piece of chicken is to gently shake off excess flour and egg with each step. If there’s too much flour on the chicken, the egg wash will not properly stick. You also don’t want too much egg wash on this chicken, or else it will be more of a batter than a breading when the chicken gets added to the breadcrumbs.

Different ways to serve chicken parmesan


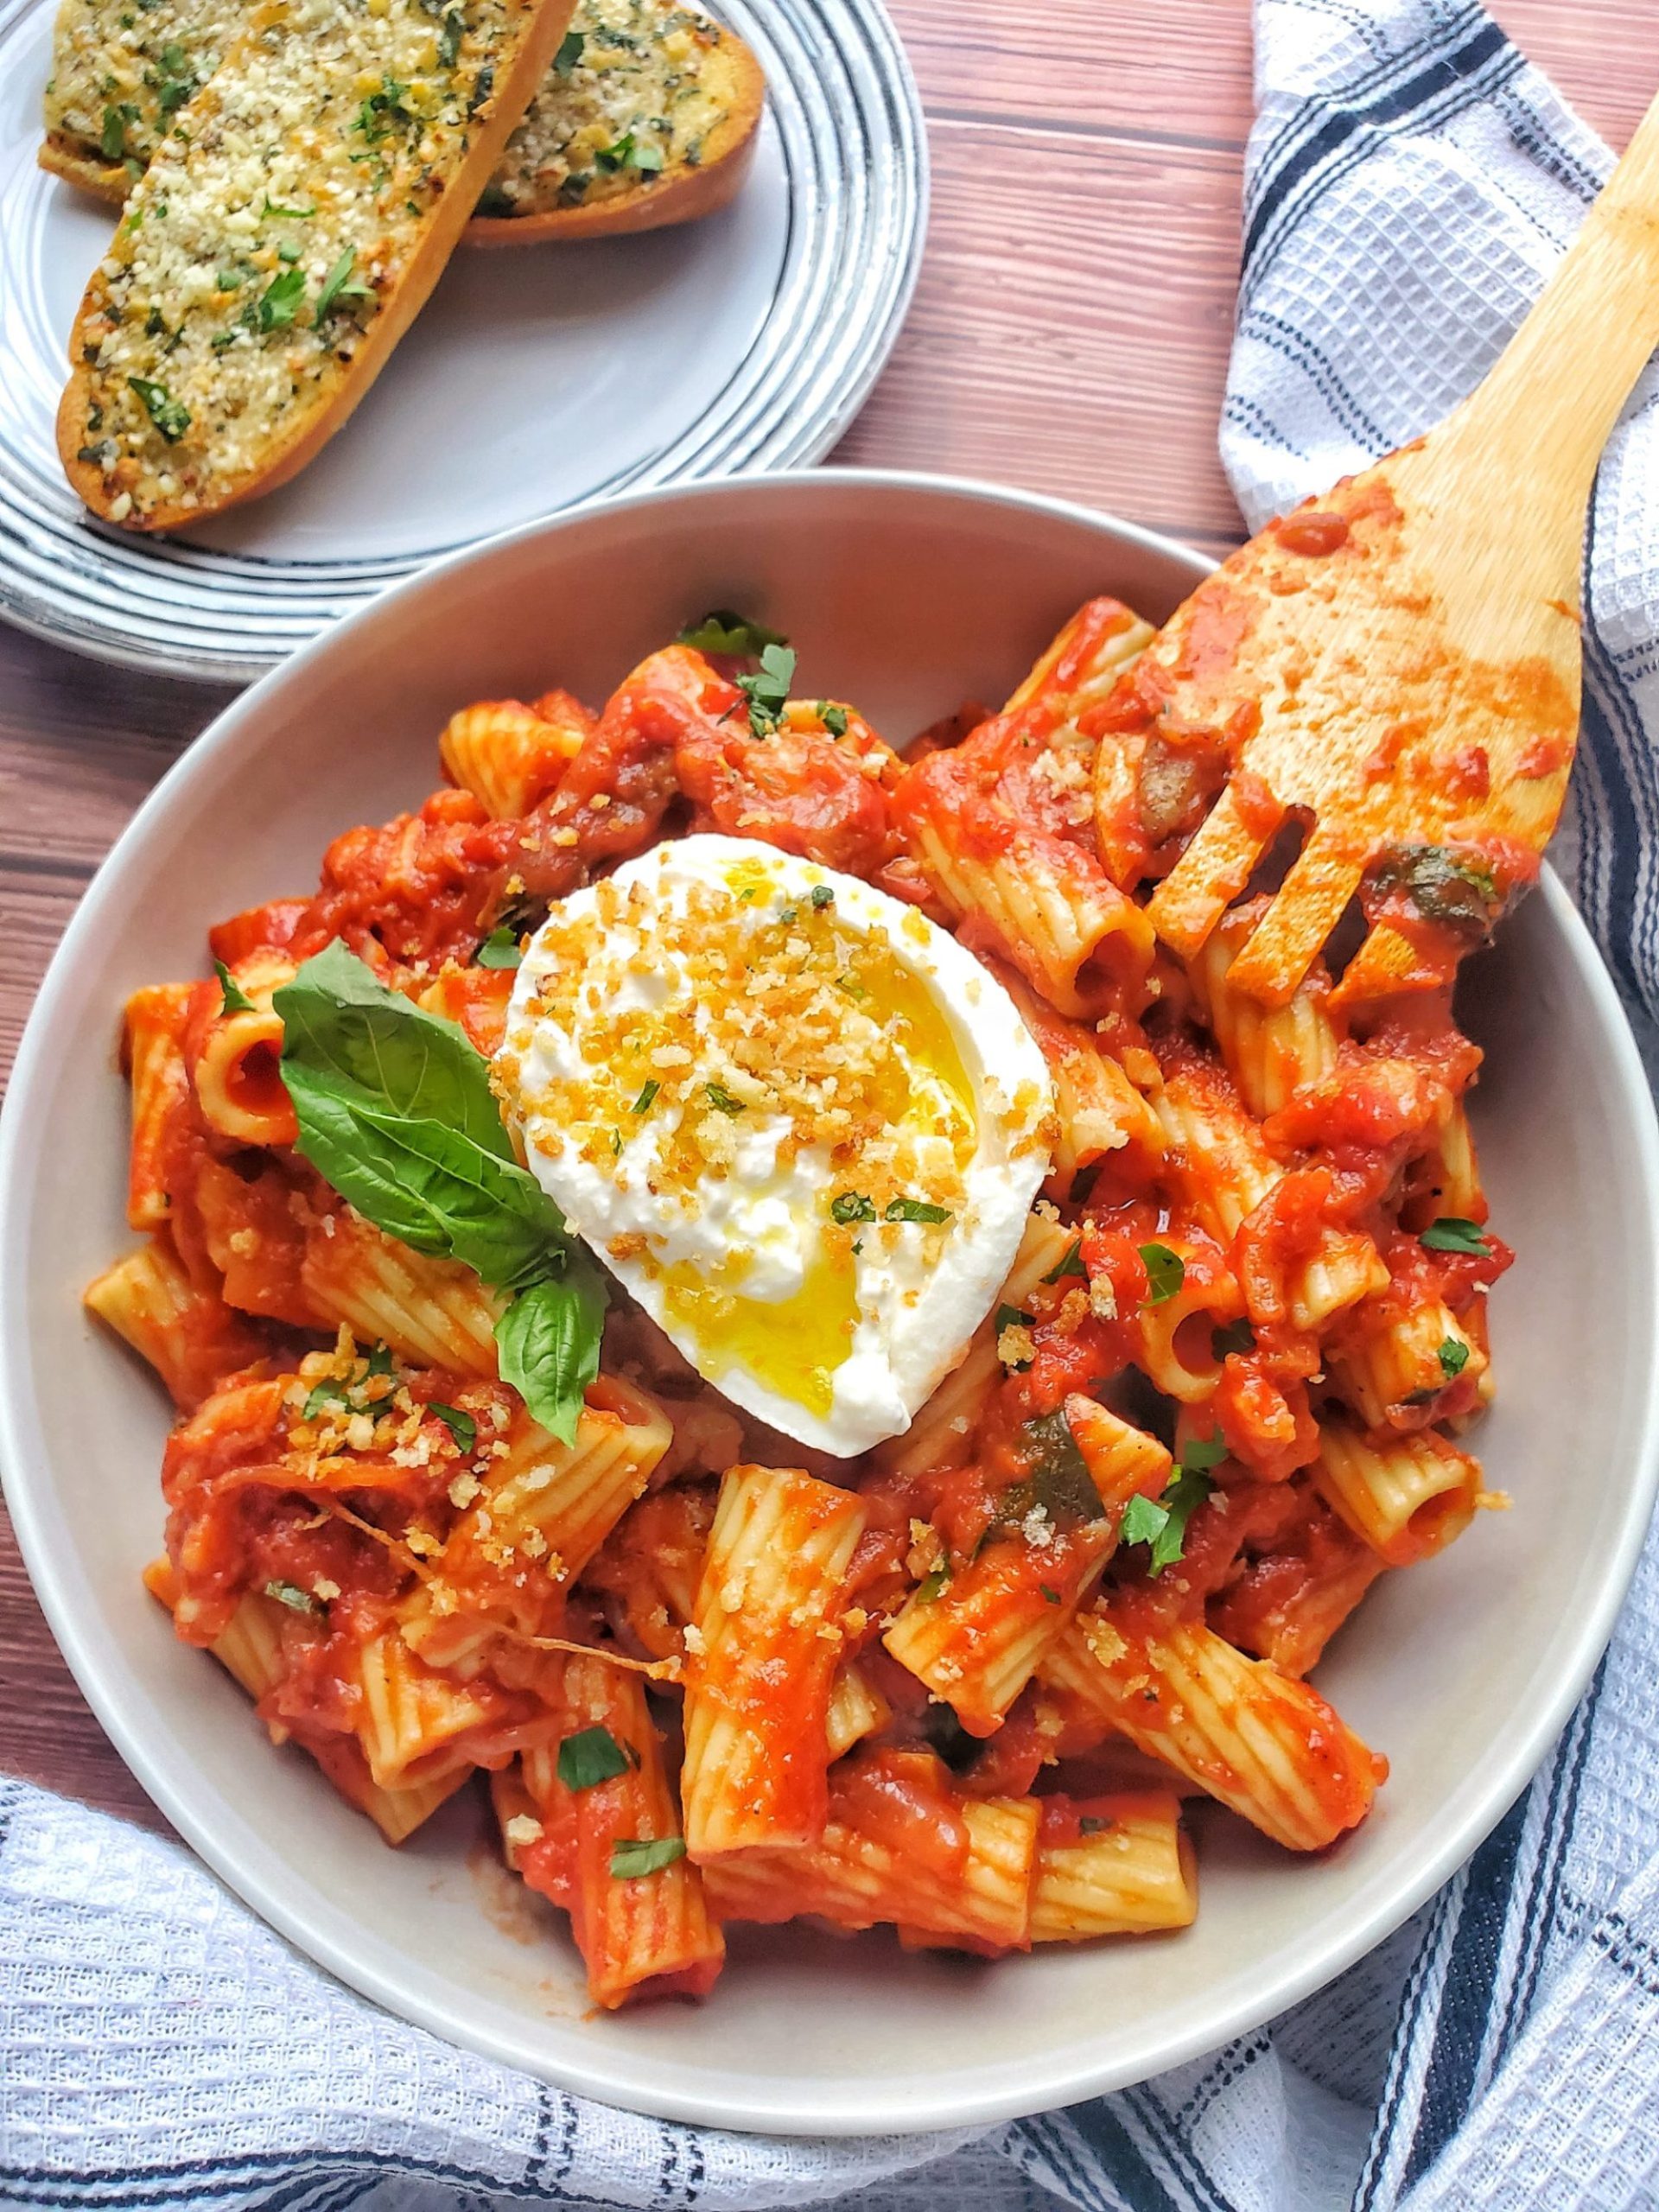
The classic way of serving up chicken parmesan is on a bed of your favorite pasta. Spoon a little of the sauce on the noods as well!

This is also perfect in sandwich form! Toast your sandwich bread of choice and place the chicken parmesan in between. Whew! This is a good one!

As far as sides to serve with chicken parmesan, I’d suggest a nice salad with a vinaigrette. And of course, a great pasta dish isn’t complete without some cheesy garlic bread!!!

Piece of chicken parmesan in a bowl with pasta

Can chicken parm be made gluten free?


Yes! Chicken parmesan can most certainly be a gluten free recipe!

The chicken does NOT have to be breaded. Simply season each side with salt and pepper before searing on both sides.

Also, either a gluten free pasta or bread can be used so you aren’t missing out on the fun of eating some type of carb because carbs is bae!

I hope you get to make and love my Chicken Parmesan recipe as much as I do!!! If you get a chance to make it, be sure to share it on Instagram by tagging me! Happy eating!!!

Close up of chicken parmesan in a skillet
Print Recipe
5 from 7 votes

Cheesy Chicken Parmesan with Spicy Marinara Sauce

Chicken parmesan is a perfect weeknight dinner option. You can really never go wrong with cheesy breaded chicken breasts cooked with a garlic infused tomato sauce!
Prep Time5 minutes
Cook Time30 minutes
Total Time35 minutes
Course: Main Course
Cuisine: American, Italian
Keyword: cheesy, chicken, chicken parmesan, marinara, marinara sauce, parmesan, san marzano, tomato sauce, weeknight dinners, weeknight meals
Servings: 4 servings
Author: Crystal

Equipment

  • 3 medium bowls
  • Cutting board
  • Large oven safe skillet or cast iron pan
  • Large plate
  • wooden spoon
  • Whisk

Ingredients

Breaded chicken ingredients

  • ½ cup all purpose flour
  • ½ tablespoon kosher salt
  • ½ teaspoon ground black pepper
  • 1 large egg
  • 1 tablespoon water
  • 1 cup panko breadcrumbs
  • ½ cup grated parmesan cheese
  • 2 chicken breasts, boneless and skinless split in half width wise

Chicken Parmesan Ingredients

  • 4 tablespoons canola oil
  • 4 tablespoons olive oil
  • 6 garlic cloves minced
  • ¼ cup onion small diced
  • ¼ cup white wine
  • 28 ounce crushed tomatoes
  • 1 tablespoon unsalted butter
  • ½ teaspoon red pepper flakes
  • 1 tablespoon kosher salt
  • 1 teaspoon black pepper
  • 8 basil leaves rough chopped
  • 4 ounces shredded mozzarella
  • 6 ounces cooked pasta kept warm

Instructions

To bread the chicken breasts

  • In one bowl, evenly mix together the flour, salt, and pepper. Set aside.
  • In another bowl, whisk together the egg and water. Set aside.
  • In a third bowl, mix together the panko breadcrumbs and grated parmesan cheese.
  • One at a time, place and toss a chicken breast in the flour mixture to coat. Remove the chicken, gently shaking off excess flour that doesn’t stick.
  • Dip the floured chicken into the egg mixture, shaking off excess egg that doesn’t stick.
  • Next, place the chicken breast into the breadcrumb mixture, thoroughly coating the chicken so the breadcrumbs stick to the egg. Once coated, lightly shake off any excess breadcrumbs that don't stick.
  • Place the coated chicken onto a plate, and follow the same steps for the remaining chicken breasts.

Chicken Parmesan Steps

  • Preheat a large oven safe skillet or cast iron on medium low heat with the canola oil.
  • Once the oil is heated, add the breaded chicken breast. Cook for 2 minutes per side. Once seared, remove the chicken and place onto a plate. Wipe the skillet clean.
  • Reduce the heat on the skillet to low heat.
  • Add the olive oil and minced garlic. Cook the garlic for 2 minutes while constantly stirring to prevent the garlic from burning.
  • Add the chopped onion and cook for 2 minutes, stirring every few seconds to sweat the onions.
  • Slowly pour in the white wine and stir. Cook for 2 minutes to reduce the amount of liquid to half, stirring occasionally.
  • Add the crushed tomatoes, butter, pepper flakes, salt, and pepper. Stir to combine. Increase the temperature to medium heat. Cover and simmer for 5 minutes.
  • Stir in the basil leaves. Submerge the seared chicken into the tomato sauce. Cover and simmer for 5 minutes. While the chicken is cooking, preheat the oven to broil on high.
  • Evenly sprinkle the shredded mozzarella cheese onto each chicken breast.
  • Put the skillet into the oven to melt the cheese under the broiler, for about 2 minutes. Keep an eye on the cheese so that it does not burn.
  • Once the cheese is melted with some color, remove from the broiler.
  • Serve with cooked pasta and fresh torn basil.

Notes

If you do not have an oven safe skillet, the tomato sauce and chicken can be put into an oven safe dish before sprinkling with cheese. 

Smothered Hamburger Steaks with Mushroom and Onion Gravy

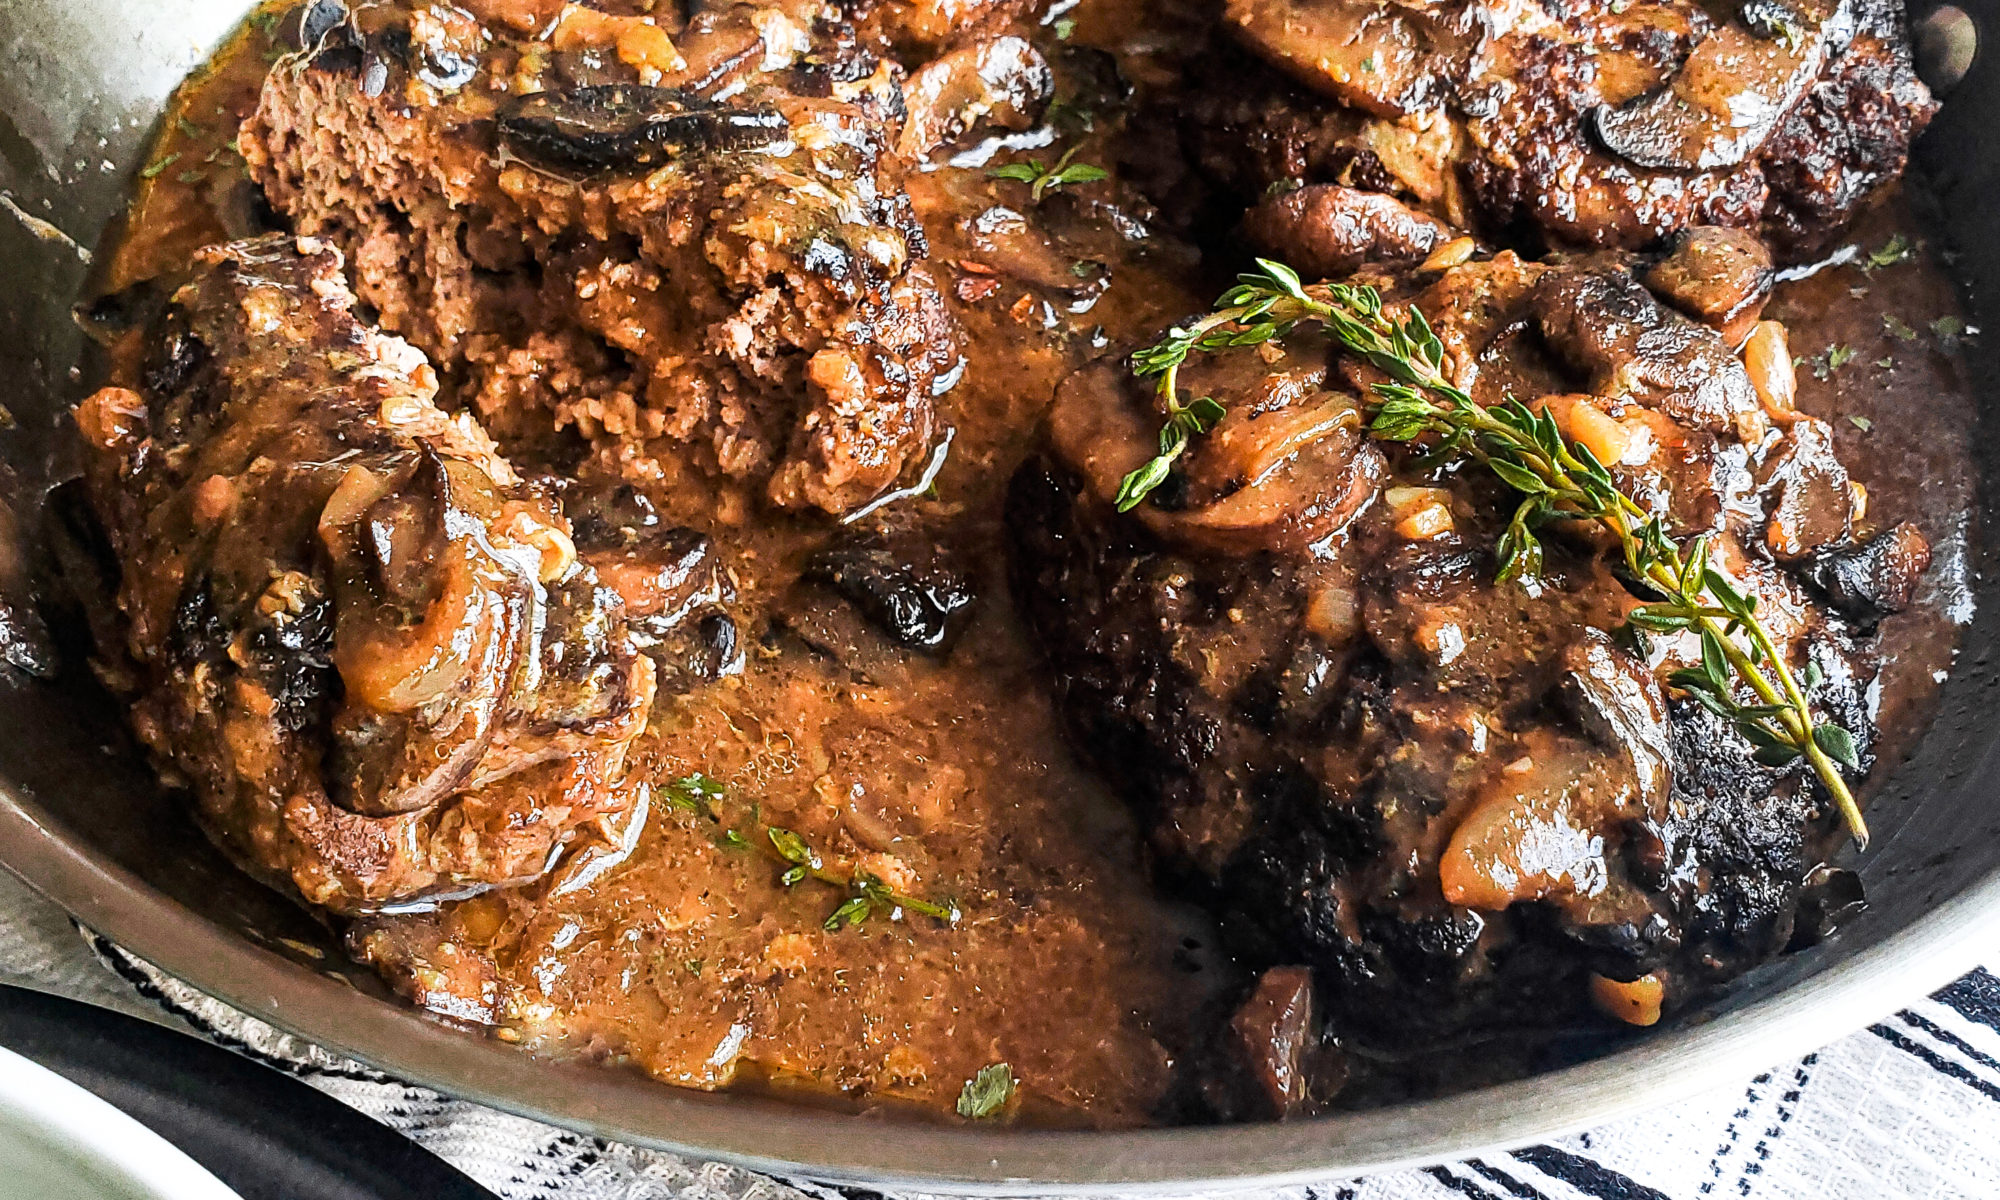
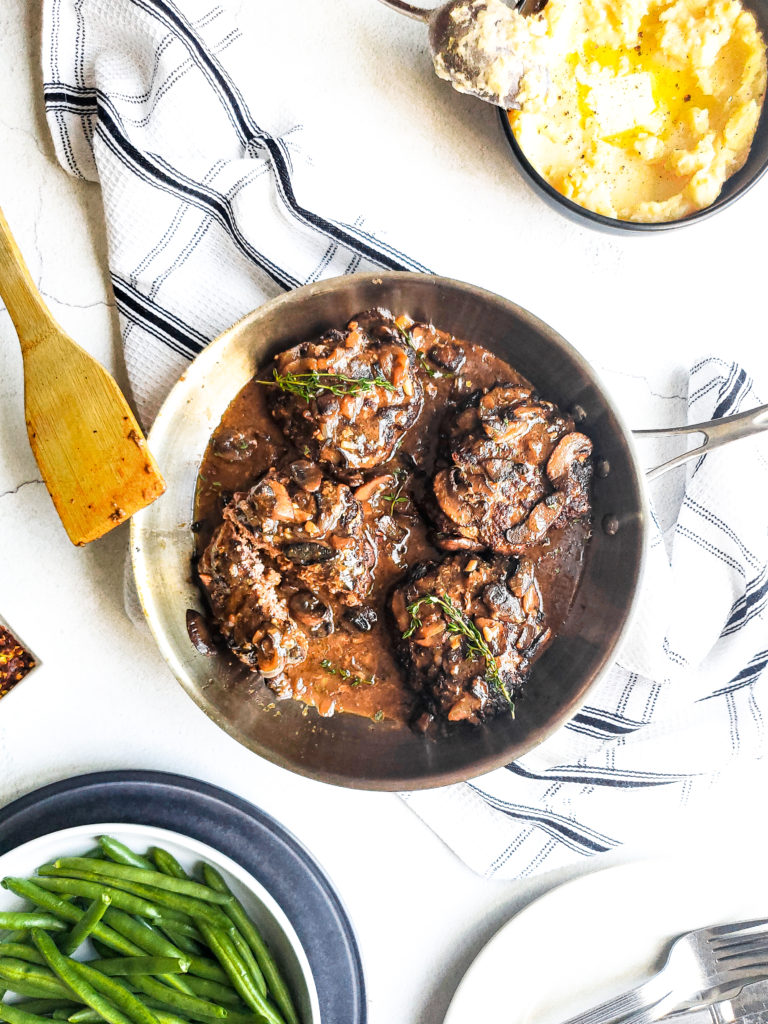
Smothered hamburger steaks with mushrooms in a pan

Hamburger steaks. Gravy. Mushrooms. Onion. Let’s go!

All you need is 30 minutes and you’ve got a super duper comforting home cooked meal! Patties are seared and simmered in a mushroom and onion gravy. Soooo yummy, especially when served with some mashed taters to soak all dat sawse up!!!

Smothered hamburger steaks with mushrooms in a pan

Everyone has a meal that reminds them of a great time or person in their life. Smothered hamburger steaks with gravy is that dish that immediately takes me back to my dad cooking this for our fam back growing up.  While he never showed me how he made his, over time I’ve finally mastered his recipe, and now I’m here to share it with you all!

My dad’s  hamburger steaks were much more simple than what I’ve created, but still so damn good. Me being me, I had to jazz up his recipe a little bit, so I added some mushrooms. Oooooohhhh, I wish he were here to try this one out!

How to make smothered hamburger steaks

Ground beef gets seasoned, formed into patties, and seared on each side so it’s partially cooked.

In the same pan,  mushrooms and onions are sauteed with a little garlic, which will then be turned into a nice and flavorful gravy with some beef stock.

Finally, the beef patties are added back into that gravy yummy-ness to slowly simmer for a few minutes. 

Can I make this recipe gluten-free?

You sure can! I’ve added panko breadcrumbs as a binder for the ground meat, but it can most certainly be omitted if you’re looking for a gluten-free meal.

Is this recipe dairy-free?

There is a little bit of butter used to help make the mushroom gravy.

Just as a fun fact: to make gravy, you need equal parts of flour with ANY type of fat. So the butter can be replaced with your fat of choice! There’s already some canola oil being used, so the butter can be swapped out for that.

What sides should I serve with hamburger steaks?

These hamburger steaks are made to be devoured with mashed potatoes. Rice would work really well with this too. There’s a good amount of gravy with this recipe, and we can’t let that go to waste amiright?

I usually keep it simple with my veggie side by doing a quick saute of green beans. But depending on my mood and timing, I’ll cook up a batch of my slow cooked string beans with smoked turkey.

Hamburger Steaks with Mushroom and Onion Gravy

Prep Time5 minutes
Cook Time30 minutes
Total Time35 minutes
Course: Main Course
Cuisine: American
Keyword: gravy, hamburger gravy, hamburger meat, hamburger steaks, mushroom, mushroom gravy, mushrooms, weeknight meal
Servings: 4 servings
Author: Crystal

Equipment

  • Mixing bowl
  • wooden spoon
  • large skillet
  • spatula

Ingredients

For the Hamburger Steaks

  • 1 ½ lbs ground beef
  • ¼ tsp paprika
  • ¼ tsp onion powder
  • ¼ tsp garlic powder
  • tsp red pepper flakes
  • ½ tbsp kosher salt
  • ½ tsp ground black pepper
  • tsp thyme
  • 1 egg beaten
  • 2 tbsp plain Panko breadcrumbs
  • ½ tbsp worchestershire sauce

For the Mushroom Gravy

  • 4 tbsp canola oil
  • 8 ounces mushrooms sliced
  • 1 cup yellow onion sliced
  • 1 tbsp unsalted butter
  • 3 garlic cloves minced
  • 1 tbsp all purpose flour
  • 1 ½ cup beef broth
  • ½ tsp kosher salt
  • ¼ tsp black pepper
  • ¼ tsp onion powder
  • ½ tbsp worchestershire sauce

Instructions

For the Hamburger Steaks

  • In a large bowl, mix all ingredients for the burgers. Evenly divide the burger mixture into 4 portions. Flatten each portion into patties about a quarter inch thick. Once flattened, put a thumbprint in the center of each patty.
  • In a large saucepan or skillet, heat 2 tablespoons of the canola oil on medium heat. Sear each hamburger patty for 2 minutes per side. Keep seared patties on a separate plate, and set aside. Reserve the pan to cook the gravy. Wipe the pan clean.

For the Mushroom Gravy

  • In the same pan that the hamburger steaks were seared, heat 2 tablespoons of canola oil. Add mushrooms and onions and cook for 3-4 minutes, stirring occasionally until lightly browned. Add the butter and minced garlic, stirring for 1 minute.
  • Dust the flour over the mushroom mixture, stirring for 1 minute. Pour in beef broth, and bring to a simmer while stirring. Add remaining gravy ingredients, stirring to combine. Turn heat down to it's lowest setting.
  • Place the partially cooked burgers into the gravy, along with any juices leftover in the plate. Cover the pan and cook for 10 minutes, flipping the burgers in the sauce halfway through cooking. Remove from heat.
  • Serve with your favorite veggie and mashed potatoes. Enjoy!

Notes

To make dairy free, omit the butter and replace with a tablespoon of canola oil. 
 

Pin It on Pinterest