Apple Butter No Bake Cheesecake with Spiced Graham Cracker Crust

Close up of a square piece of no bake apple butte cheesecake

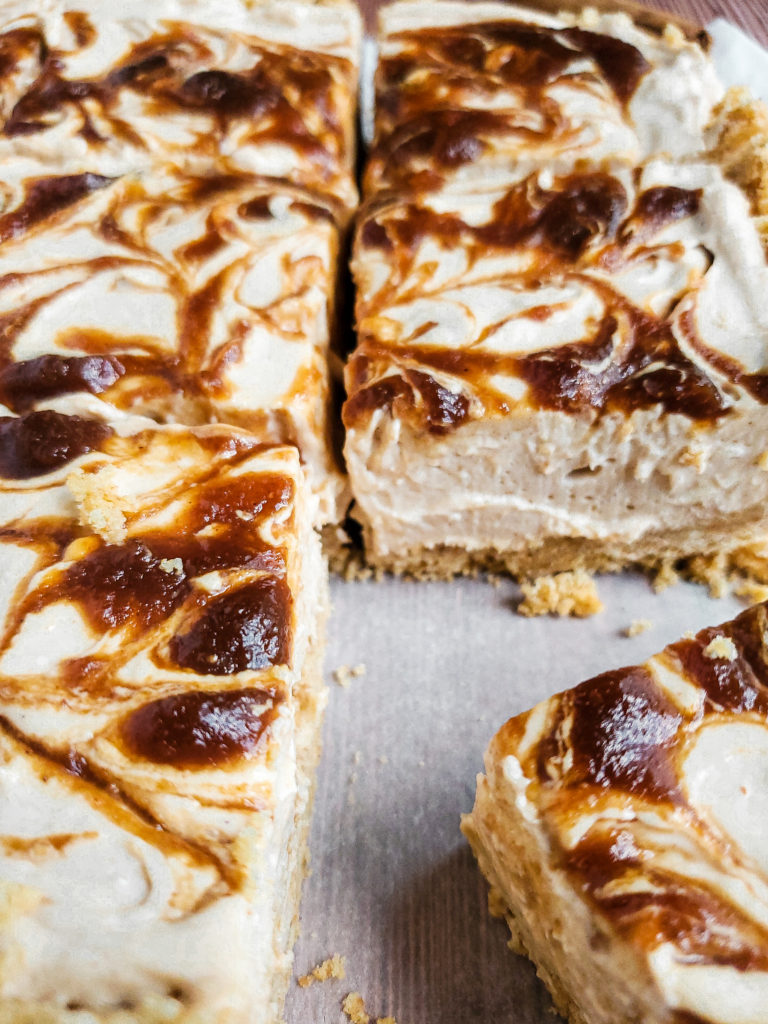
A creamy no bake cheesecake with swirls of spiced apple butter is a great option for a fall dessert. Add a spiced graham cracker crust, and you’ll be in for a real treat!

When it comes to fall flavors, one of the main things I love is all things apple! From drinks to savory dishes to desserts, apples have a special place in my heart. And so does cheesecake. So why not put them together with some apple butter, and make it no bake cheesecake style!!!

Overhead close up of a square piece of no bake apple butte cheesecake

What is no bake cheesecake?

Cheesecake is a custard made with cream cheese and raw eggs that’s slowly cooked in the oven until it’s firm. With no-bake cheesecake, there are zero eggs, which makes the filling safe to eat without it being cooked!

These 2 cheesecakes will have a different texture. The no-bake version will have a softer texture, more like a mousse or pudding, while the baked version will be more firm. The flavor will be the same for each style, but the no-bake version is a more fool-proof recipe which is perfect for the non-bakers (like myself). 

How to make no bake cheesecake

Putting together a no-bake cheesecake takes about 20 minutes of prep. All you have to do is:

  • Assemble your crust and chill in the fridge
Overhead shot of graham cracker crust being mixed together
Mix graham crackers, spices, sugar, and melted butter
Overhead shot of graham cracker crust in a square pan
Pour the graham cracker mix into the pan of your choice
Overhead shot of graham cracker crust being pressed in a square pan
Press the graham cracker crust into the pan with the bottom of a cup
Overhead shot of graham cracker crust in a square pan
Put in the graham cracker crust into the fridge, and make your cheesecake filling!
  • Whip together the cheesecake filling, then pour the cheesecake filling into the chilled crust
Overhead shot of no bake cheesecake filling being scooped into a graham cracker crust
Add the cheesecake filling into the chilled crust
Overhead shot of no bake cheesecake filling being spread into a graham cracker crust
Gently spread the cheesecake filling in the crust, as the crust may still be bit crumbly
Overhead shot of no bake cheesecake filling being spread into a graham cracker crust
Nice and smooooooooth!
  • Sit in the fridge for at least 3 hours, preferably overnight
  • To serve, slice with a warm knife

The only difficult part about this recipe is waiting for the cheesecake to set, since you’ll want to eat this right away!

What pan should I use for no bake cheesecake

For this recipe, I assemble the cheesecake in an 8×8 baking pan. Luckily, there are a few ways this can be put together:

  • Springform pans are standard for cheesecakes. If you have one, definitely use it!
  • Individual servings are a fun idea, which can be done by assembling the cheesecake into muffin tins! Be sure to use cupcake liners for this.
  • Make individual cheesecake parfaits! Layer the cheesecake filling with the crumbs used for the crust  into cups before chilling. Or if you want, this can be served right away!!!

What kitchen tools do I need to make cheesecake?

Whether it’s regular cheesecake or no bake, there are a couple of tools that you should have to make the filling:

Stand mixer or hand mixer with a whip attachment – this will ensure you have a nice smooth cheesecake filling. The cream cheese needs to be beaten into a very smooth consistency with zero lumps,, and the only way to do this is with a mixer.

Rubber spatula – this is an essential tool for bakers! It helps to gently scrape the contents that’s on the inside of mixing bowls. Super cheap too. Go invest in one!

Important steps for making no bake cheesecake

While this is a simple recipe with many variations, there are a few things that you absolutely have to do to make this correctly. 

Room temperature cream cheese

Before whipping the cream cheese, it has to be room temperature. I let the cream cheese sit out on the counter for a couple of hours before putting the filling together, but even an hour will work. This is to ensure that the completed cheesecake filling does not have any lumps. Biting into a chunk of cream cheese is not appealing when trying to enjoy a smooth cheesecake.

Powdered sugar vs regular sugar

Since the filling is not being cooked, it’s best to use powdered sugar instead of granulated. 

Granulated sugar is a standard when making desserts, in which the sugar will melt while cooking. The no-bake cheesecake is obviously not being cooked. Using it can make the filling a little gritty.  So using powdered sugar, which is much finer but just as sweet, will give the sweetness that’s needed and also keep the filling smooooooth. 

Fresh lemon juice

The eggs in a baked cheesecake helps the filling to set, which is omitted from the no-bake version.

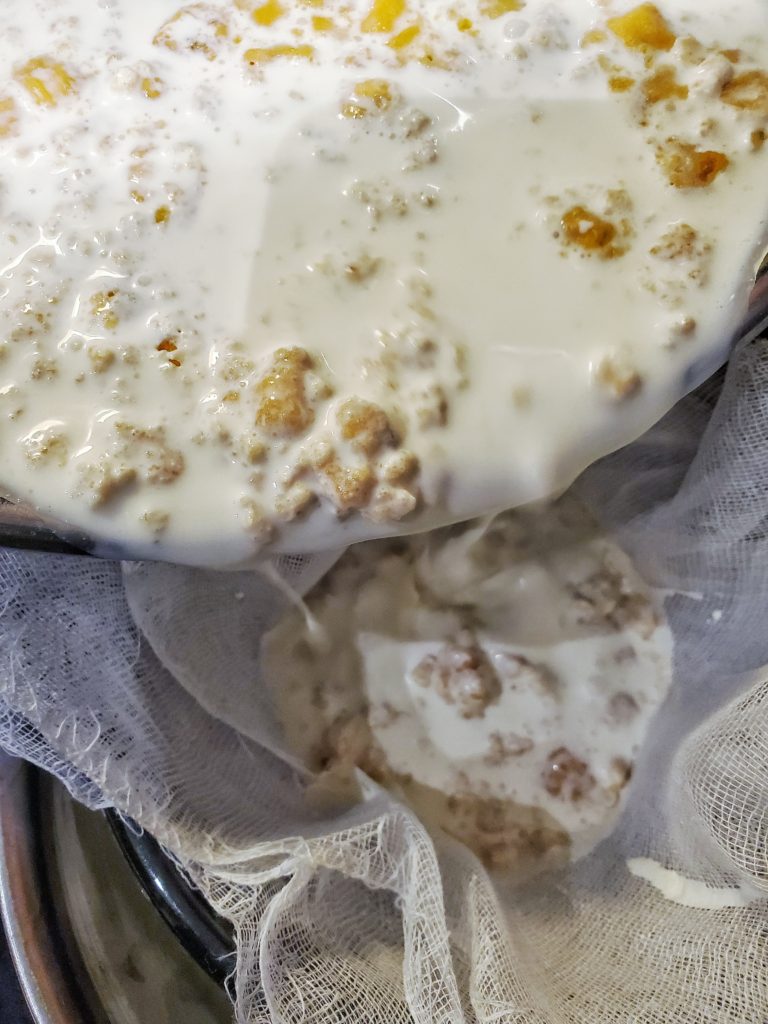
In order to get the filling to set, fresh lemon juice is needed. Acid does some science-y sh*t where it  cooks protein. In this case, the natural protein in milk is being “cooked” by the lemon juice.

Don’t worry though….the amount of lemon juice used does not alter the taste of the cheesecake. It actually helps to brighten the flavor a bit, and gives it the tanginess in cheesecake that we all love!

Don’t use reduced fat cream cheese!

This is NOT one of those recipes where you should use a low fat or nonfat cream cheese. In reference to needing lemon juice, that lemon juice needs something to cook. If there isn’t the right amount of fat in the filling, it will not set like it’s supposed to. 

How to store cheesecake

Cheesecake can be stored in the fridge for up to 5 days. Be sure to tightly cover the cheesecake with plastic wrap, or cut and store in an airtight container.

There’s also the option to freeze anything not being consumed before the 5 days are up. Wrap the cheesecake with plastic wrap and store in a freezer safe zippered bag for 1-2 months. Defrost on the counter for a couple of hours, or in the fridge overnight. 

Close up of a square piece of no bake apple butte cheesecake

Now that you have the rundown of making a no bake cheesecake, you can now make my Apple Butter Cheesecake!

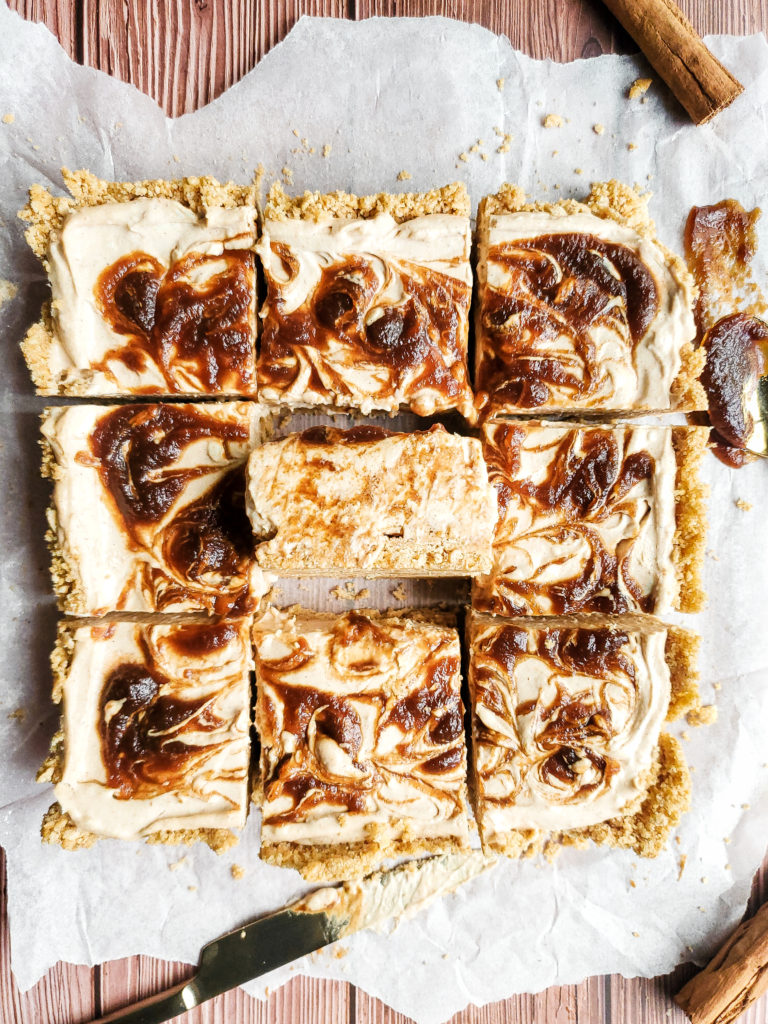
The crust for my cheesecake is made with regular graham crackers. In true fall fashion, I felt the need to shake things up by adding a few spices to the mix. There’s cinnamon and nutmeg, which is also in the filling. But there’s a little ground ginger as well. Yummmmmyyyy!!!!!

Overhead shot of no bake cheesecake with dollops of apple butter
Add dollops of apple butter onto the cheesecake filling
Overhead shot of no bake cheesecake with dollops of apple butter being swirled
Swirl the apple butter with a skewer
Overhead shot of apple butter no bake cheesecake
Once swirled, put in the fridge!

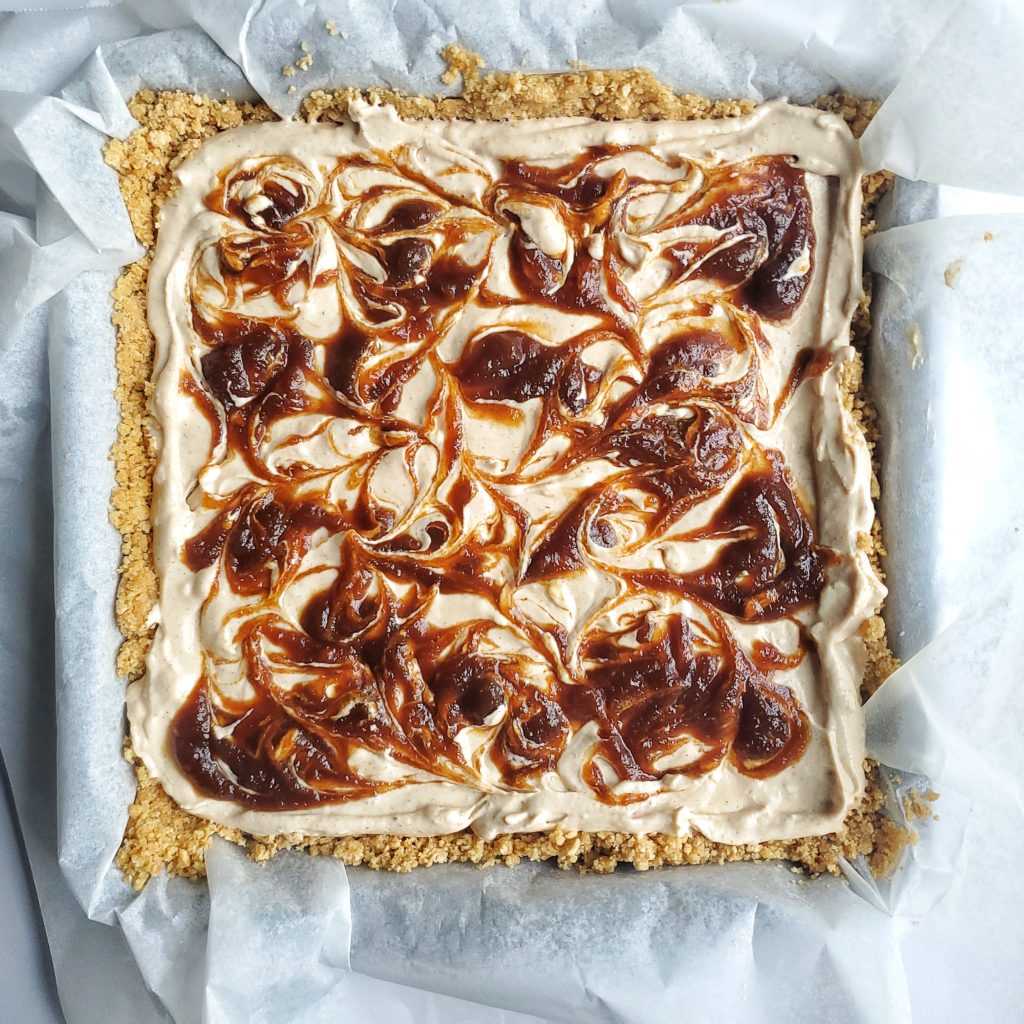
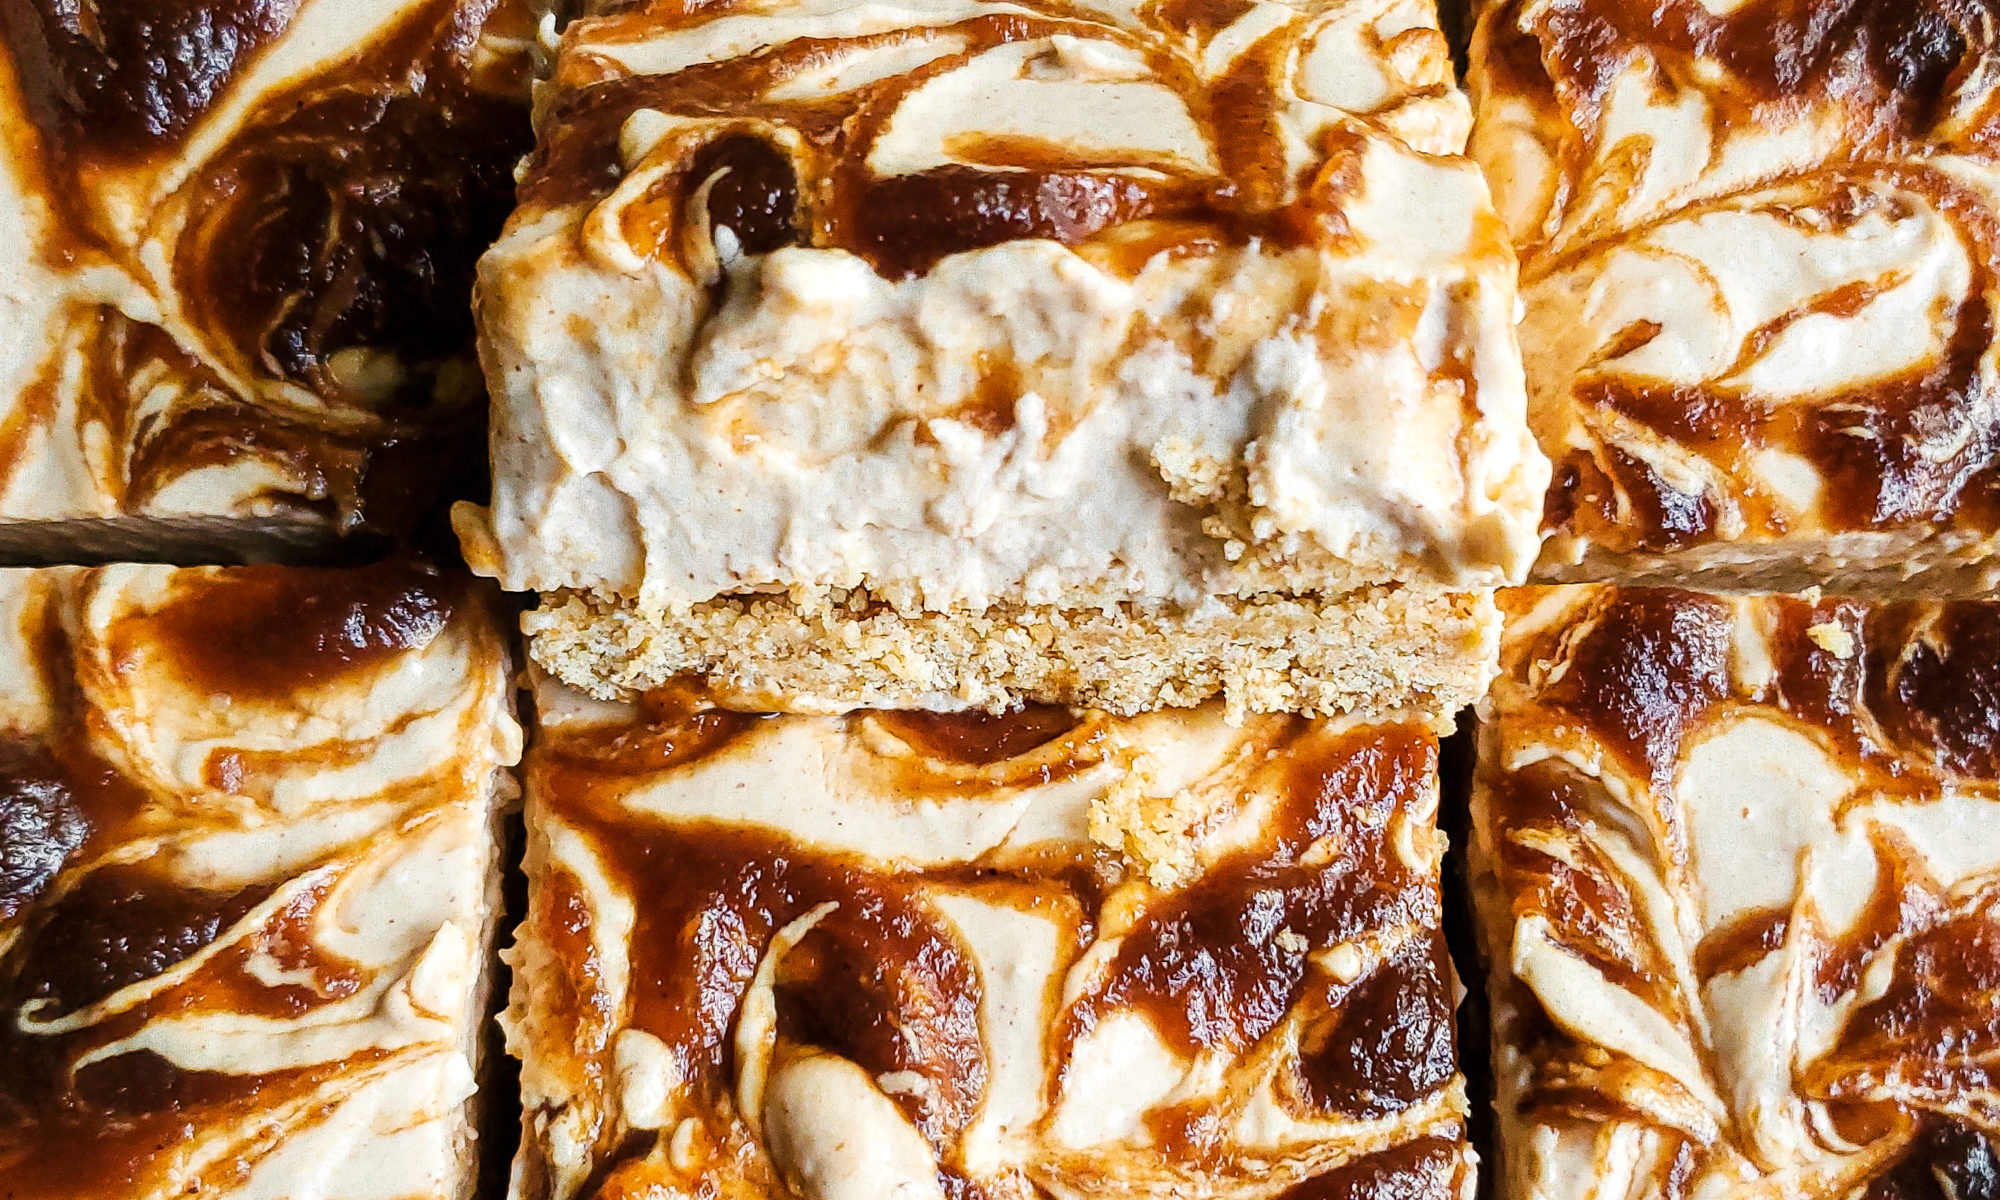
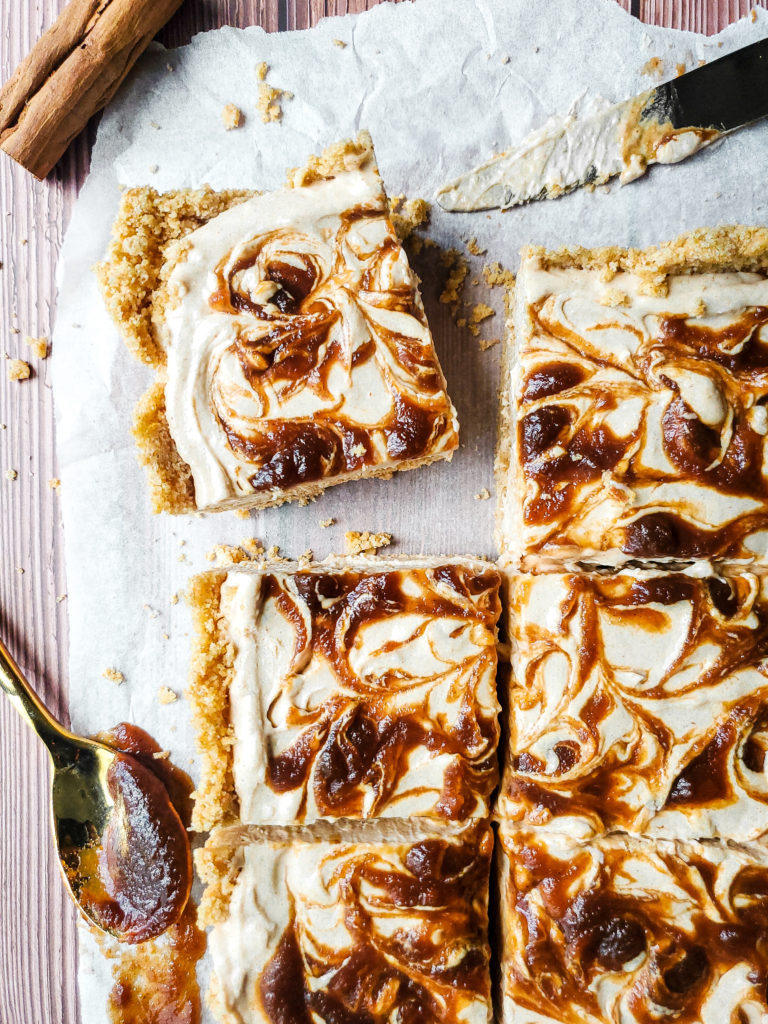
Your apple butter of choice is added into the cheesecake filling base. Once poured into the chilled crust, I also add several dollops of the apple butter onto the top to swirl into the filling. It’ll look super pretty, and add more of that bomb apple flavor! I used store bought apple butter, but you can most certainly make some from scratch. 

Overhead close up of a square piece of no bake apple butte cheesecake

If you’re looking for another no-bake dessert, definitely try out my Cookie Butter Chocolate Pudding Pie!!! 

Apple Butter No Bake Cheesecake with Spiced Graham Cracker Crust

A creamy no-bake cheesecake with swirls of apple butter is a great option for a fall dessert.
Prep Time20 minutes
Chill Time3 hours
Course: Dessert
Cuisine: American
Keyword: apple, apple butter, apple cheesecake, no bake, no bake cheesecake
Servings: 9 servings
Author: Crystal

Equipment

  • Stand or hand mixer
  • Square baking pan
  • Rubber spatula
  • parchment paper
  • Skewer
  • Food processor
  • Mixing bowl

Ingredients

Biscoff Cookie Crust

  • 15 plain graham crackers
  • 1 ½ tablespoons dark brown sugar
  • 1 teaspoon ground cinnamon
  • ¼ teaspoon ground ginger
  • dash ground nutmeg
  • 9 tablespoons unsalted butter melted

Cheesecake Filling

  • 2 8 ounce packages cream cheese room temperature
  • ½ teaspoon ground cinnamon
  • dash nutmeg
  • 4 tablespoons powdered sugar
  • ¼ cup fresh lemon juice
  • ¼ cup heavy cream
  • 1 ½ teaspoon vanilla extract
  • ½ cup apple butter
  • ½ cup apple butter for garnish

Instructions

For the crust

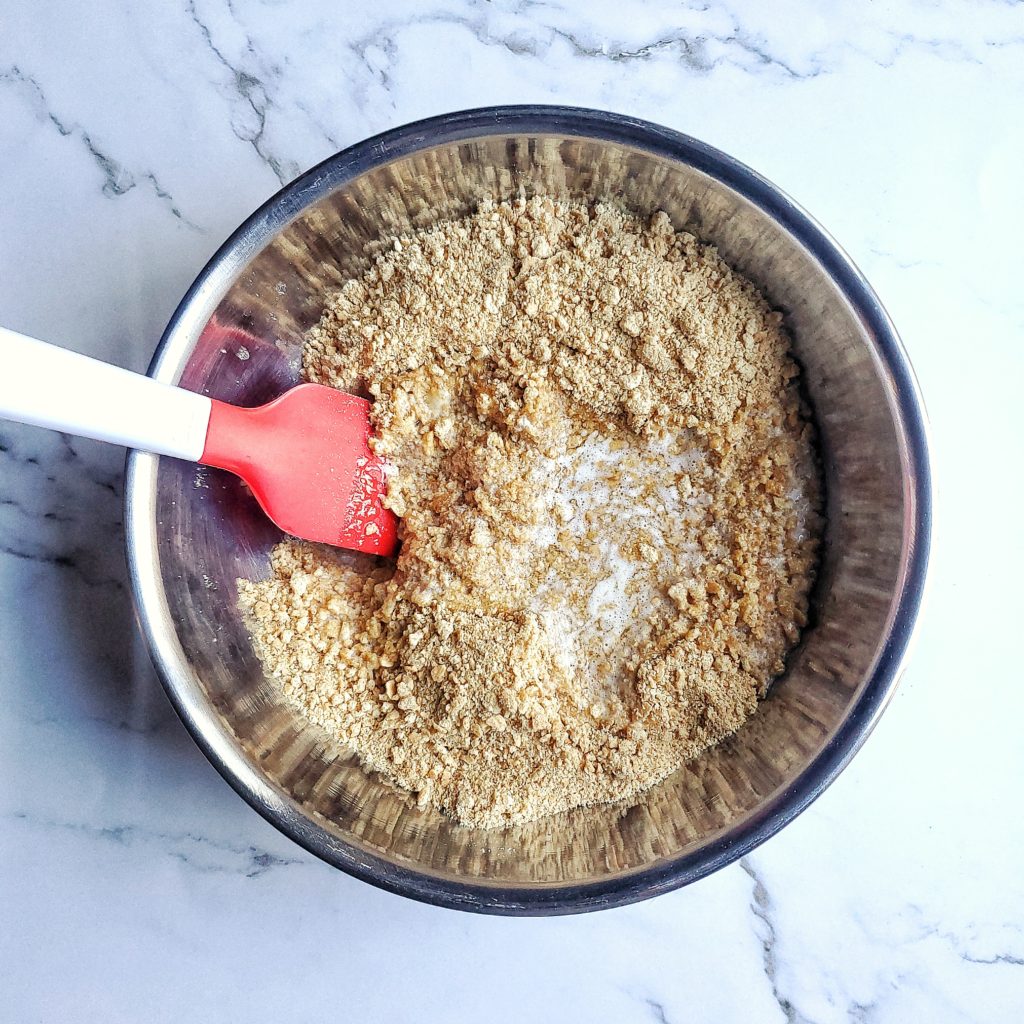
  • Place all ingredients, excluding the butter, into a food processor. Pulse into fine crumbs, then pour into a medium sized bowl.
  • Pour the melted butter in with the crumbs. Gently mix with a spoon or rubber spatula.
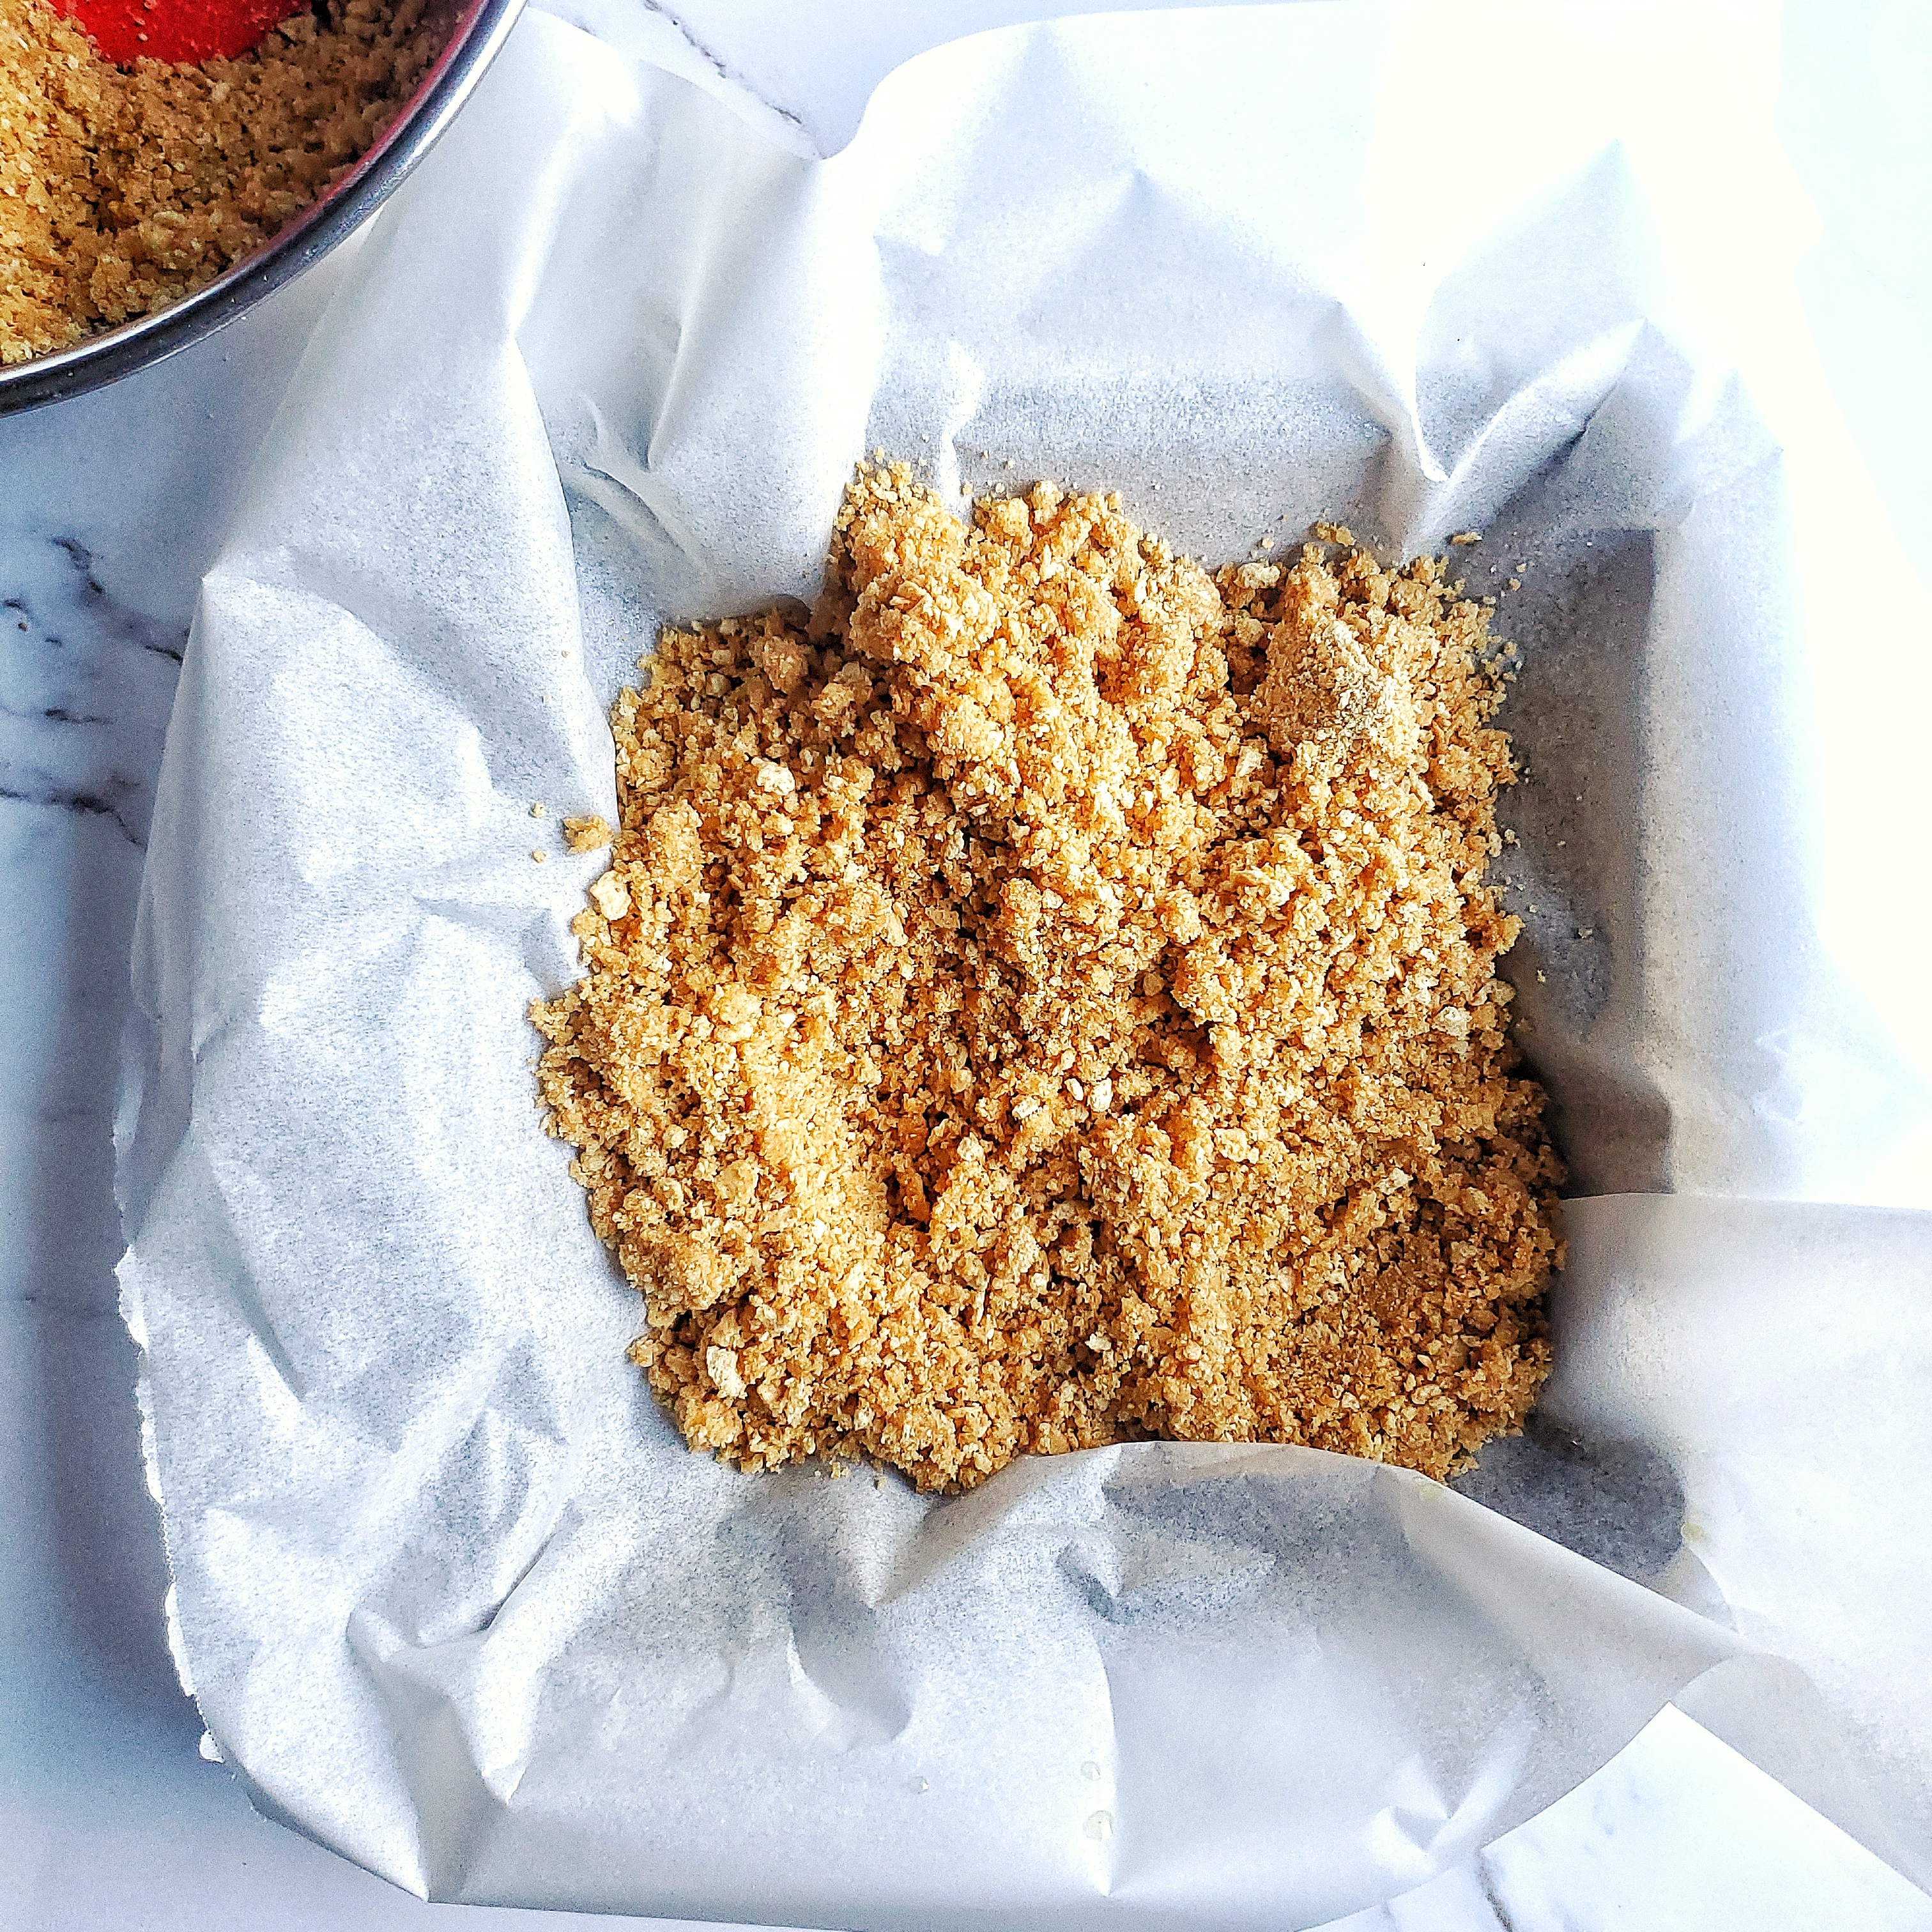
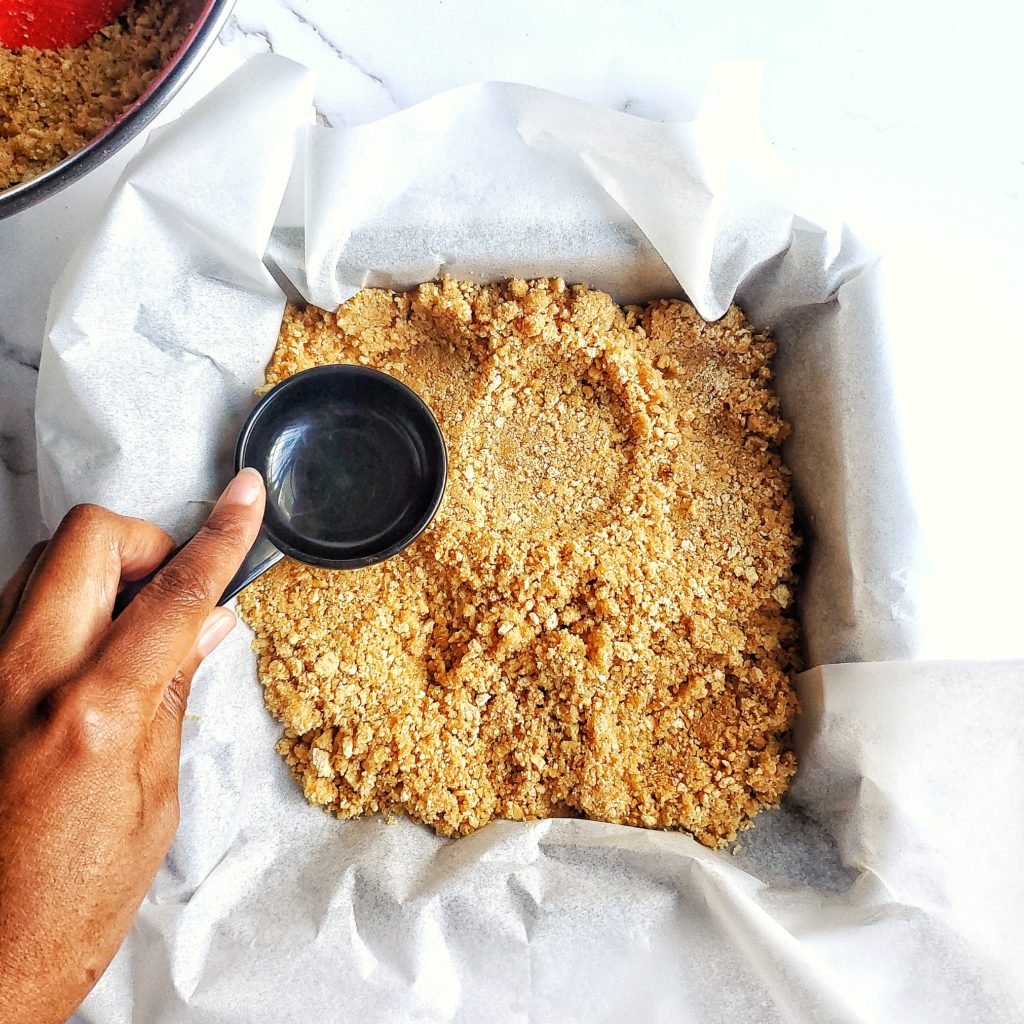
  • Line the inside of a square baking pan with parchment paper, leaving extra parchment paper hanging off the sides.
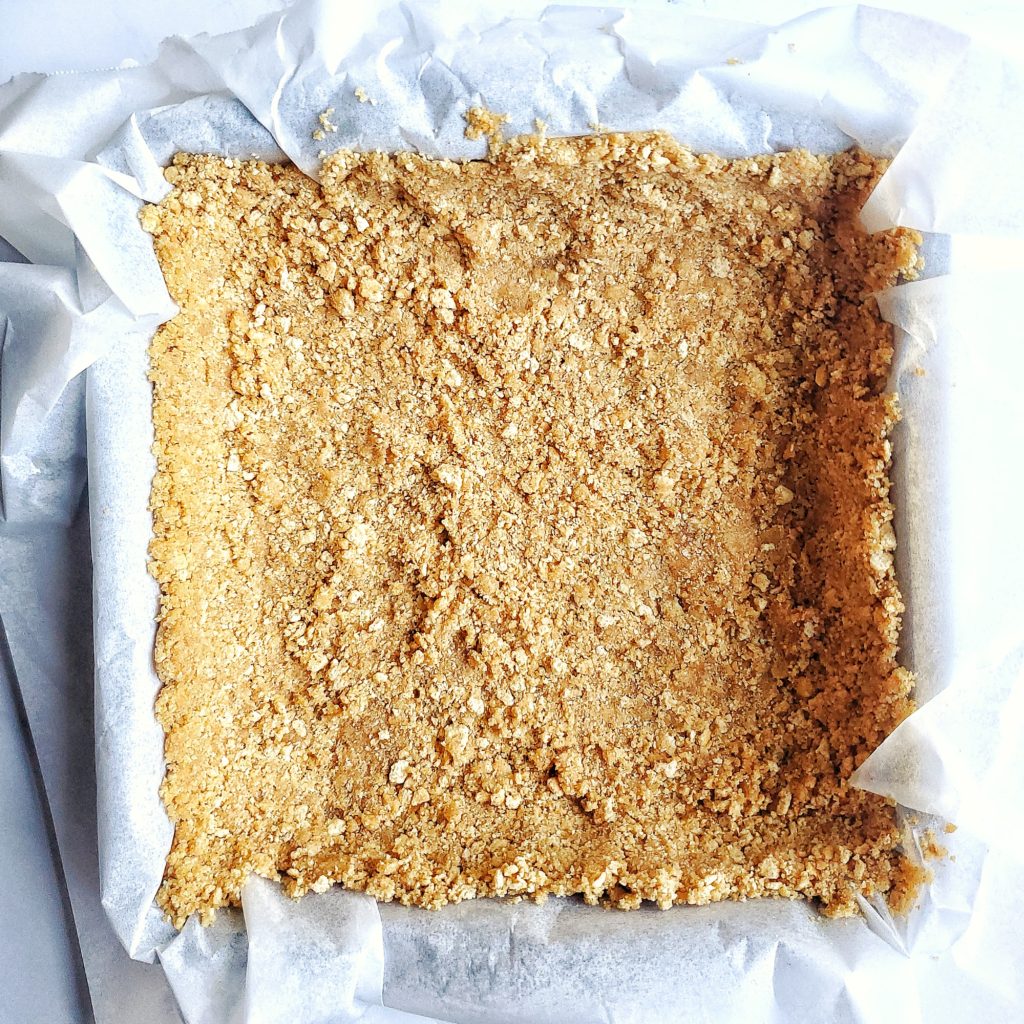
  • Pour the crumb mixture into the bottom of the pan, evenly pressing it into the bottom of the pan with the spoon, or bottom of a small cup.
  • Refrigerate for at least 10 minutes. Make the cheesecake filling while the crust is in the fridge.

For the cheesecake filling

  • Using the whip attachment on a stand mixer or hand mixer, whip the cream cheese on medium speed until smooth with no lumps, for about 2 minutes. Scrape down the cream cheese from the inside of the bowl with a rubber spatula, and whip for 1 more minute.
  • Add the remaining ingredients, excluding the apple butter. Whip on low speed for 1 minute. Scrape down the filling again, and whip on low for 1 more minute.

Cheesecake assembly

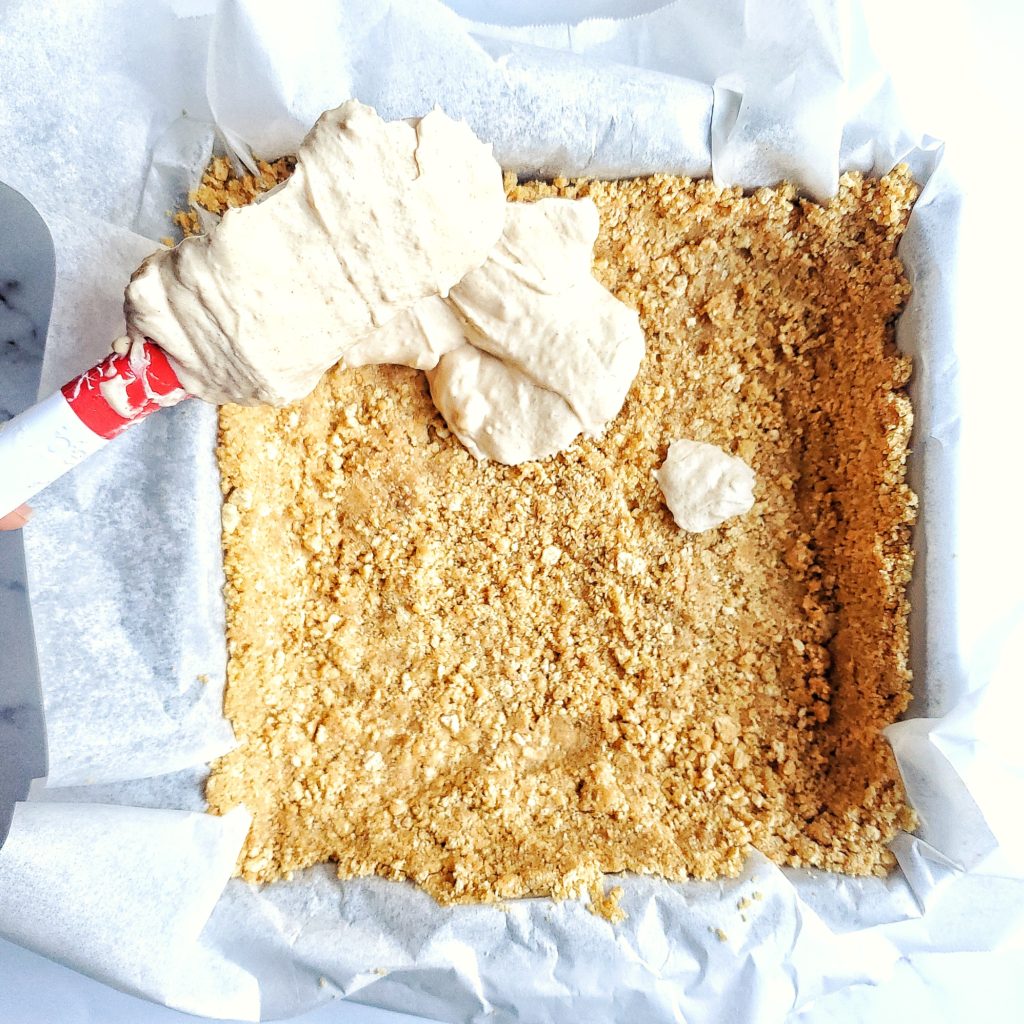
  • Remove the cookie crust from the fridge.
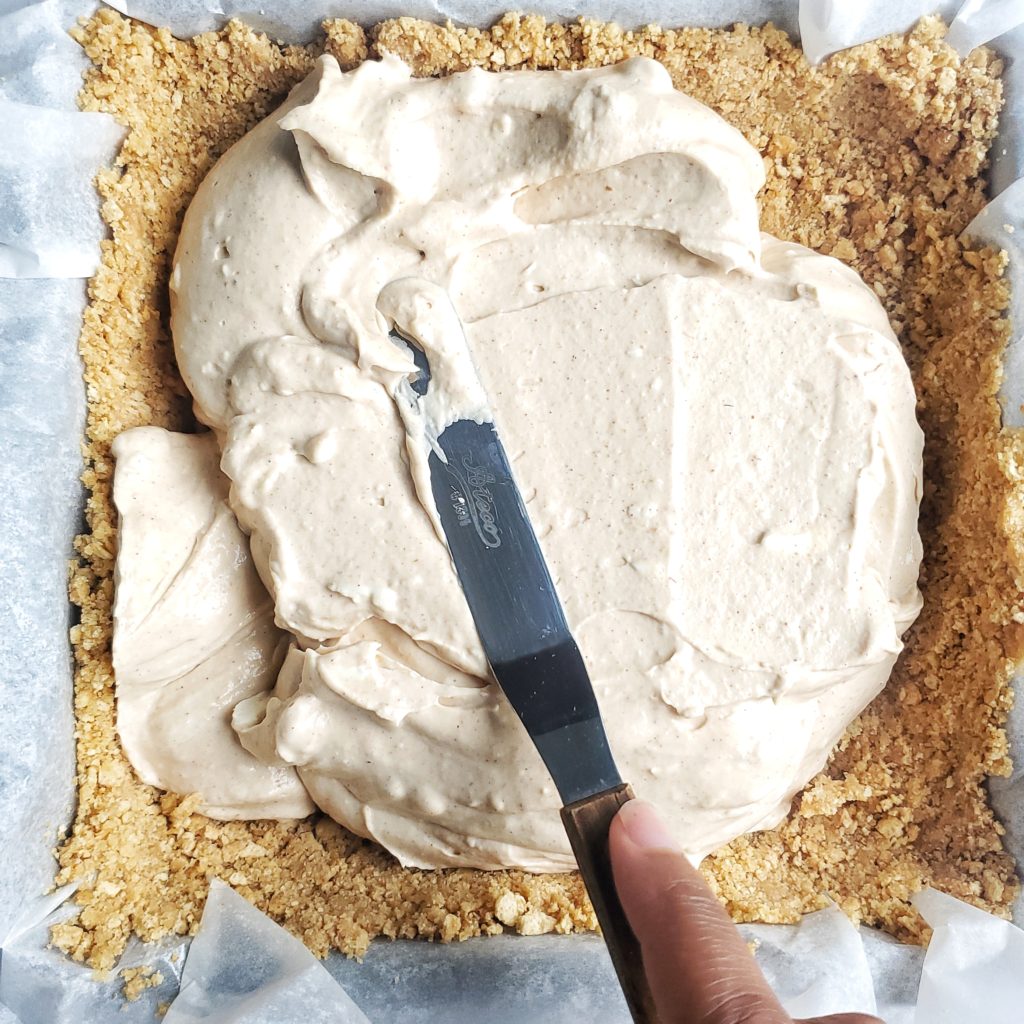
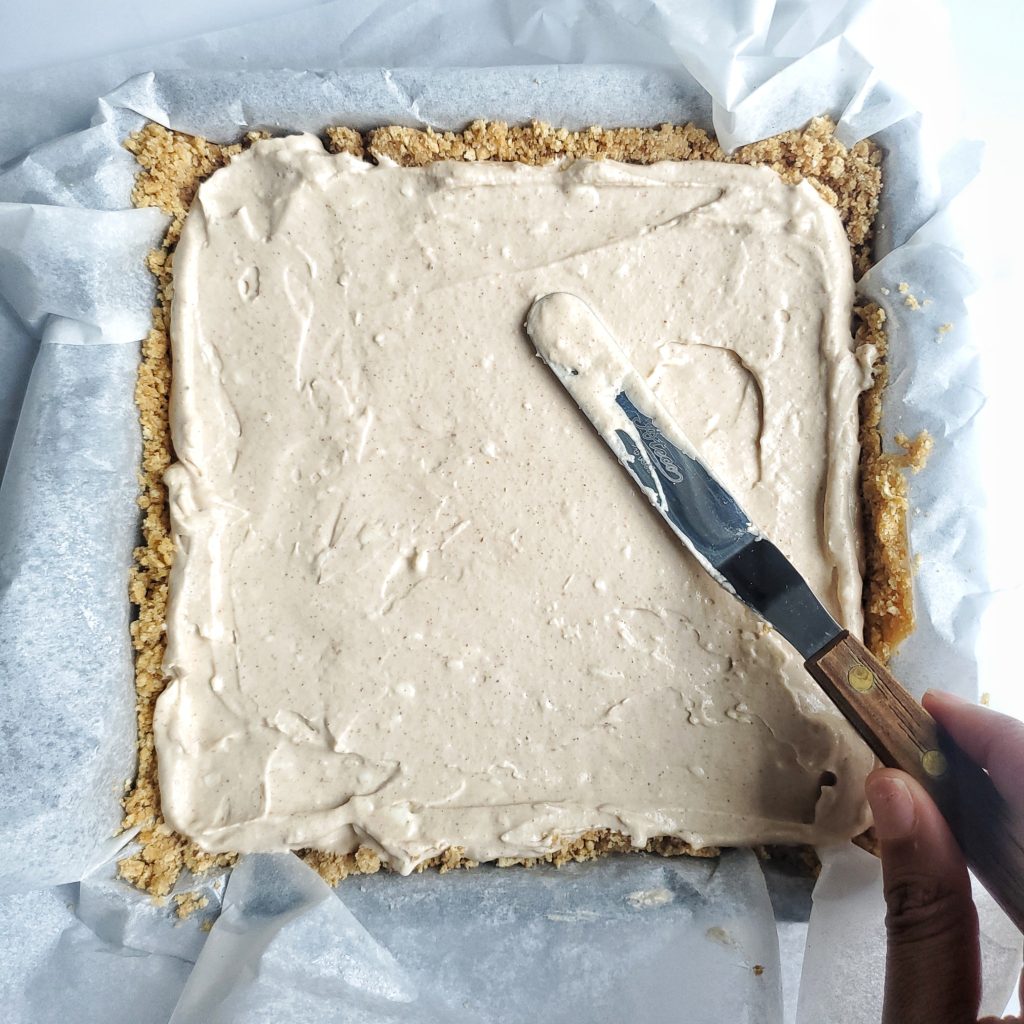
  • Pour half of the cheesecake filling into the crust. Spread evenly using the rubber spatula.
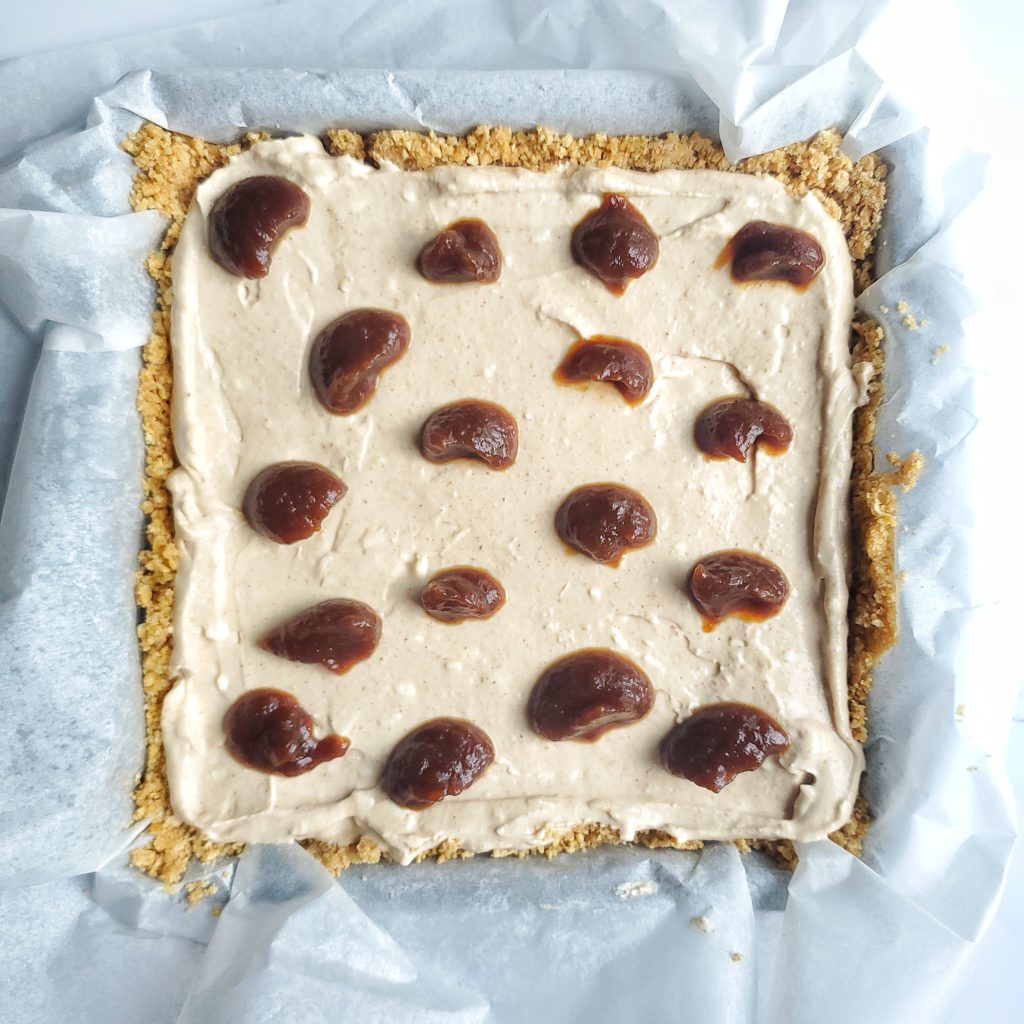
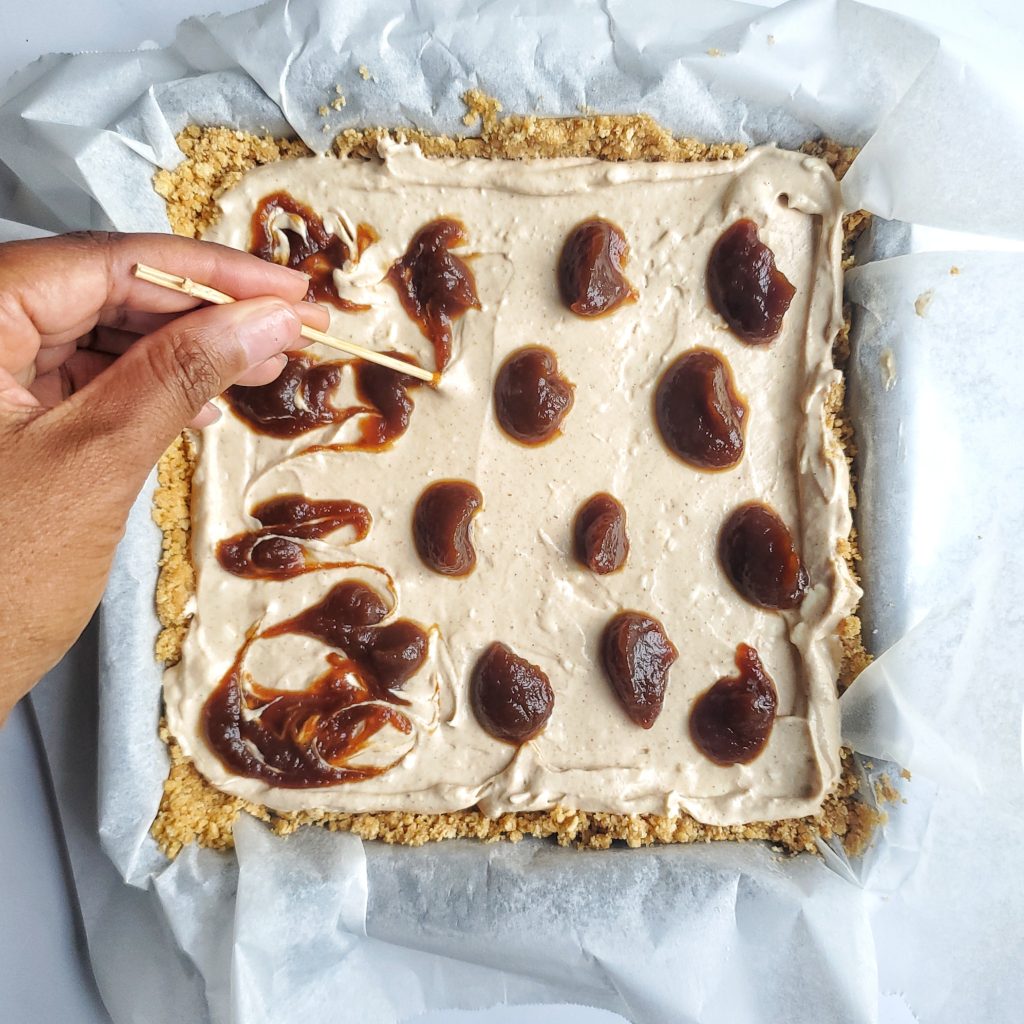
  • Using half of the apple butter garnish, drop several small dollops onto the filling. With a skewer or tip of a knife, gently swirl the apple butter back and forth into the cheesecake filling.
  • Pour the remaining cheesecake filling into the pan and spread evenly with the spatula. Dollop with the remaining apple butter and swirl with the skewer.
  • Refrigerate uncovered for 3 hours, until set. Once the filling has set, the cheesecake can be covered with plastic wrap.

To serve

  • Remove cheesecake from the fridge.
  • While holding 2 sides of the parchment paper that’s hanging off the side of the pan, carefully lift the cheesecake out of the pan and place onto a cutting board.
  • Warm a sharp knife under hot water. Cut the cheesecake into 9 squares, or to desired serving size.

Notes

Any flavor of graham crackers can be used.
A premade graham cracker crust can be used instead of homemade. 
Light brown or granulated sugar can be replaced for dark brown sugar in the crust. 

Easy 4-Ingredient Strawberry Key Lime Sorbet

Overhead shot of two bowls of strawberry key lime sorbet in bowls with sliced strawberries and key limes

Strawberry key lime sorbet is the perfect treat to close out a warm summer evening. With just 4 ingredients, you’ll fall in love with the ease of this no churn recipe!

Scoops of strawberry key lime sorbet in a bowl

Making a sorbet at home may seem a bit scary. But it’s one of the easiest homemade desserts that can be made! Just a few ingredients and a couple of hours for freezing is all you need!

How to make homemade sorbet

To make a simple sorbet base at home, all you’ll need is a blender, a freezer safe container, and fruit! No ice cream machine needed. Just blend, freeze, scoop, and serve!

For this particular recipe, there are additional ingredients to jazz up the strawberry sorbet base. The addition of an acid, key lime juice in this case, brightens up the flavor. Honey is a natural sweetener, which will help if you’re using strawberries outside of strawberry season. Lastly, the ginger adds a very slight spice kick that isn’t overwhelming (I love using Gourmet Garden’s ginger paste!)

Honey vs simple syrup for sorbet

Sorbet is commonly made with a simple syrup – equal parts of sugar and water simmered together and cooled. 

While it’s delicious, it’s better to use the simple syrup method for a sorbet that will be used in an ice cream maker. The churning helps to make the sorbet base smoother, which is important for the liquid content being added.

Since this strawberry key lime sorbet is a no churn recipe, I used honey! Not only is it a natural sweetener, the water content is much lower so the churning isn’t necessary!

Sorbet storage

The homemade sorbet should be stored in a freezer safe container with an airtight container.

It’s shelf life is around a month. Ice crystals will start to form on top of the sorbet, but can be lightly scraped off before serving.

Frozen fruit vs fresh fruit for sorbet

This strawberry key lime sorbet recipe calls for fresh strawberries. However if you can not get your hand on any, frozen is a great alternative. 

When the ingredients are blended together using frozen fruit, the end result will be more of a frozen slushy than a puree when using fresh fruit. Don’t worry though….it will still be delicious! Proceed with pouring the slushy into the freezer-safe container, and spread evenly before freezing for about an hour.

Overhead shot of two bowls of strawberry key lime sorbet in bowls with sliced strawberries and key limes

How to serve homemade sorbet

Once the sorbet is frozen, sit the container out at room temperature for about 5 minutes. The sorbet will be a bit easier to scoop this way. 

If you want to be fake fancy, slice up some fresh fruit to serve on the side of the scooped sorbet!

What I love is that sorbet can also be served as a drink! Scoop the frozen sorbet into a blender, and pulse until smooth. Make it an adult beverage by  adding a shot (or 2) of your favorite alcohol while blending. Or pour your favorite wine or hard seltzer over a scoop of sorbet in cups. Perfect summer treat!

If you’re looking for another easy dessert, you’ll definitely want to check out my no churn ice cream flavors: Cookie Butter, Cereal Milk, and S’mores!

Scoops of strawberry key lime sorbet in a bowl
Print Recipe
5 from 9 votes

4 Ingredient Strawberry Key Lime Sorbet

Strawberry and key lime sorbet is the perfect treat to close out a warm summer evening.
Prep Time10 minutes
Freeze time3 hours
Course: Dessert
Cuisine: American
Keyword: key lime, no churn, no churn sorbet, sorbet, strawberries, strawberry
Servings: 4 servings
Author: Crystal

Equipment

  • Blender
  • Freezer safe container with a lid
  • Ice cream scoop

Ingredients

  • 1 pound fresh strawberries rinsed with stems removed
  • ¼ cup pure honey
  • 3 tablespoons key lime juice
  • 1 teaspoon ginger paste (optional)

Instructions

  • Place all the ingredients into a blender.
  • Quickly pulse the ingredients to break the strawberries into smaller pieces by quickly turning the blender on and off in 1 second intervals, for about 10 seconds in total.
  • Turn the blender on blend or puree for 20 seconds, mixing until smooth.
  • Pour the mixture into a freezer safe container. Cover tightly with plastic wrap or a tight-fitting lid. Freeze for 2-3 hours.
  • To serve: Remove sorbet from the freezer and let sit at room temperature for 5 minutes. Scoop and serve!

Notes

Ginger can be omitted from recipe
Frozen strawberries can be replaced with fresh strawberries. 

Easy No-Churn Cereal Milk Ice Cream

Scoops of cereal milk ice cream

This no-churn ice cream takes your favorite cereal and turns it into the perfect summer treat!

When you think of eating a nice big bowl of cereal, one of the best parts is the leftover milk. It has a lightly sweet flavor that’ll put a regular cup of milk to shame. Take that same idea, and turn it into a frozen dessert…. cereal milk ice cream is born!!!

This is a super simple recipe. Not only is the cereal milk fool-proof, since we all pretty much make this all the time, the ice cream is also no churn! Can’t go wrong with that!

Scoops of cereal milk ice cream

What type of cereal should I use for cereal milk?


The best part of cereal milk is that you can use any brand and flavor you love! No limits with cereal milk.

For my cereal milk ice cream recipe, I went with Cap’n Crunch! It’s not only one of my favorite cereals, it also leaves behind the most delicious drinkable cereal milk everrrrr!!!! The flavor of sweetened corn cereal in milk can’t be beat!

But whether you’re a fan of corn, fruity, or chocolate cereals, you can make a batch of cereal milk with just 2 ingredients: cereal and milk (I stated the obvious lol, but you get it).

How to make cereal milk


Making cereal milk is done as simply as we’ve been unintentionally (or intentionally) doing by letting your cereal of choice soak in milk. To get more of the cereal’s sweetness into this milk, it’ll get soaked for 30 minutes. There’s the option to add a little brown sugar to make it a bit sweeter if you’d like.

  • The cereal gets finely ground in a food processor, or crushed in a bowl with your hands.
  • Next, pour milk over the cereal, and soak for 30 minutes.
  • While the cereal is soaking, set up a separate bowl with a strainer. Inside of the strainer, add a few layers of cheesecloth.
  • Once the cereal has soaked, pour it into the cheesecloth. The milk that’s being strained is that nice flavorful cereal milk!
Cereal with brown sugar in a bowl for cereal milk
Cap’n Crunch cereal in a mixing bowl with brown sugar
Crushed cereal with brown sugar in a bowl for cereal milk
Crushed Cap’n Crunch cereal in mixing bowl with brown sugar
Cereal with brown sugar in a bowl with cream for cereal milk
Heavy cream poured into crushed Cap’n Crunch cereal
Cereal milk process shot
Soaked Cap’n Crunch cereal being poured into strainer with cheesecloth

You’ll want to squeeze out as much of the milk from the soaked cereal as you can. To do this:

  • Grab all the corners of the cheesecloth into one hand
  • Pickup the cheesecloth so you’re holding it like a pouch with the soaked cereal.
  • Squeeze the excess liquid from the soaked cereal with your hands, still keeping the cheesecloth pouch over the strainer. A glove can be used to keep your hands clean.

For cereal milk ice cream, the cereal is soaked in heavy cream instead of milk.


What to do with the leftover cereal from making cereal milk


That cereal paste that’s leftover from straining the cereal milk can be tossed.

BUT, for the cereal milk ice cream, the paste can be incorporated into the ice cream base! Again, this is optional, but does help to add a little more sweetness to the ice cream.

It’s also up to you how much of that cereal paste you’d like to add. If you’re crushing your cereal by hand, be mindful of any chunks. Once it’s mixed and frozen with the ice cream, the texture can be a bit odd, almost like it’s stale, even though it still has flavor. The finer the crushed cereal, the better!

How to make cereal milk ice cream


As I mentioned earlier, the cereal is soaked in heavy cream instead of milk, as heavy cream is what’s used in an ice cream base. It’s still being soaked and strained in the same manner.

Once strained, the heavy cream is beaten on high speed to create a stiff whipped cream. Then, sweetened condensed milk and vanilla is incorporated. Adding the soaked cereal to the ice cream base is optional.

How to store homemade ice cream:


The best way to store your ice cream in the freezer is in an airtight container that is freezer safe. I keep mine in a Tupperware container.

Pressing some plastic wrap or parchment paper directly on top of the ice cream helps to prevent freezer burn.

Scoops of cereal milk ice cream

Additional toppings for the cereal milk ice cream


I’m a big fan of different textures in a dish. So just like adding crushed cookies on top of ice cream as a garnish, you can sprinkle cereal on the ice cream as well! Almost like making a bowl of cereal, but your milk is scoop (or 2, or 3) of cereal ice cream! Sounds like a great time to me!!!

If you’re looking for more super easy no churn ice cream recipes, check out my S’mores Ice Cream with Toasted Marshmallows, and my Cookie Butter Cheesecake Ice Cream with Espresso and Kahlua!

And remember to tag me on Instagram if you try out any of my recipes, along with leaving a rating and review!!!

Scoops of cereal milk ice cream
Print Recipe
5 from 9 votes

Cereal Milk Ice Cream

This no-churn ice cream takes your favorite cereal and turns it into the perfect summer treat!
Prep Time40 minutes
Freeze Time2 hours
Total Time2 hours 40 minutes
Course: Dessert
Cuisine: American
Keyword: cereal, cereal milk, desserts, ice cream, no churn, no churn ice cream
Servings: 12 serving
Author: Crystal

Equipment

  • Food processor
  • Hand or stand mixer
  • Mixing bowl
  • Strainer
  • Cheesecloth
  • Freezer safe container with a lid
  • Parchment paper or plastic wrap

Ingredients

  • 1 cup cereal brand and flavor of your choice
  • 2 tbsp brown sugar
  • 3 cups heavy cream
  • 14 oz sweetened condensed milk
  • 1 tsp vanilla extract

Instructions

  • Crush the cereal in a food processor, or by hand, until finely ground.
  • Combine the crushed cereal with the brown sugar and 2 cups of the heavy cream, reserving 1 cup of heavy cream for later. Soak the cereal for 30 minutes.
  • Once soaked, set up a bowl with a strainer and 4 layers of cheesecloth. Pour the cereal mixture into the cheesecloth to strain into the bowl. Squeeze any additional cream from the cereal by bunching together the loose ends of the cheesecloth, turning it into a pouch holding the cereal, and squeezing excess liquid into the strainer.
  • Set the soaked cereal aside (optional)
  • Combine the strained milk and the reserved cup of heavy cream in a large bowl or stand mixer. Whip the heavy cream mixture on high for 2-3 minutes. The whip cream is the right consistency when stiff peaks are formed.
  • Pour the sweetened condensed milk and vanilla extract into the whipped cream. Whip on low for 30 seconds.
  • If desired, gently mix in the leftover soaked cereal.
  • Pour the ice cream mixture into an airtight and freezer safe container. Press a layer of plastic wrap or parchment paper directly onto the ice cream.
  • Cover the container with an airtight lid and freeze for 2 hours for a soft serve consistency, or at least 4 hours for a scoopable consistency.

Notes

You can use any type of cereal that you’d like!!!
Adding the soaked cereal to the ice cream base is optional. 
Sprinkle the scooped ice cream with more cereal for extra texture!

Pin It on Pinterest