Creamy Roasted Mushroom Risotto + A Beginner’s Guide

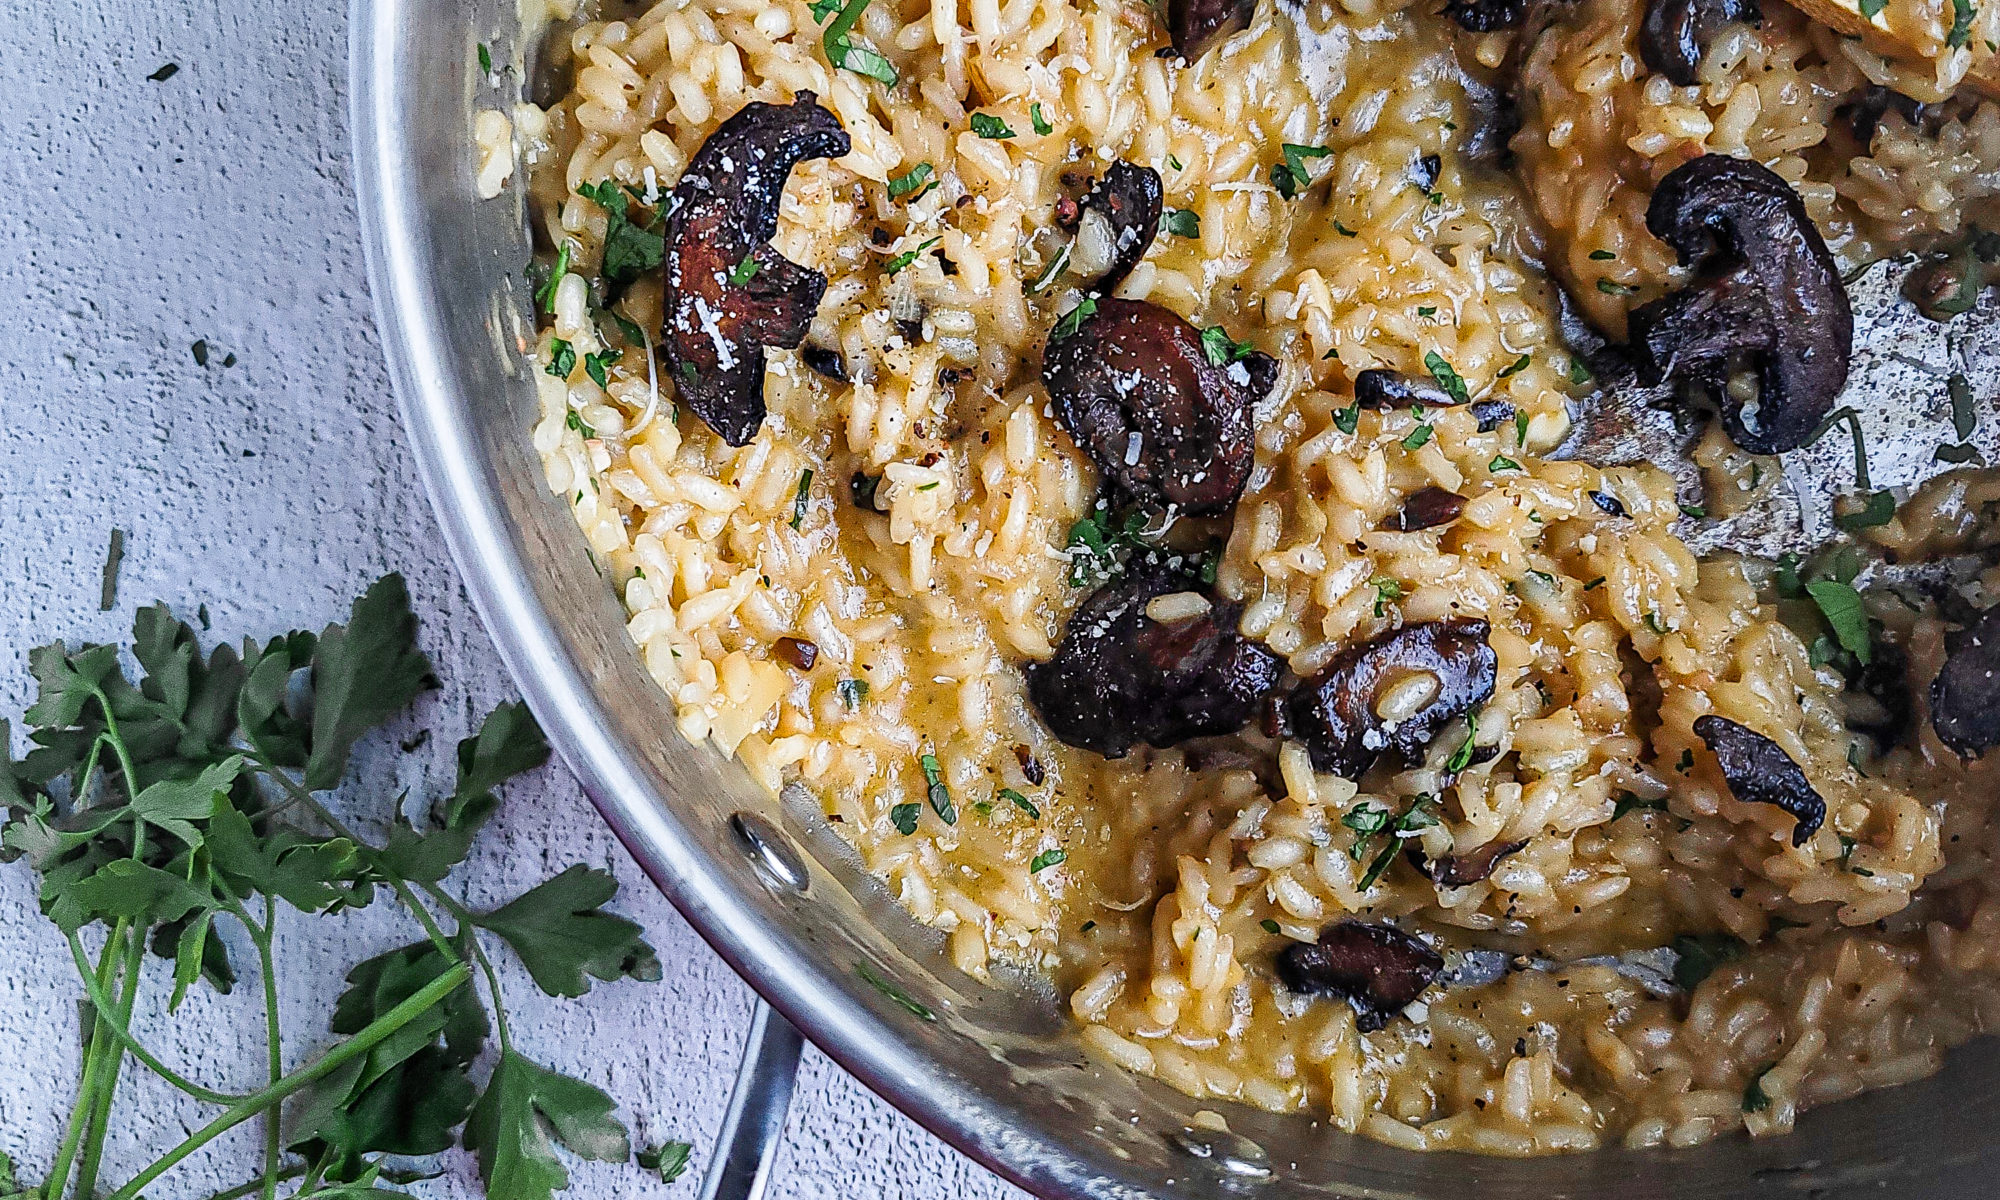
Close up of a pan full of mushroom risotto with a wooden spoon

A warm bowl of mushroom risotto is great as a vegetarian entree, or a side dish to meat and fish. The roasted mushrooms and addition of mascarpone cheese make for a restaurant-quality dinner!
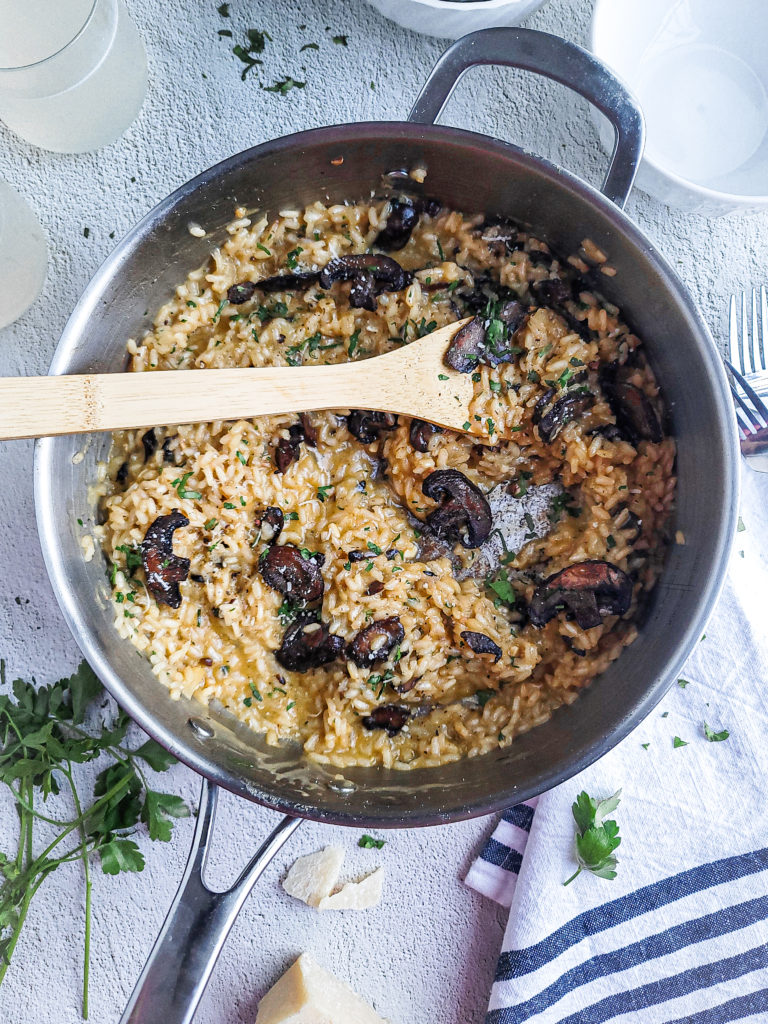
Close up of a pan full of mushroom risotto with a wooden spoon

Mushroom risotto may seem like a difficult dish to make. But in reality, it’s so easy to execute. The only “difficult” part is the length of hands-on cooking. It takes some time to cook, and directions look tedious.

This is not a pot of rice left alone on the stovetop or made in a rice cooker. But don’t be scared! Risotto is a meal that requires extra love, which you will taste with the final product. 

The following tips are important for making the perfect pot of risotto. There are some essentials you’ll need to make the best pot of risotto. Then, you’ll be able to make this yummy batch of mushroom risotto, or even your own variations of this Italian dish.

How to cook risotto

Risotto has several easy steps, but takes time to execute

  • The onions are sauteed until soft and translucent.
  • Arborio rice is poured into the pan to lightly toast with the onions.
  • The hot liquid is pour in small amounts into the rice.
  • Stir the rice every few seconds, so it absorbs the liquid.
  • Cheese is added once all the liquid is absorbed.

What type of rice to use for risotto:

Arborio rice is a short-grain rice used to make risotto. It has a lot more starch than the long-grain rice, which is why more attention is needed when cooking. 

When it’s made properly, cooked risotto will be soft and creamy without it being mushy. Stirring the rice is EXTREMELY important for this starchy rice, which I’ll explain below. 

Arborio rice can be found in the rice aisle of your local grocery store. If not there, it can be found in the international aisle with the Italian products. 

Why does risotto take so long to cook?

Risotto needs to cook low and slow, so each grain absorbs the right amount of stock. It should be cooked on medium-low heat. The rice will not cook at too high of a heat, and will become rice pudding at too low of a heat.

The starch also needs to be released from the arborio rice. The rice needs to be constantly stirred at the lower temperature, which takes a bit of time.

What type of pan to use to cook risotto

The pan used to cook risotto is also important. The rice needs to absorb the rice at a certain speed. When fully cooked, arborio rice should have a texture like al dente pasta. The rice will be soft, with a slight bite.

If you use too wide and shallow of a pan to cook risotto, the stock evaporates before the rice can absorb it. This makes the rice crunchy, since there is no liquid to cook. In turn, if a tall pot is used, the rice can take longer to absorb the liquid, causing the rice to steam. The rice will be mushy and starchy.

The best pot to use to cook risotto combines both types of pots mentioned above. You want to use a pan with a little height, 3 to 5 inches tall, to keep your stock from evaporating too quickly. It should also be the width of your burner. 

Why should I use hot stock for my risotto?

Another important factor in cooking risotto is to NOT use cold or room temperature stock! Heat your broth of choice to a simmer, and turn the stove onto it’s lowest setting. Keep the stock warm while making the risotto.

Adding cold stock to the hot risotto will slow down the cooking process. Risotto is a timed dish, so cooling it in any form extends the cooking time, resulting in a mushy pot of rice. And remember…we don’t want that!

Can I add all the stock at once?

The short answer is HELL NO! Now for the explanation:

Arborio rice does not cook like traditional long grain rice. Adding all the stock boils the rice, and it will not absorb the liquid like it’s supposed to. The stock needs to be added in small batches, so the rice takes in the liquid at the proper speed. 

Why do I have to keep stirring the risotto while cooking?

Arborio rice is very starchy. But, the only way for the starch to be released is by stirring. Believe it or not, constantly stirring the rice in stock while cooking creates a creamy texture without any dairy. 

However, it is possible to stir the rice too much. The hot rice will cool down if stirred too frequently. Once the stock is added to the risotto, stir it for about 5 seconds every 30 to 45 seconds. 

Now that you know the science behind it, you can make my creamy roasted mushroom risotto!
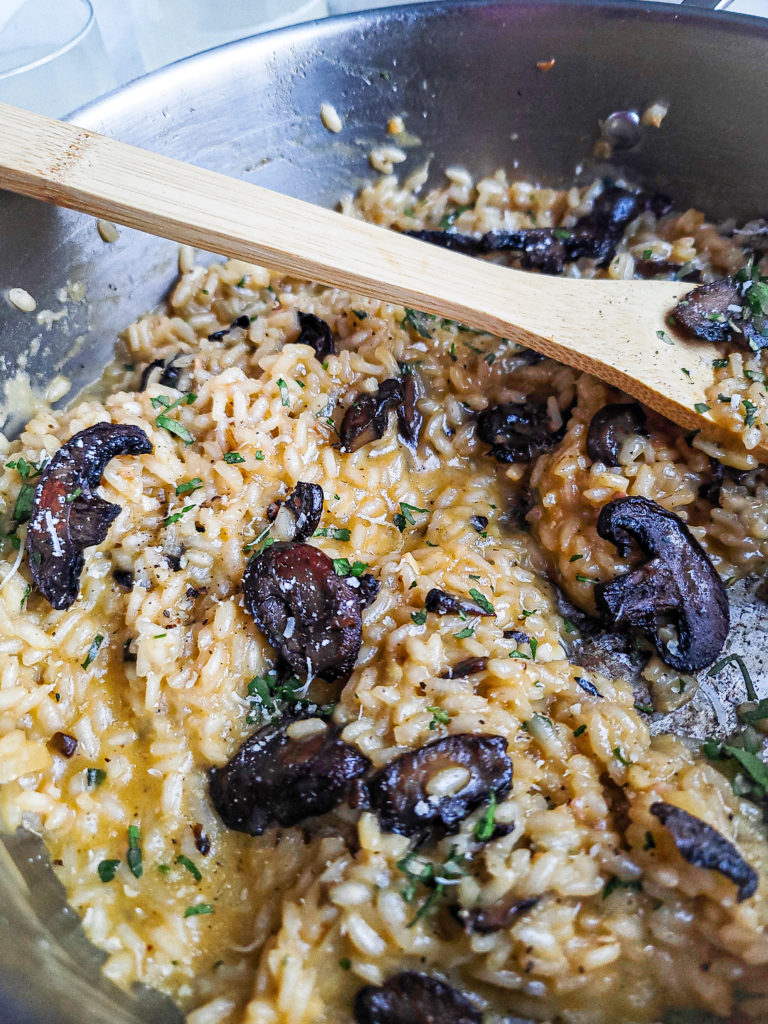
Close up of a pan full of mushroom risotto with a wooden spoon

Which mushrooms should I use for mushroom risotto?

There are so many varieties of mushrooms out there. Luckily, you can use whichever ones you’d like! 

Cremini, or baby bella, mushrooms are what’s regularly found in grocery stores. I like to use these for all my cooking. They’re a bit firm and hold up to high heat and liquids. 

What kind of white wine should I use for the risotto?

It’s always best to use a white wine that you do not mind drinking. However, you should use a dry wine instead of sweet, since we’re making a savory dish and not dessert. Chardonnay is my favorite wine to cook with.

Are there any variations for your mushroom risotto?

The risotto can be made without dairy, making it vegan friendly! Omit the butter, grated parmesan, and mascarpone cheese. Luckily, most of risotto’s creamy consistency comes from the cooking process. 

Mascarpone cheese is not widely available in grocery stores. If you choose, it can be omitted. Or, it can be replaced with heavy cream. You want to use one of the 2 to give the risotto the velvety flavor.

The wine can also be left out of the recipe. Make sure you replace the alcohol with the same amount of warm stock. 

What should I serve with the mushroom risotto?

Risotto works an appetizer, entree, and side dish. This particular recipe is vegetarian, making it the perfect main course. Grilled or baked chicken and a side salad would taste great with this.

Yes, this was a lot to take in! Once you make one pot of risotto, you’ll realize how easy it is to execute, and you’ll question why rice intimidated you. Give this recipe a try to impress yourself and your friends!

If you’re looking for another intimidating recipe to tackle, check out these Five Spice Braised Short Ribs with Creamy Slaw. 

Close up of a pan full of mushroom risotto with a wooden spoon
Print Recipe
5 from 10 votes

Creamy Roasted Mushroom Risotto

A warm bowl of mushroom risotto is great as a vegetarian entree, or a side dish to meat and fish.
Prep Time5 minutes
Cook Time1 hour
Course: Appetizer, Main Course, Side Dish
Cuisine: Italian
Keyword: appetizer, dinner, dinner ideas, entree, mushroom, mushrooms, risotto, weeknight dinners
Servings: 4 servings
Author: Crystal

Equipment

  • 1 Cutting board
  • 1 wooden spoon
  • 1 small sauce pot
  • 1 Ladle
  • 1 large pan
  • 1 Baking sheet
  • 1 Mixing bowl

Ingredients

  • 8 ounces mushrooms cleaned and sliced
  • 6 tablespoons olive oil
  • 1 teaspoon kosher salt
  • ½ teaspoon ground black pepper
  • ½ cup yellow onion small diced
  • 2 tablespoons unsalted butter
  • 4 cloves garlic minced
  • ½ cup white wine
  • 1 cup arborio rice
  • 32 ounces vegetable stock
  • ¼ cup grated parmesan cheese
  • 4 tablespoons mascarpone cheese
  • 1 tablespoon chopped parsley
  • 2 teaspoons lemon juice
  • Salt and pepper to taste

Instructions

  • Preheat your oven to 400 degrees. Line a sheet pan with aluminum foil. Mix the mushrooms in a medium size bowl with 4 tablespoons of the olive oil, and the salt and pepper. Pour the mushrooms onto the tray in an even layer, and bake for 25 minutes. Set aside once they are roasted. You will cook the risotto while the mushrooms are roasting.
  • In a small saucepot, heat the vegetable stock to a simmer. Then turn it down to it’s lowest setting to keep warm while making the risotto.
  • In a large skillet, heat the remaining 2 tablespoons of olive oil on medium-low heat.
  • Add the diced onions. Stir the onions while sauteeing to prevent them from getting color. Cook for 2-3 minutes until the onions are soft and slightly translucent.
  • Add the butter and minced garlic. Cook while stirring until the butter is melted.
  • Add the arborio rice into the skillet. Continuously stir for 2 minutes to lightly toast the rice.
  • Pour the white wine in the skillet. Stir until all the liquid has absorbed in the rice.
  • Pour a half of a cup of the warm vegetable stock over the rice. Every 30 seconds, give the rice a stir until most of the liquid has been absorbed. This should take 2-3 minutes.
  • Continue the process of adding a half cup of stock at a time to the rice, and stirring until most of the liquid has been absorbed. The stock will be added to the rice 8 times. Do not add all the stock at once!
  • When you add the last half cup of stock, also add the parmesan and mascarpone cheese, parsley, lemon juice, and the roasted mushrooms. Thoroughly mix to combine and remove from heat.
  • Taste the cooked risotto and season with salt and pepper to your liking.
Buttermilk Cheddar Biscuits with Scallions

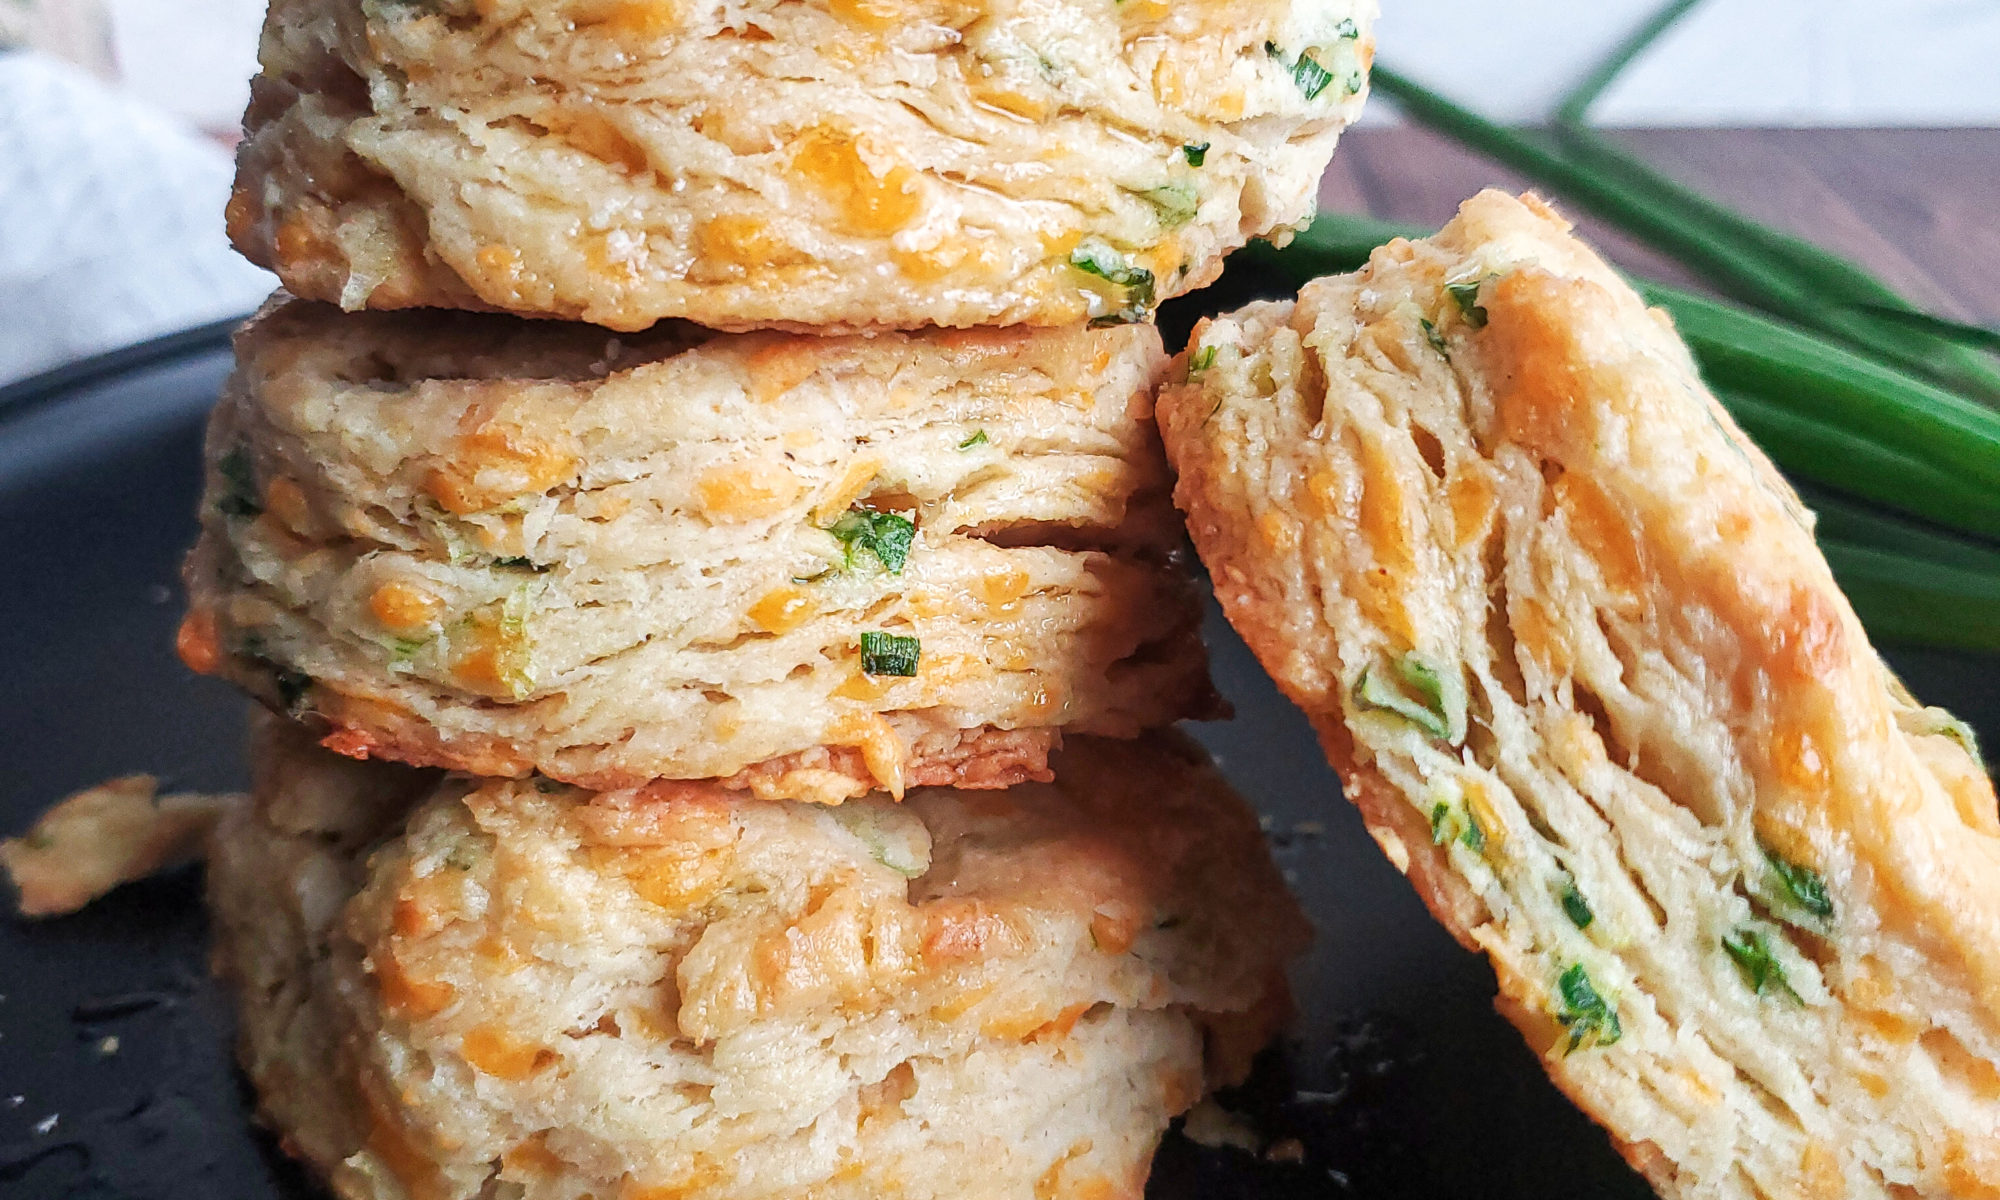
Cheddar scallion biscuits on a plate

If you’re looking for a savory breakfast biscuit, I’ve got you covered. My buttermilk cheddar scallion biscuits are the perfect addition to your breakfast needs!

These cheddar scallion biscuits are something you’ll definitely want to keep in rotation for breakfast or brunch. It’s also a great side dish for dinner! Or, if you’re like me, it’s great to randomly snack on during the day! I’ve also added a hint of garlic to the recipe, because….well, why not???

Stack of cheddar scallion biscuits on a plate
Cheddar scallion biscuits

How to make homemade biscuits

Making biscuits from scratch may seem a bit scary in the beginning (talking to myself here). But after learning some simple tricks to making the dough, you’ll want to make a batch of biscuits every day! 

It’s also so so simple to make biscuits from scratch, that it’s actually a bread recipe where your measurements do not have to be exact! Being someone that likes to eyeball their measurements and is also NOT a baker, I love the ease of putting together a biscuit recipe. But, as a guide, I’ve created an actual recipe for ya!

You simply mix chunks of butter with a flour mixture, then add your milk of choice. If there’s additional flavors or seasonings you’d like to add, it’ll get tossed in before the milk.

Tips to making a great batch of biscuits

While biscuits are pretty simple to execute, there are a few small tips to making a batch go from “Mmmmmmm!” to “MMMMMMMMMMMMM!

Keep your cold ingredients cold!

The most important tip when it comes to making a batch of biscuits is to keep all of your refrigerated ingredients in the fridge until it’s ready to be used for the dough. I usually measure out what’s needed, then tuck it back in the fridge. Even if I plan on using it within 5 minutes, I keep it cold until the very last second. 

Using cold ingredients helps to create those layers that we all love biscuits for. You really want to avoid letting your cold ingredients get to room temperature. If this happens, your biscuits will not create those layers, and can also be a bit dense once baked.

Measure out your milk of choice and butter, and keep it in the fridge until ready to use. 

Grate your butter!

If you have time, freeze your butter for about 15 minutes. Then get a grater, and grate the butter like it’s cheese! This is a fun trick to get the butter into small enough pieces without getting the butter too warm with your body heat or having it sit at room temperature.  

If you do not have a grater available, you can cut the butter into a pea size amount with a knife before putting it back in the fridge to chill. 

Another option is to first cut your butter into larger chunks, then use a bladed dough blender to break the butter up into tinier pieces directly into the flour while the bowl. It’s a pretty cool tool to use too!

There’s also the option to cut and break the butter up into those smaller pieces with your fingers. But again, since we want to keep the cold ingredients cold, this should be a last resort. So the previous options are the better way to go.

Create even more layers in your biscuits!

Another trick to getting those flaky layers in biscuits is to create them!

To do this, you’ll flatten the mixed dough onto a floured surface to an inch thick with a rolling pin, forming a rectangle. Next, you’ll fold that rectangle in half on top of itself, like folding a book together. Rotate that folded dough a quarter of a turn, flatten the dough out again, and repeat the folding process 4 additional times (5 folds in total.) Using a bench scraper is very helpful with getting the dough off the counter to be folded. 

Do this quickly though, since you do want to keep the ingredients in the dough as cold as you can before baking. This will take about 3 minutes to do.

What to serve with cheddar scallion biscuits

These cheddar scallion biscuits are delicious on their own! I love to slice one open and spread some butter onto it. Sooo good!

It’s also perfect for making breakfast sandwiches, or even to accompany a sausage gravy to make the ultimate biscuits and gravy brunch meal! (recipe coming soon for the sausage gravy!)

I hope you have as much fun making (and eating) my cheddar scallion biscuits like I did!

Cheddar scallion biscuits on a plate
Print Recipe
5 from 9 votes

Buttermilk Cheddar Scallion Biscuits

My flaky cheddar scallion biscuits are the perfect addition to your breakfast needs!
Prep Time5 minutes
Cook Time30 minutes
Total Time35 minutes
Course: Appetizer, Side Dish, Snack
Cuisine: American
Keyword: bay biscuits, biscuit, biscuits, cheddar bay biscuits, cheddar biscuit, cheddar biscuits, red lobster biscuits
Servings: 8 biscuits
Author: Crystal

Equipment

  • sheet pan
  • parchment paper
  • Mixing bowl
  • wooden spoon
  • Rolling Pin
  • Bench scraper
  • Bladed dough cutter or grater
  • pastry brush

Ingredients

  • 2 ¾ cup all purpose flour plus extra for dusting
  • 1 tablespoon baking powder
  • 1 tablespoon garlic powder
  • 1 teaspoon salt
  • 4 scallions sliced thin
  • ½ cup shredded cheddar cheese
  • ½ cup unsalted butter kept cold
  • 1 cup buttermilk kept cold
  • 2 tablespoons melted butter

Instructions

  • Preheat the oven to 400 degrees. Line a small sheet pan with parchment paper. Spray the parchment with pan spray and set aside.
  • In a large mixing bowl, thoroughly whisk together the flour, baking powder, garlic powder, and salt.
  • Toss in the scallions and shredded cheese and coat with the flour mixture.
  • Grate the cold butter into the flour, and coat with the flour mixture with a wooden spoon.
  • Pour the milk into the center of the flour mixture. Slowly mix in the flour with the wooden spoon to incorporate. Then use your hands to thoroughly mix until the dough is formed. Dough may be slightly wet.
  • Take a couple of spoonfuls of flour and dust onto the countertop. Dump the dough onto the flour. Dust a little more flour on top of the dough. Roll the dough out to an inch thick.
  • Fold the rolled out dough in half like a book. Rotate the folded dough a quarter of a turn, and roll the dough to an inch thick. Fold and rotate the dough a total of 5 times, flouring the counter top as needed.
  • After folding the dough one last time, roll out to 1 inch thick and cut into desired biscuit sizes. Place biscuits onto the parchment lined sheet pan.
  • Bake for 15 minutes, rotating halfway through baking.
  • Remove from the oven. Brush with melted butter and serve.

How to Perfectly Season and Pan Sear Steak!

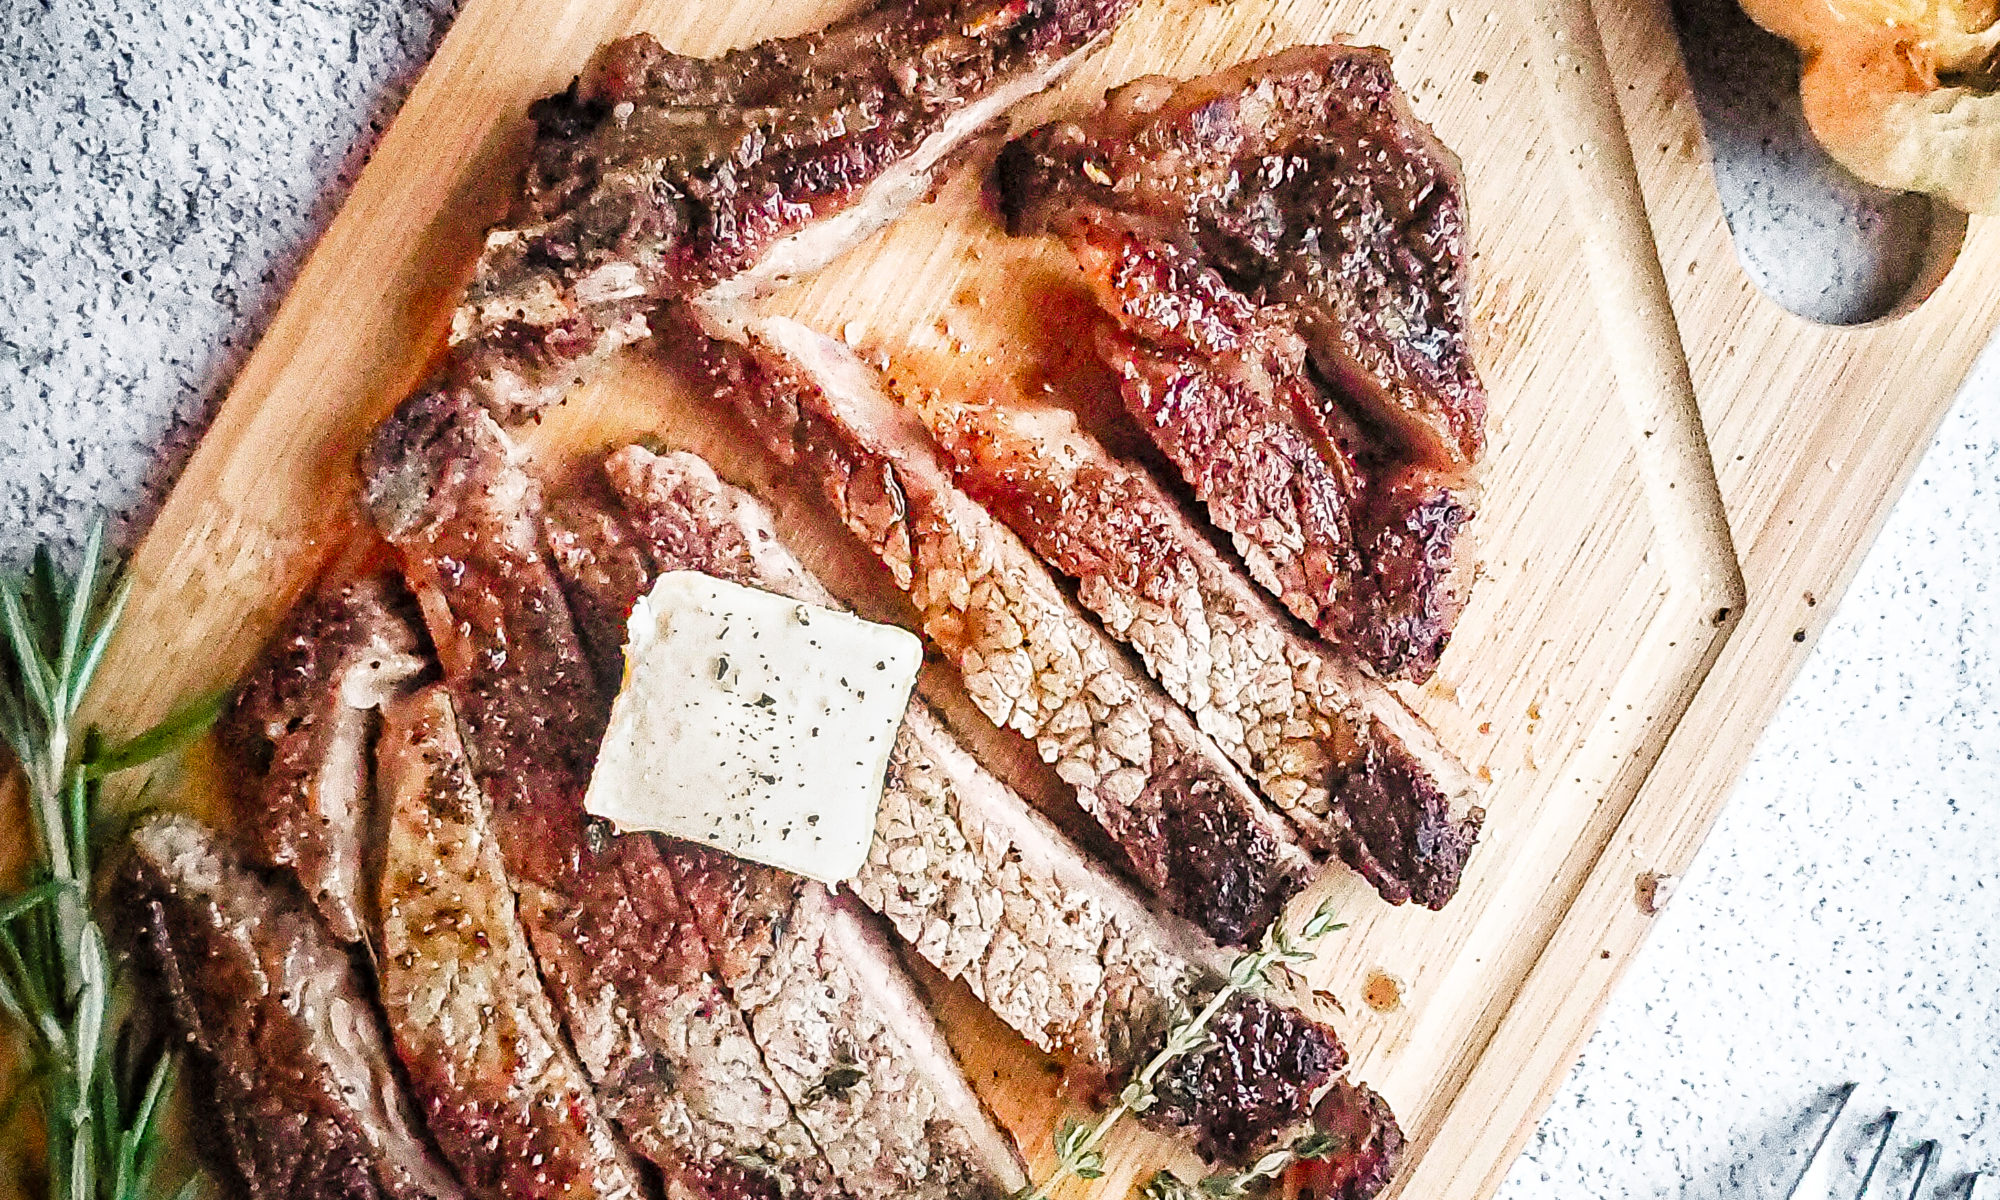
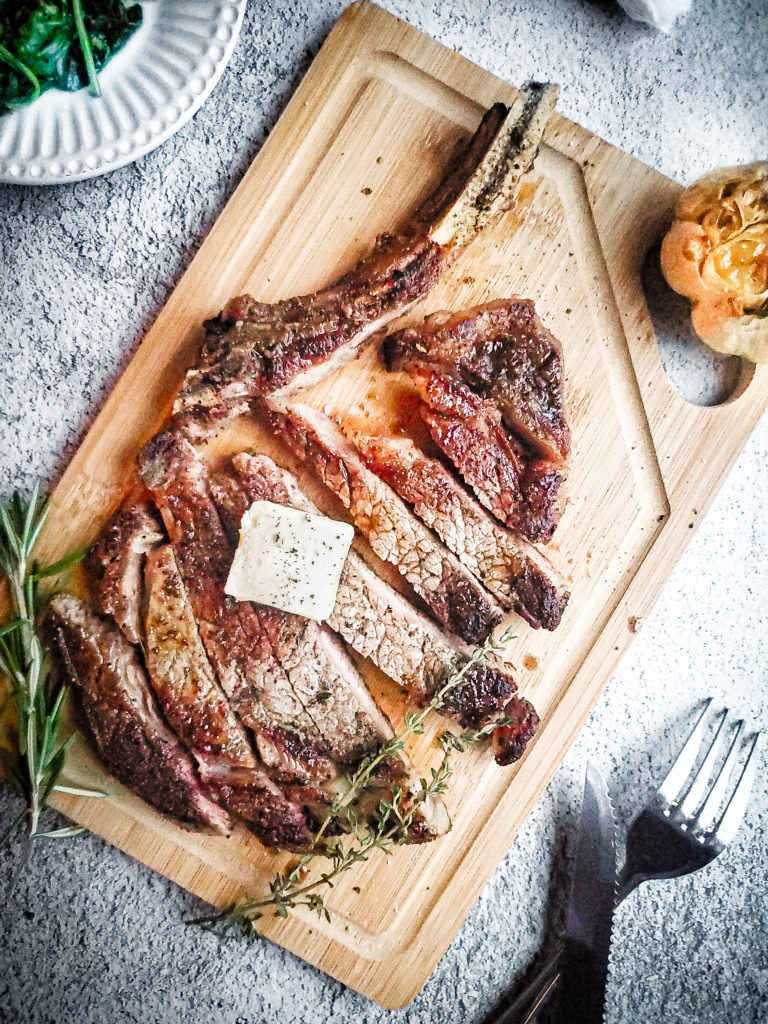
Overhead shot of a sliced ribeye steak on a cutting board with garlic and spinach

Whether you’re a well done steak eater, or you like yours with a quick sear, I’ve got some universal tips to get you that perfectly seasoned, seared, and sliced steak!

So you need help to pan sear steak at home. Well, everyone’s definition of perfect is definitely different. Especially when it comes to cooking meat that can be consumed at various temperatures. 

So many different cuts of steak exist in this meat-eater world, so the amount of time it cooks varies greatly. For this lesson, I’m using a bone-in ribeye.

Overhead shot of a sliced ribeye steak on a cutting board with garlic and spinach

There are 2 main points (with sub points)  that involve your steak coming out delicious: the prep done to the steak before cooking, and the actual cooking process. All the steps are covered below!

Steps to take when prepping a steak to be cooked:

Slice off a little of the fat cap 

Depending on the cut of steak you purchase, you’ll find a thick layer of fat on one side, which is called the fat cap. First let me say that fat means flavor! So you don’t want to remove this whole piece, but trimming off some of it is perfectly fine. Don’t worry though, that fat will get cooked, which will be brought up later.

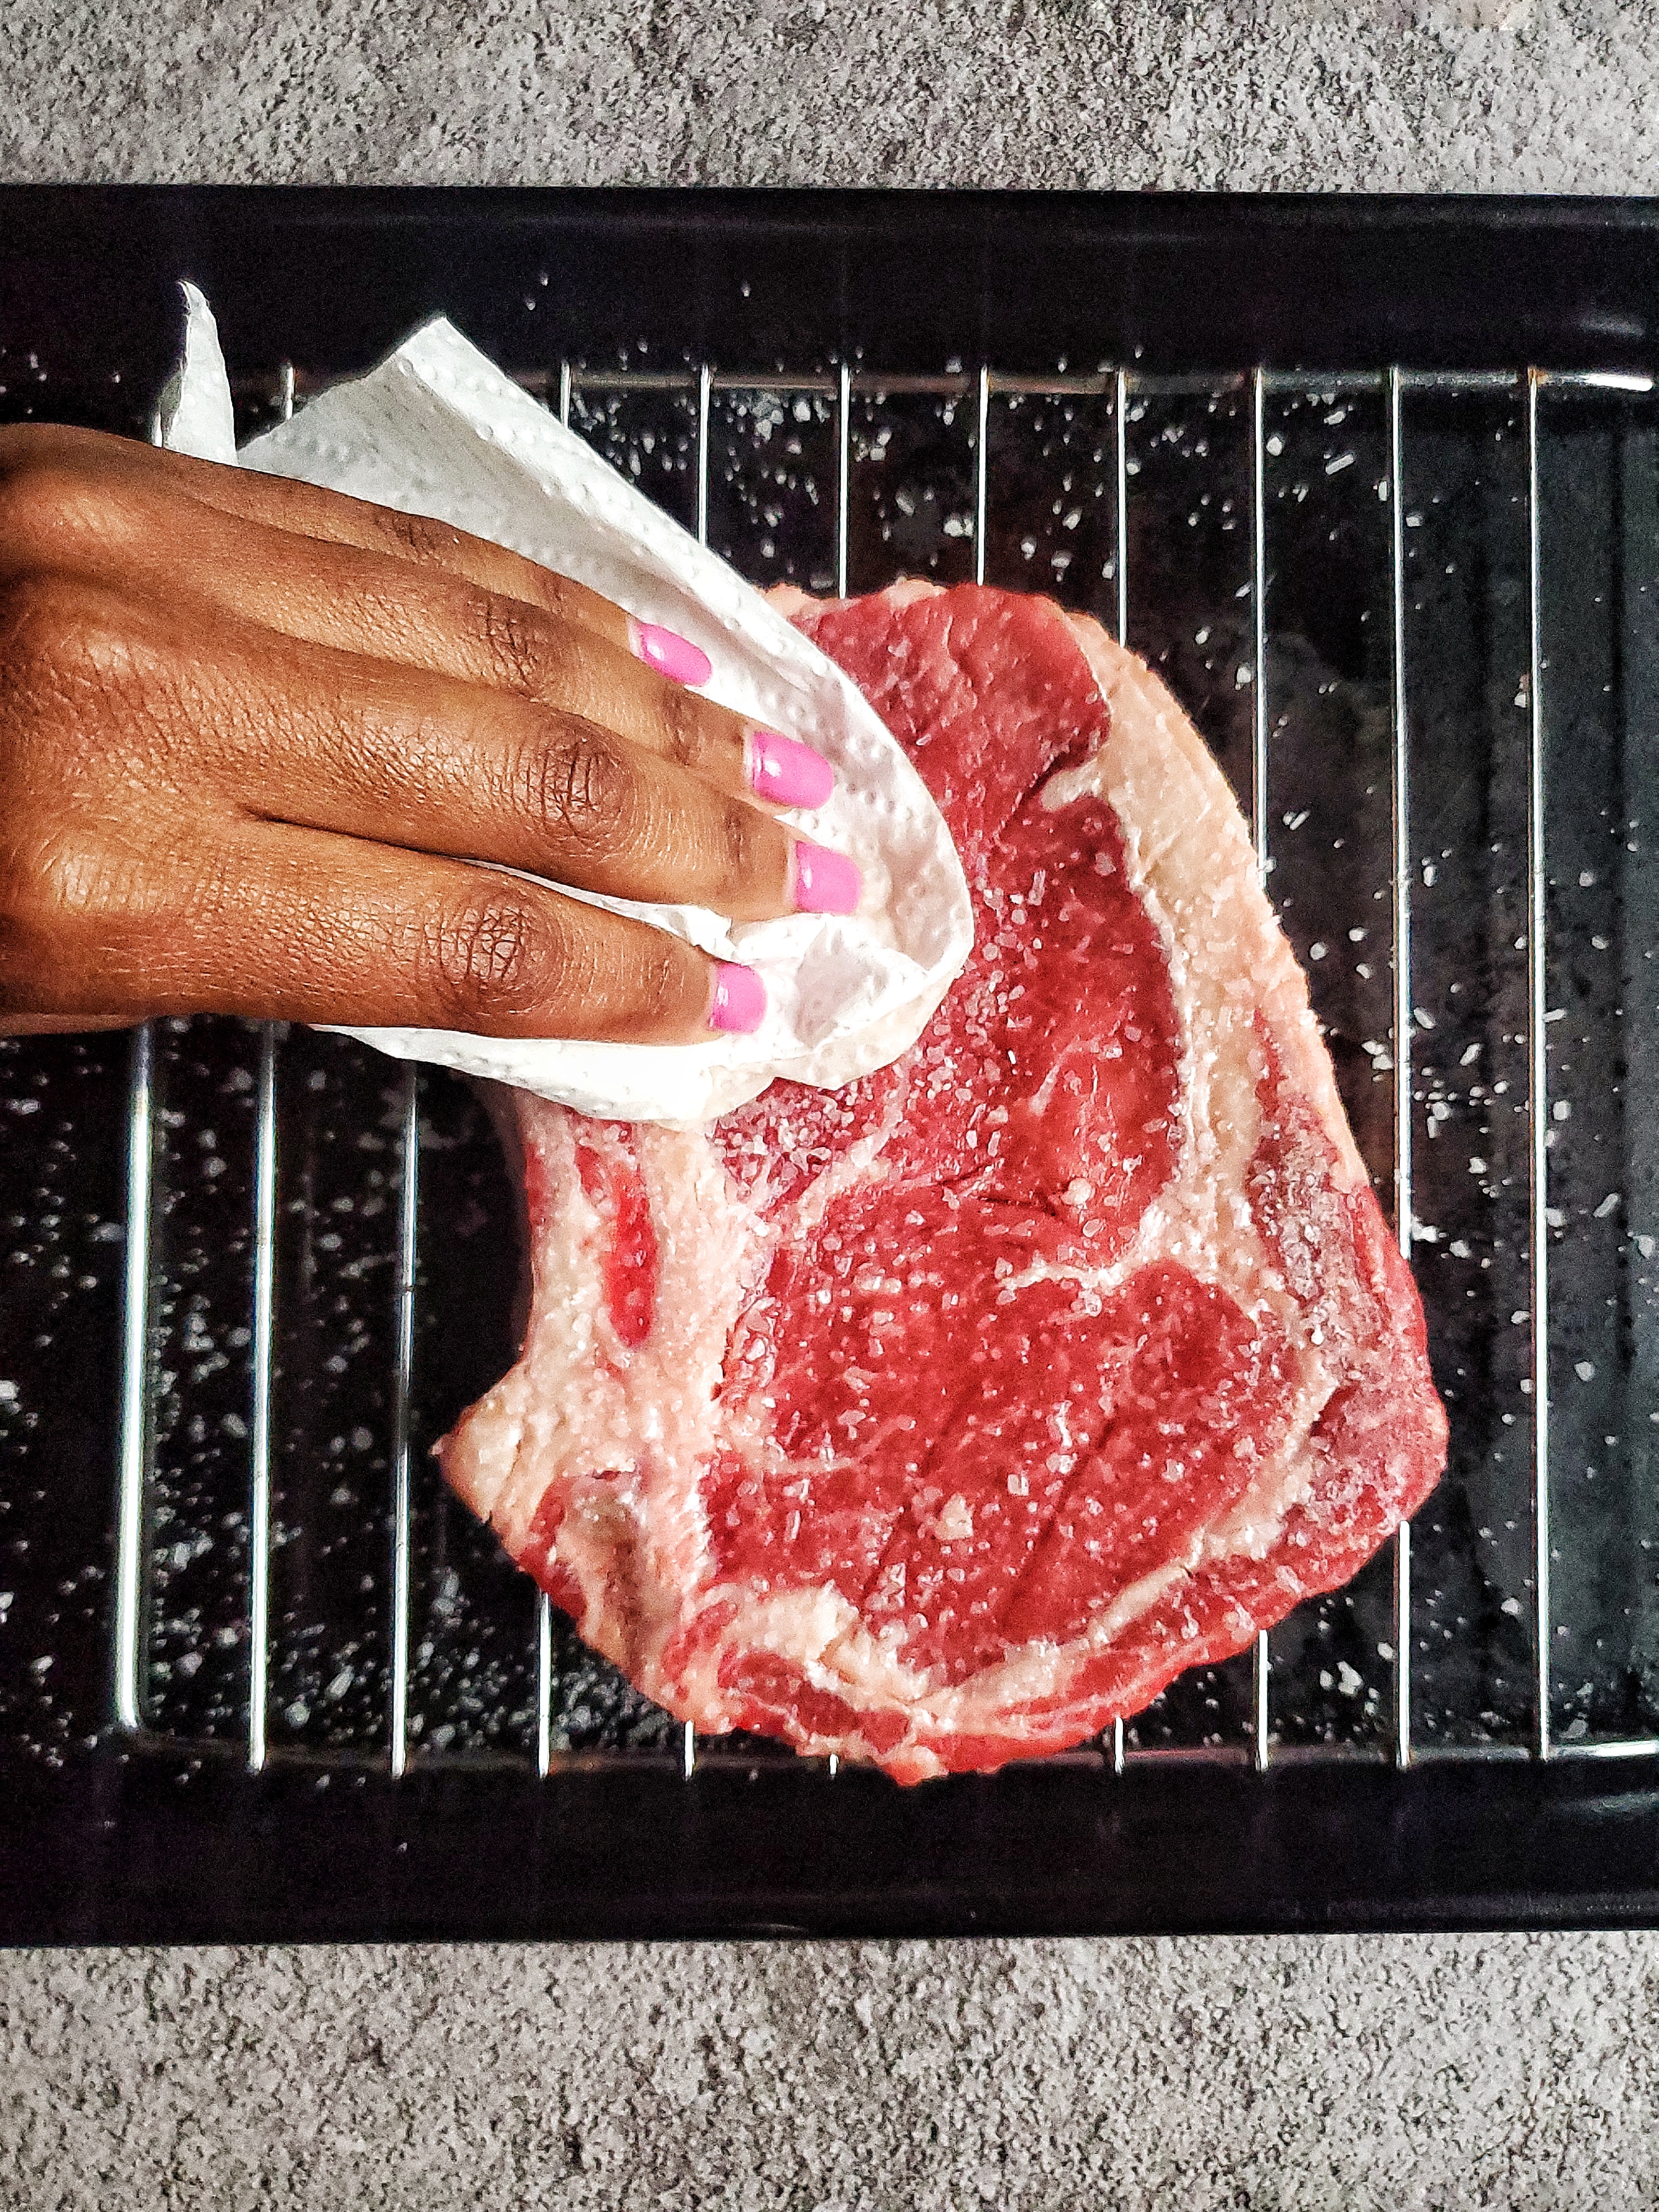
Pat the steak dry 

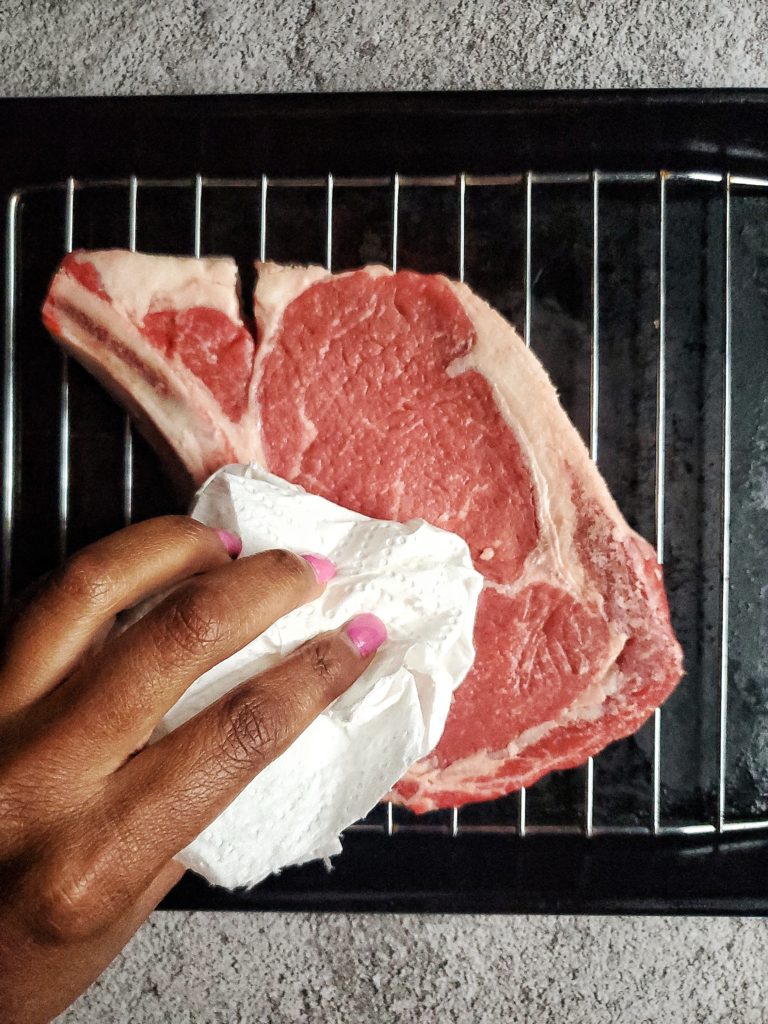
Like with any protein you’re searing, you want the skin to be free of excess water. This is natural and nothing to stress over, but you’re gonna want that perfect sear for this. Grab a paper towel and pat both sides to remove the extra moisture.

Ribeye steak being pat dry
Pat your steak dry when removing from it’s packaging
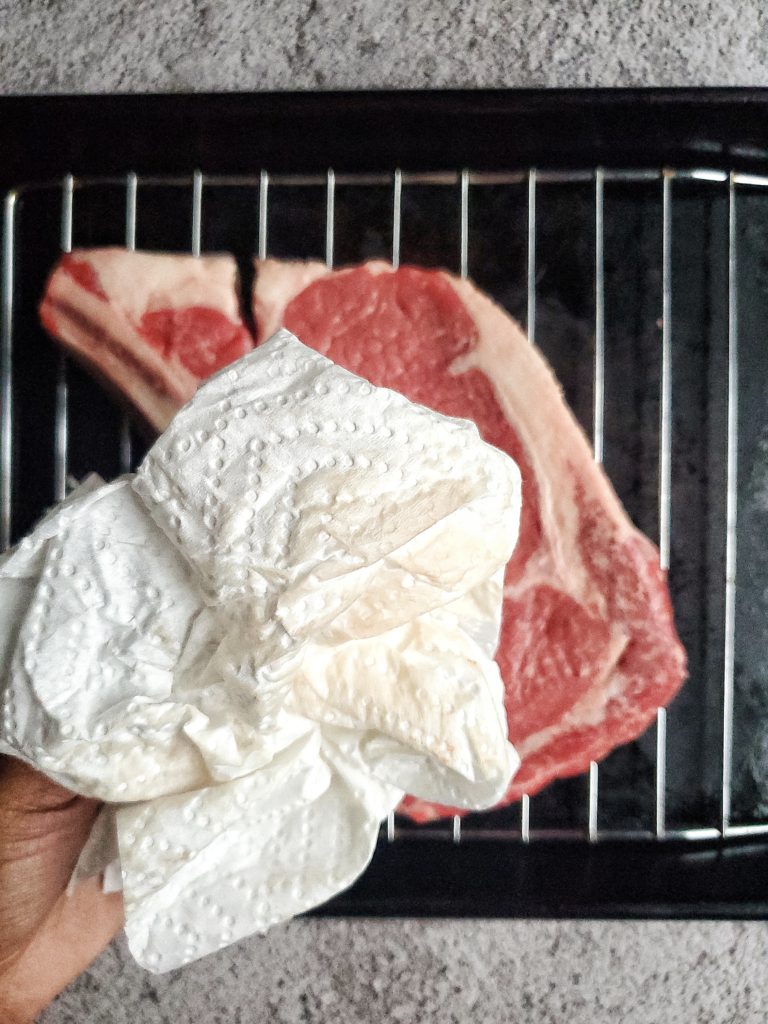
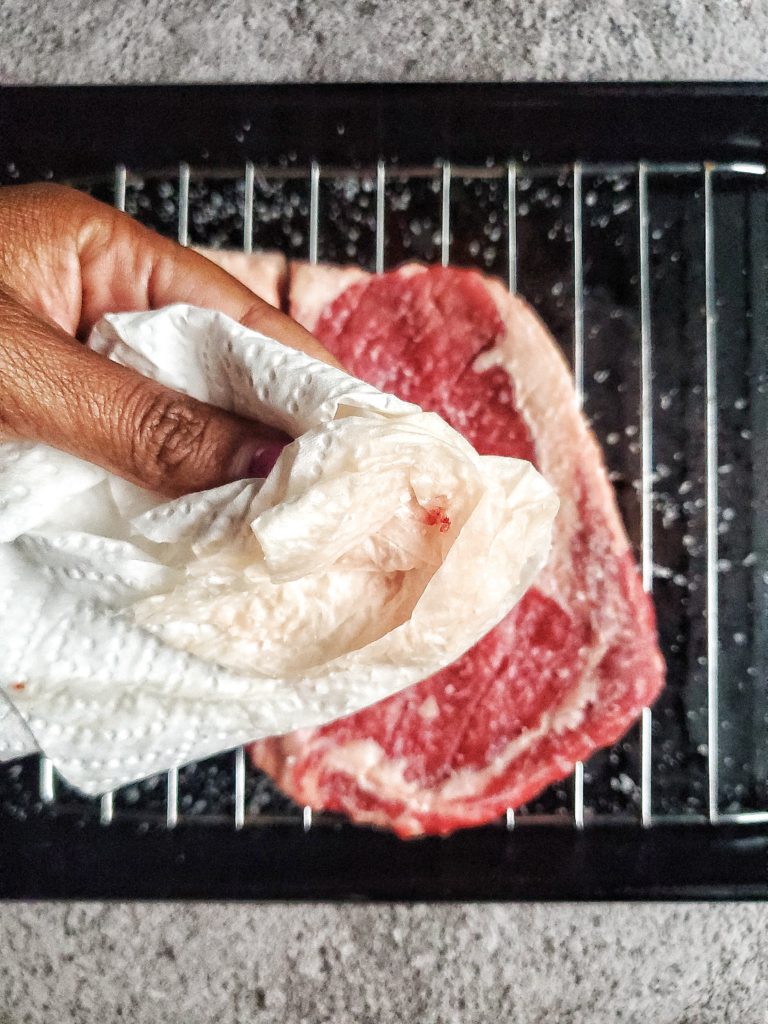
Ribeye steak being pat dry
Excess moisture from patting the steak dry

Sit the steak on a wire rack, if possible

If you have a wire rack, it’s the perfect time to use it! 

Wanna know where I got this mini rack from? My toaster oven! It fits perfectly on my smaller cookie tray too. If you don’t have either one of these, no worries. A tray or plate is just fine. 

Sprinkle liberally with kosher salt

Now, this is some science-y sh*t about to happen. The salt will draw out additional moisture from the outside of the steak. While it’s doing this, the salt flavor will also penetrate into the steak itself. 

Please note that when doing this, you should be using kosher salt. Do NOT use iodized!!!! The salt granules for iodized salt are very small, and will  make your steak overly salty and that is NOT why we’re here. However, kosher salt granules are bigger, making less salt needed to season. More science-y sh*t. 

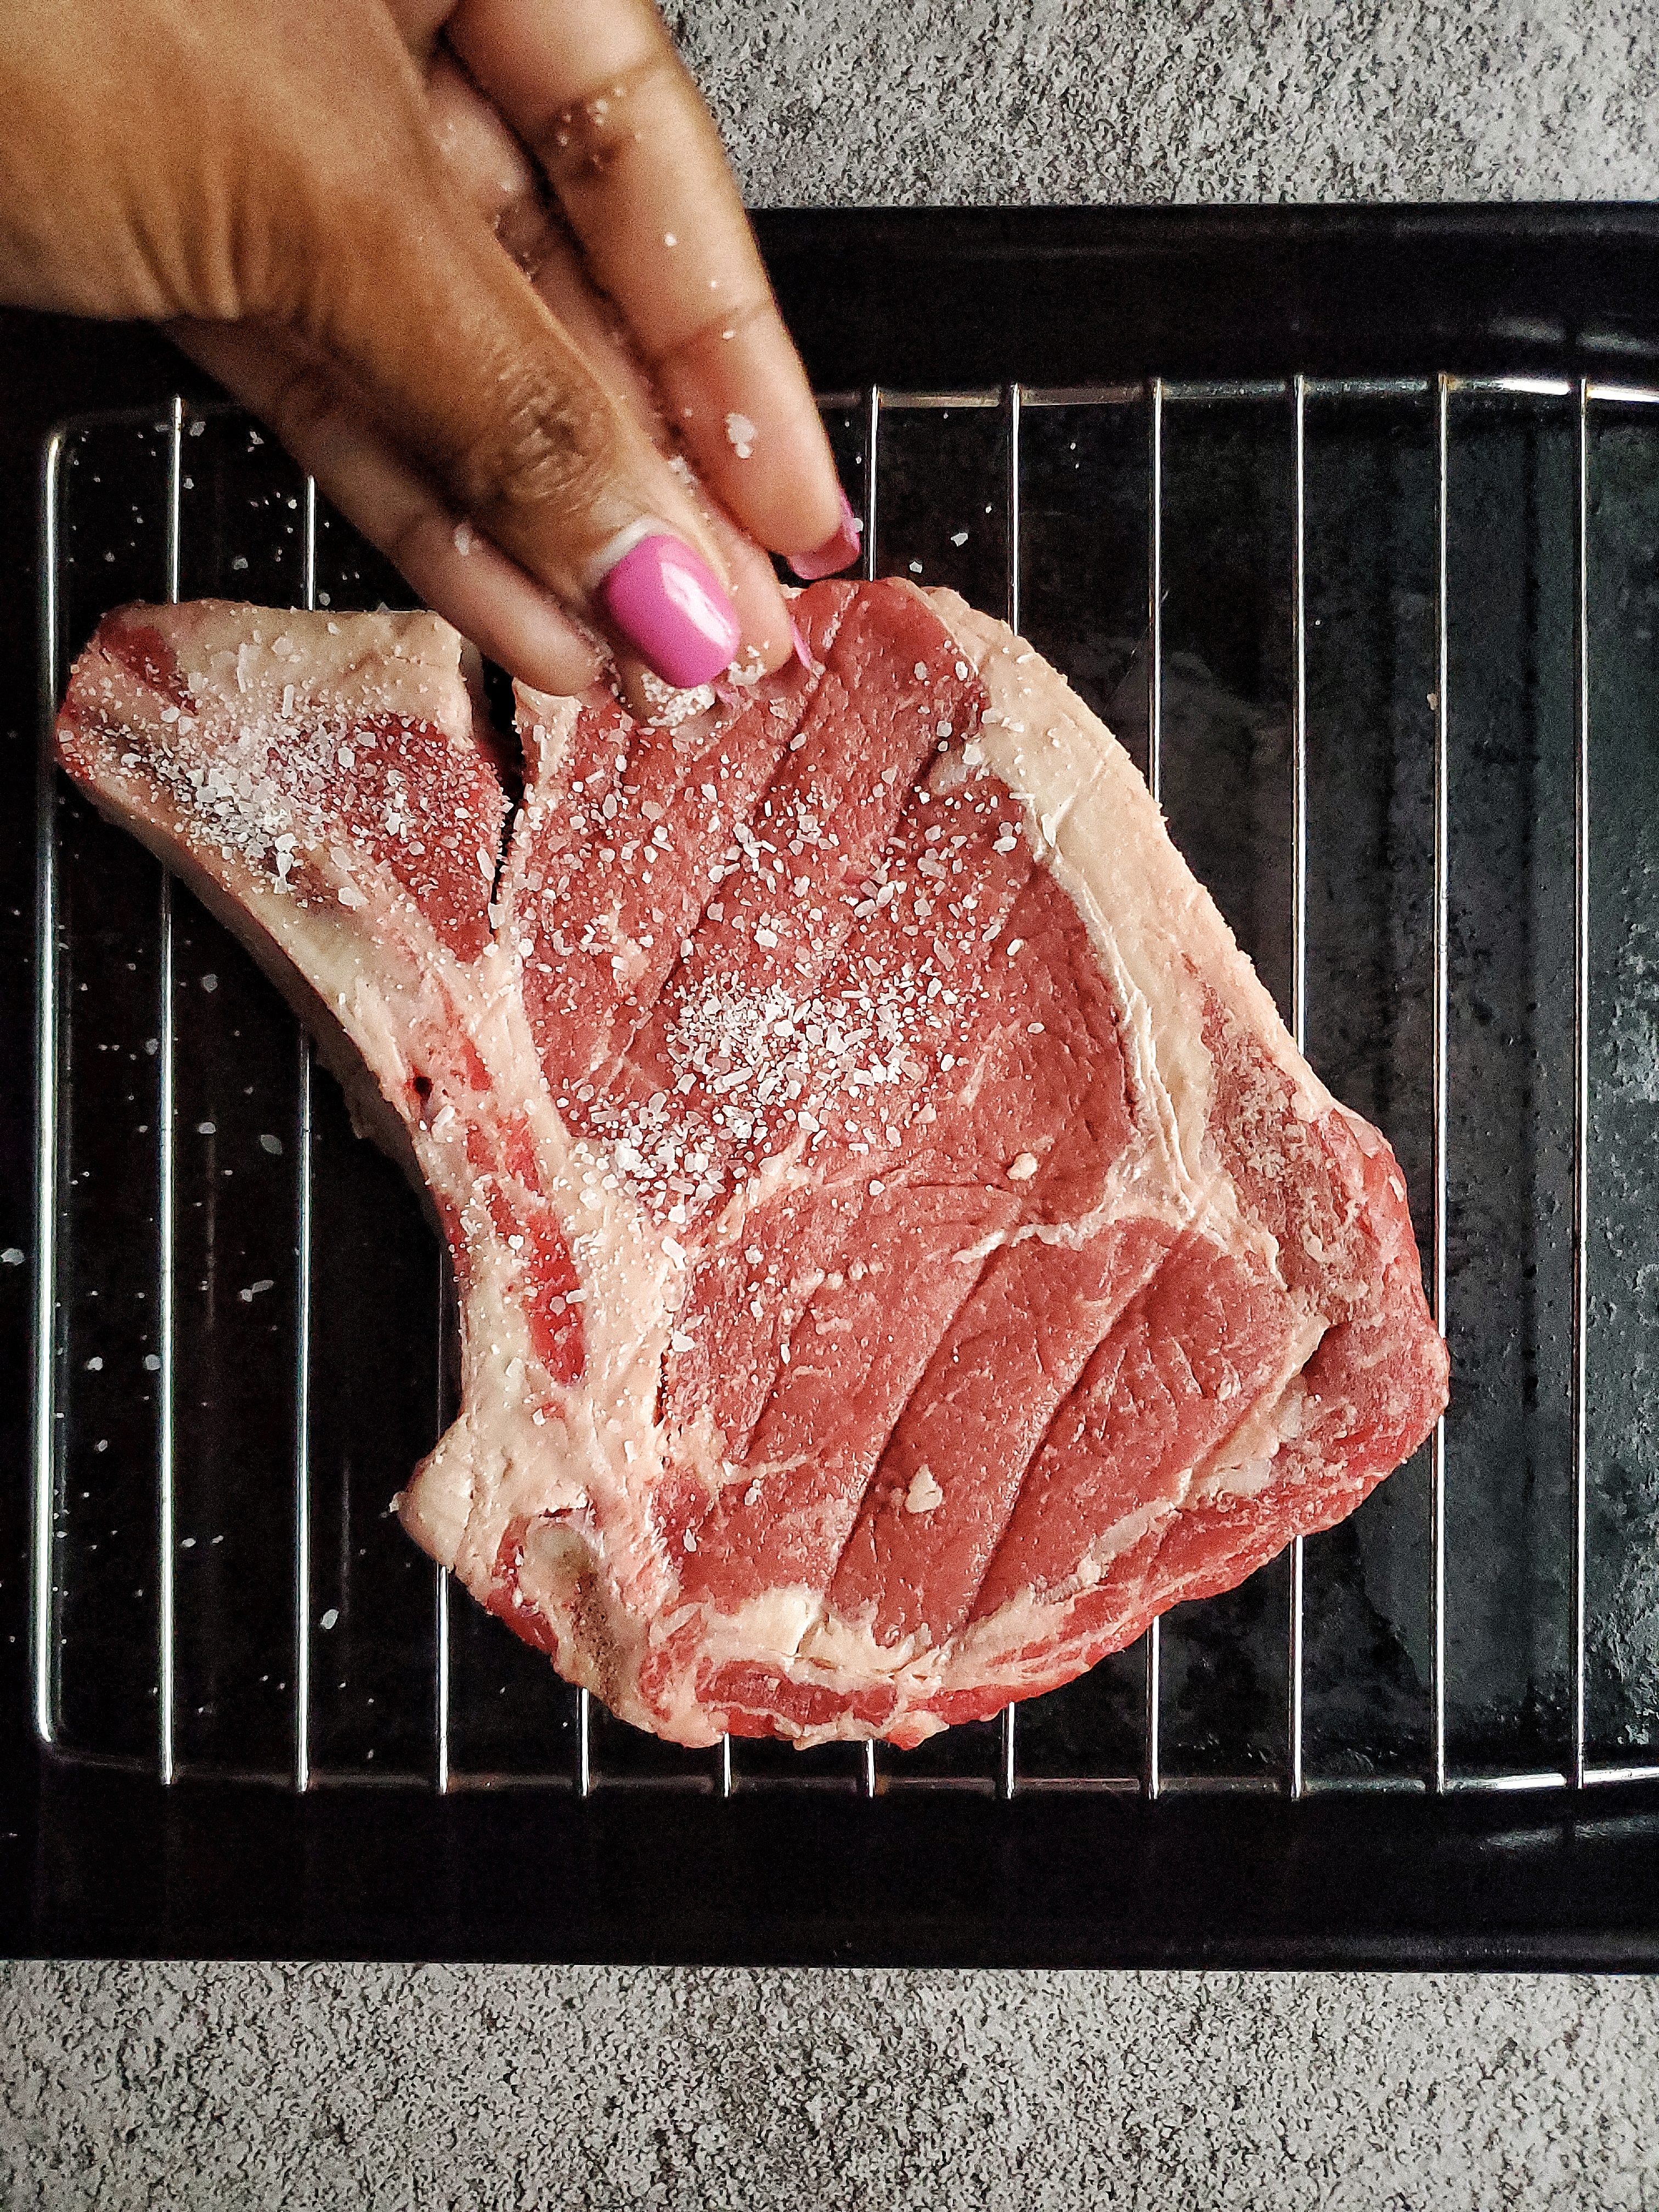
Season that steak liberally on all sides, including that fat cap. You’re essentially marinating the steak.

Ribeye steak being seasoned
Liberally sprinkle both sides of the steak with kosher salt

Let rest 30 minutes per inch

Next, let the steak sit with the salt for 30 minutes per inch of thickness. Try not to go any longer than this, as the steak will be overly seasoned with the salt/science that I mentioned above, and will also pull out too much moisture. Again, we don’t want that. If you get side tracked (cuz life happens)  an hour with the salt is fine. But pleeaasssse avoid going any further than that!

Let the steak sit at room temperature 

Don’t put the steak back in the fridge. It’s better to cook meat when it’s not cold. The steak will cook more evenly when it’s closer to it’s ideal cooked temperature. 

Believe it or not, you can let a raw steak sit out for a couple of hours, and it’ll still be safe to eat (as long as it’s straight from the fridge.)

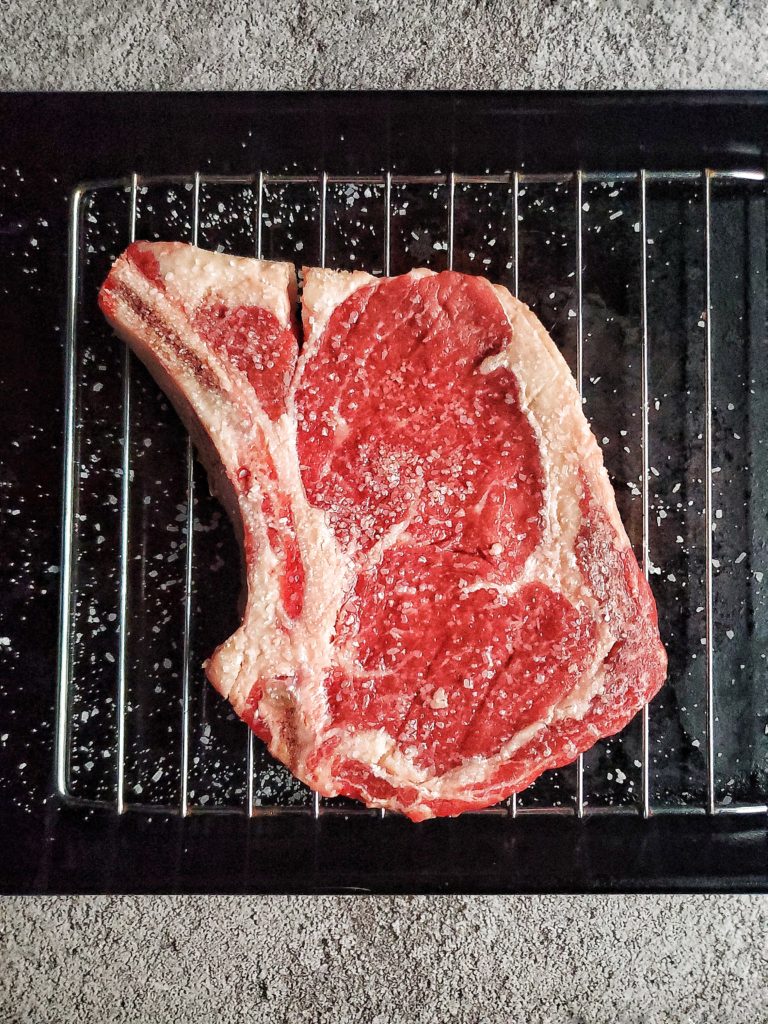
Seasoned ribeye steak
Excess moisture after salting the steak for 30 minutes

Pat steak dry again 

After the allotted time that your steak has sat out with the salt, you’ll notice a bit more moisture! That’s the science I mentioned earlier. Pat the steak dry like you did in the beginning. Make sure you aren’t wiping the steak, so that the salt isn’t being removed.

Patting the steak with a paper towel will keep the salt on the steak while still removing that excess moisture. Also, getting rid of that excess moisture creates a better crust on the steak, helping it to sear in the pan instead of creating steam.

Ribeye steak being pat dry
Pat the steak dry a second time, to remove that additional moisture from using salt
Ribeye steak being pat dry
Moisture from patting the steak dry a second time

Season with pepper 

This is optional since letting the salt sit with the steak helps to improve the flavor. But take it up a notch with some pepper. You do not need any other seasonings at this point. 

Now that the steak has been seasoned to perfection, it’s time to cook that bad boy!

First, I must tell you to invest in a cast iron skillet. Not only is it perfect to pan sear steak, it’s basically a griddle, oven safe dish, and saute pan in one! A cast iron is definitely a kitchen staple, and my favorite kitchen tool! But anyways, on to the cooking part…

How to pan sear steak:

Medium-high heat with canola or blended oil 

Heat your pan on medium-high heat. It’s best to get your pan on the stove to heat up when you pat your steak dry the second time. Once it starts to give off a little smoke, add in enough canola or blended oil to coat the pan. 

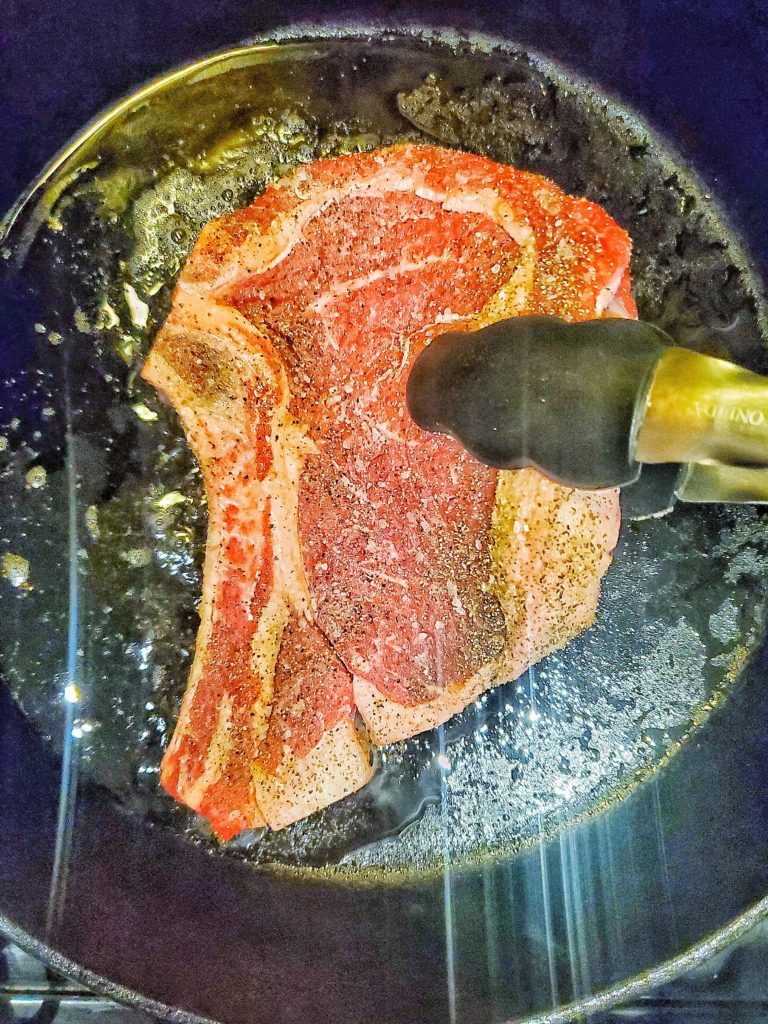
Put your steak in the pan, and just look at it for a bit 

Next, carefully place your seasoned steak into the hot pan. And don’t move it. The only times you’ll touch this steak again is to flip it over and remove it from the pan. Moving the steak around will prevent the steak from getting that perfect sear. (FYI – this method counts for ANY protein or veggie you’re cooking on the stove that you want to have some color.) So just let it hang out.

Seasoned rib eye steak in a cast iron pan
Season your steak and gently place in a preheated pan with oil

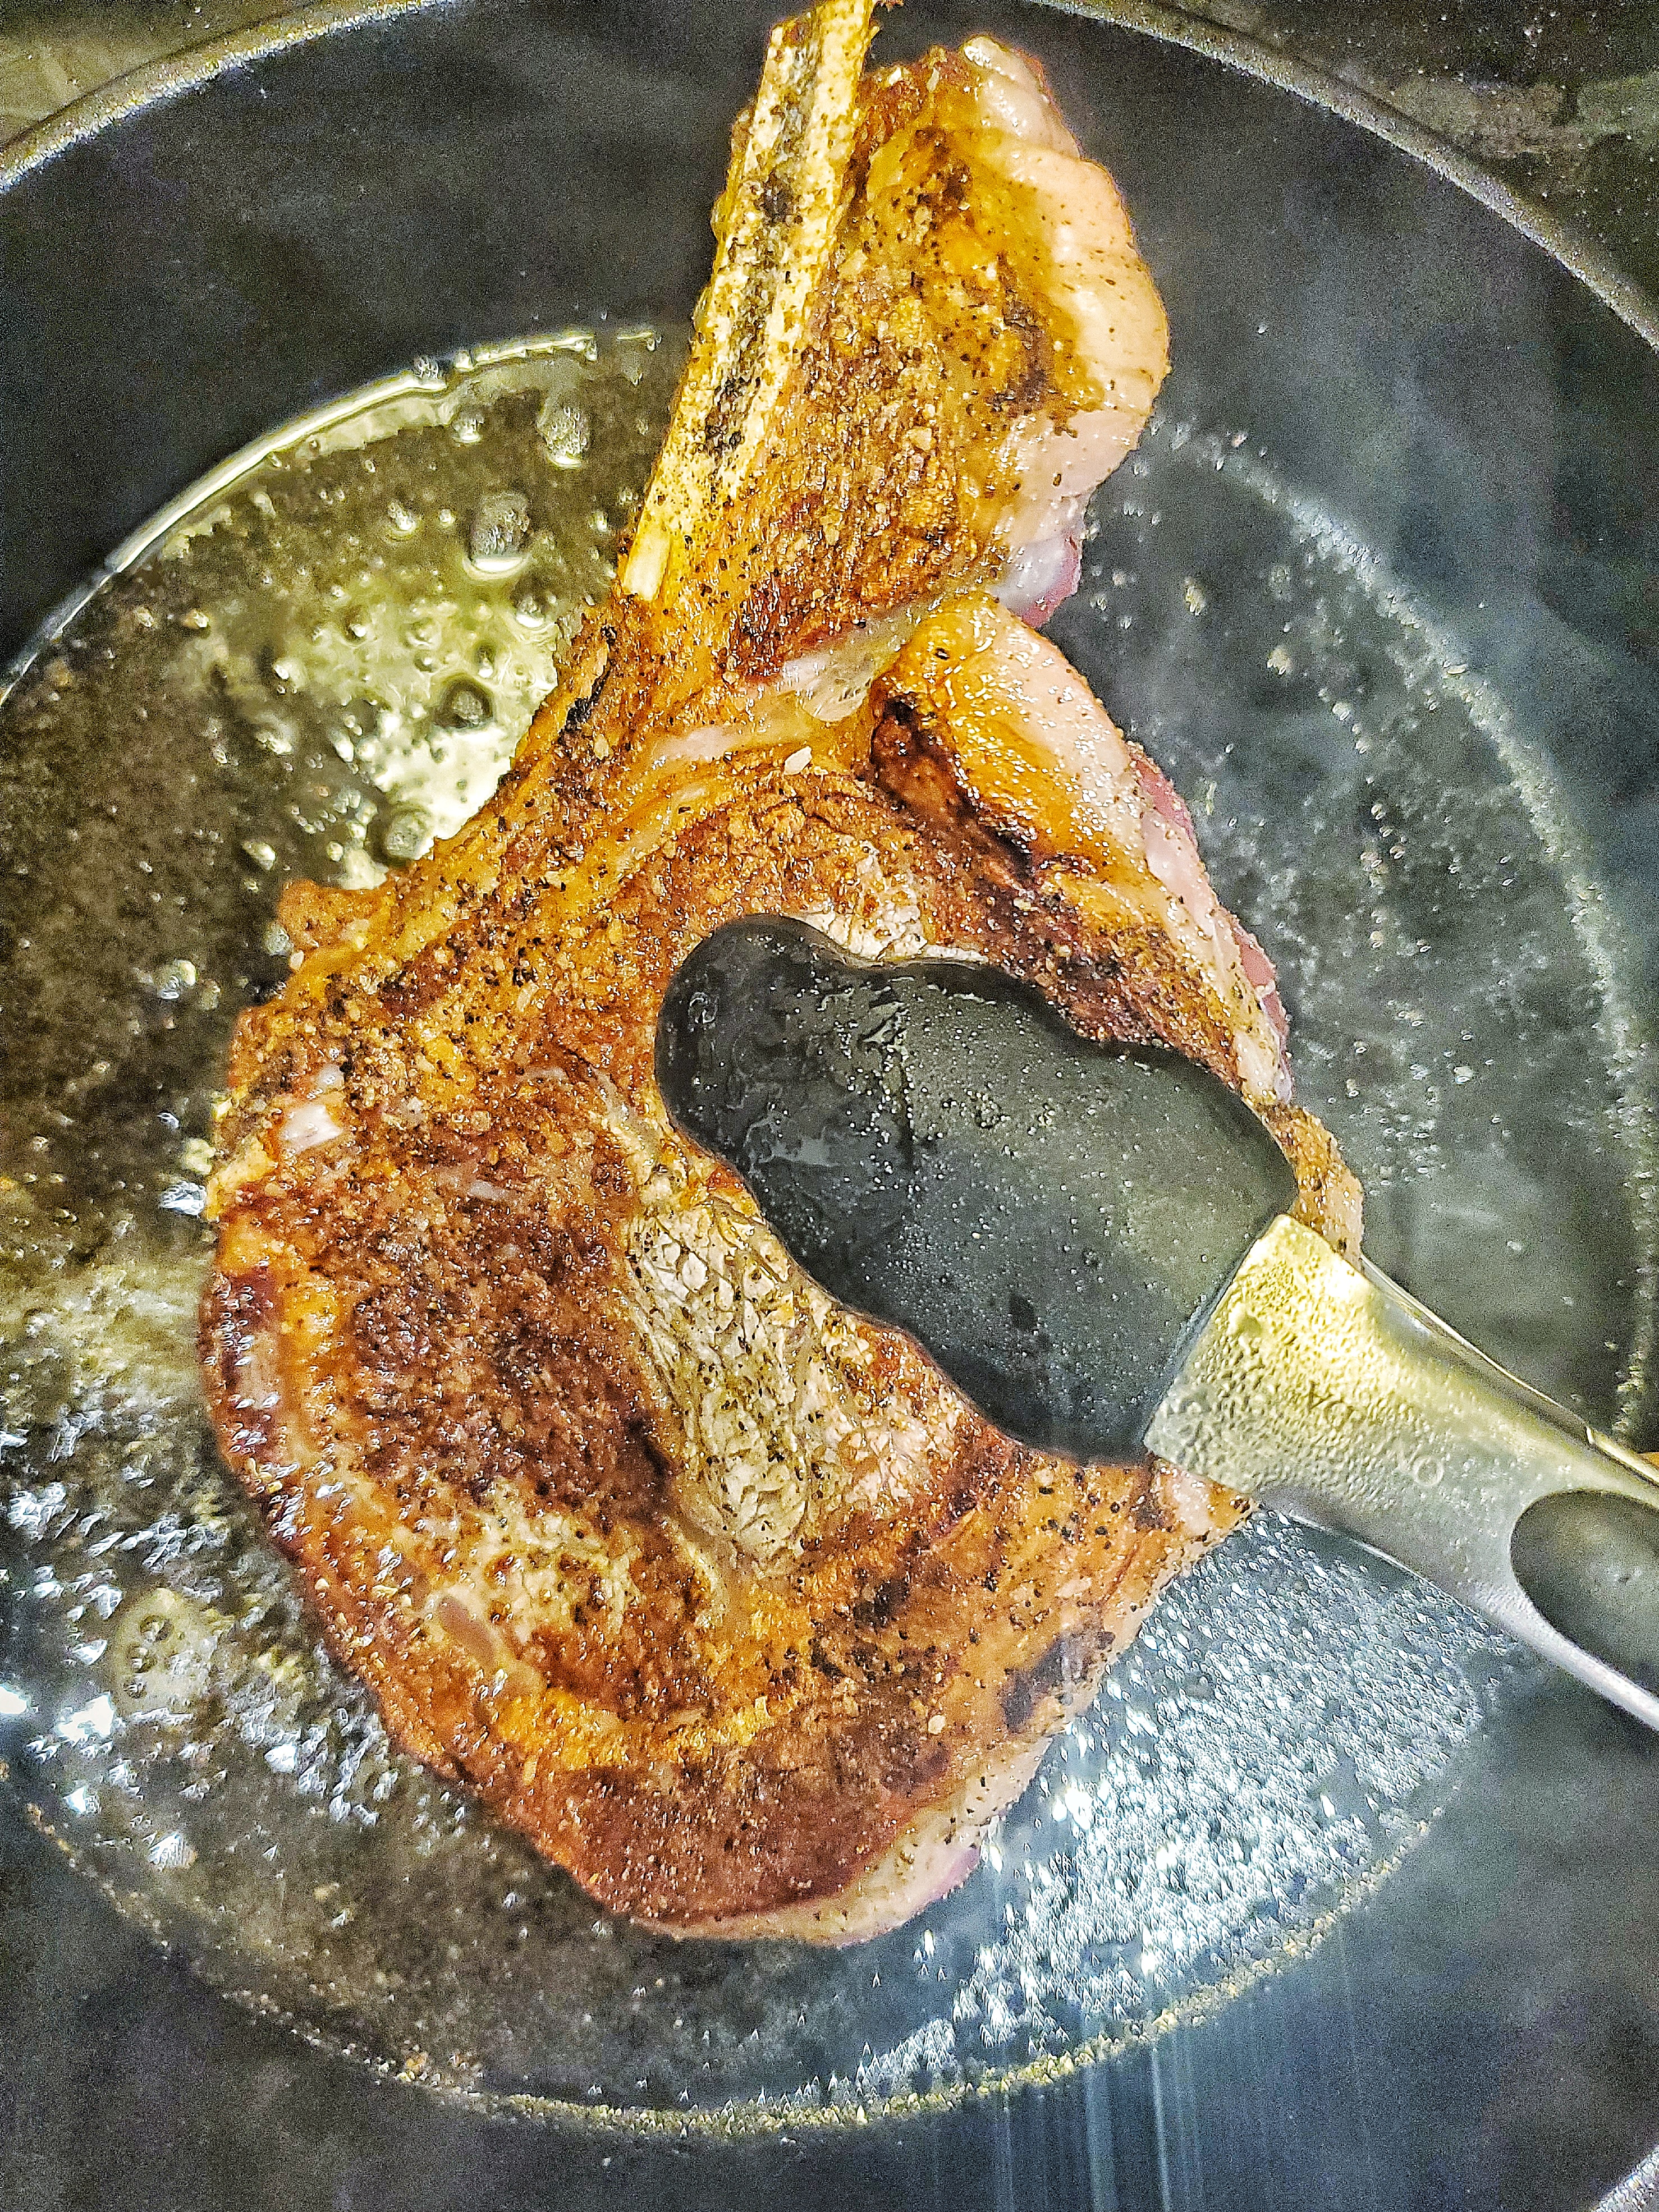
Don’t use a fork or knife to flip your steak!!! Seriously!!!

Use either a spatula or silicone tongs. When using anything other than those, you’ll be stabbing into the steak, piercing a hole for the juices to come out. And we don’t want that! Also avoid using metal tongs for this. More info on this topic a few points down. 

Ribeye being seared in a cast iron pan
Use silicone tongs or a spatula to flip. Do not use a fork or knife!!!

How long to pan sear steak

I prefer my steaks cooked to medium. So this steak, which is 1 inch in thickness, was cooked on each side for 2 ½ – 3 minutes. If you’re a medium steak person like me but you have a thicker steak, add a minute per inch per side (so a 2 inch steak will cook for 3 ½ – 4 minutes each side)  In turn if you have a thinner steak, subtract a minute per side.  Same deal if you prefer your steaks cooked a degree more or less than medium.

For reference, I’ve added steak temperatures and their names below, along with my suggested cooking time for a 1 inch pan sear steak. 

  • Rare – 125 F, cool red center (1 minute per side)
  • Medium rare – 135 F, warm red center (2 minutes per side)
  • Medium – 145 F, warm pink center. (3 minutes per side)
  • Medium well – 155 F, warm gray center with a little pink (4 minutes per side)
  • Well done – 165 F, gray AF (5 minutes per side)

If you want to check the temperature of your steak with a thermometer to play it safe, wait until after the steak has rested, since we aren’t trying to pierce the steak and lose it’s juices. 

Baste it baby! 

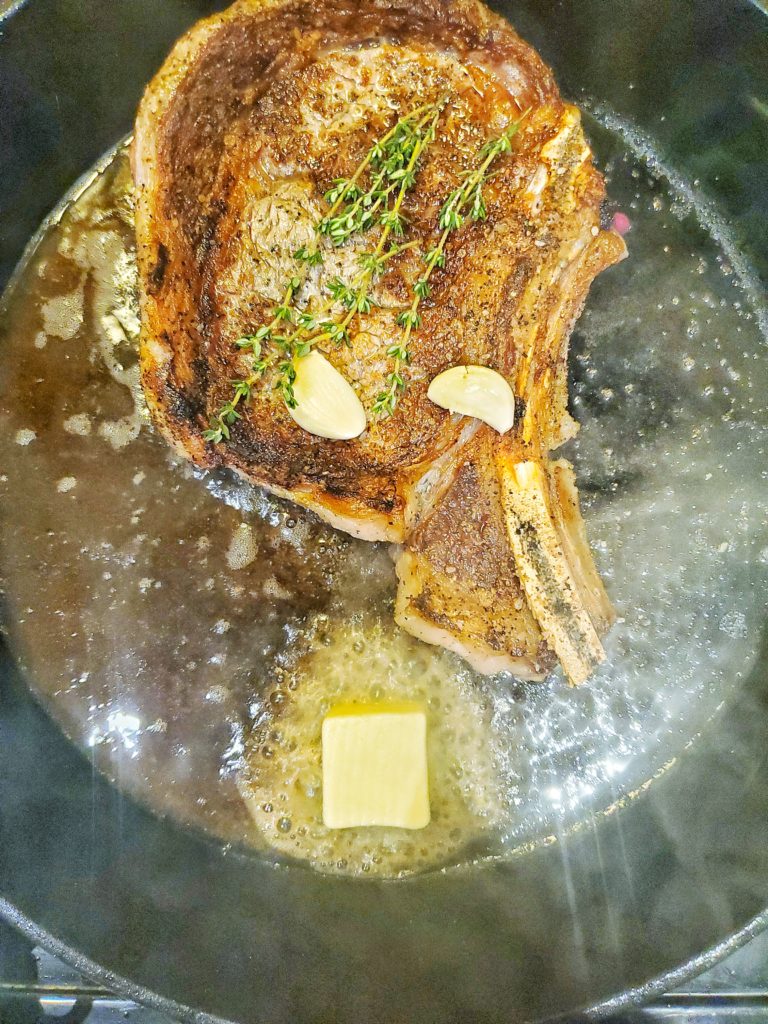
Again, fat means flavor. After you sear the first side of your steak and flip it, throw  a big chunk of butter into the pan. This should be added in the last 2 minutes of completely cooking your steak. If you have it, also throw in a couple of crushed garlic cloves and a small handful of herbs. 

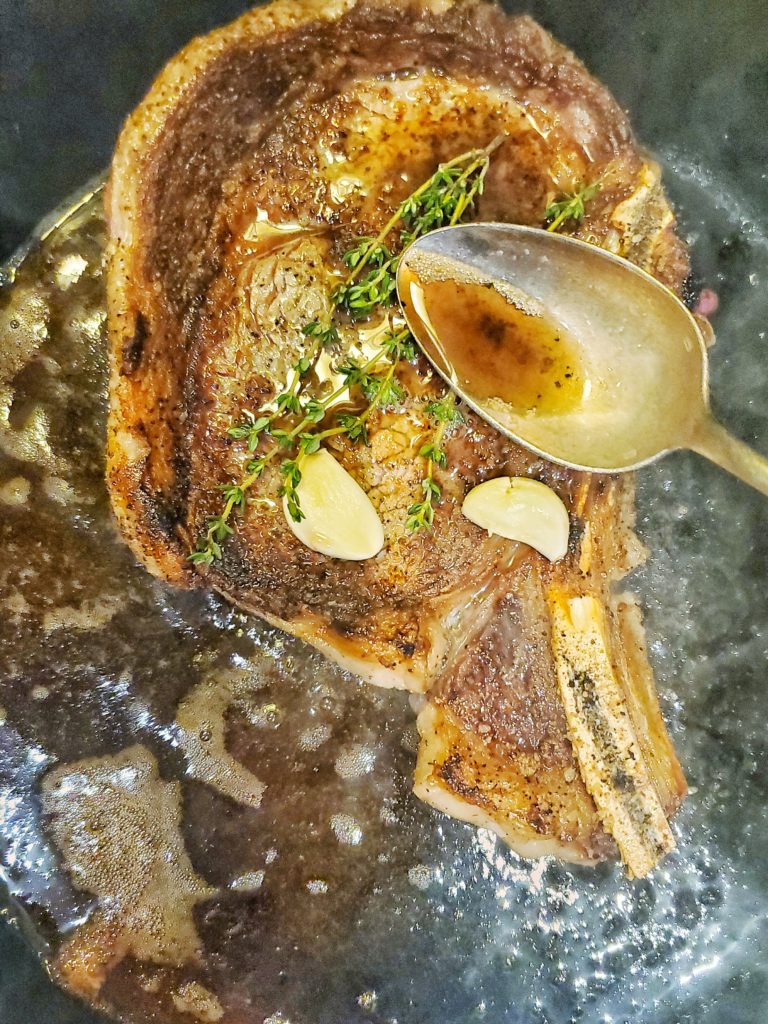
Once the butter melts, spoon it onto the top of the steak. This is called basting (think of basting a turkey). Keep in mind that this basting does account for some of the cooking time, so you only need to do this for about 30 seconds.

Ribeye steak in a cast iron pan with butter, garlic, and herbs
Add unsalted butter, crushed garlic cloves, and herb of choice into the pan near the end of searing your steak
Ribeye in a cast iron pan basting with herb garlic butter
Once the butter has melted, baste the steak using a large spoon

Sear the fat cap on your steak

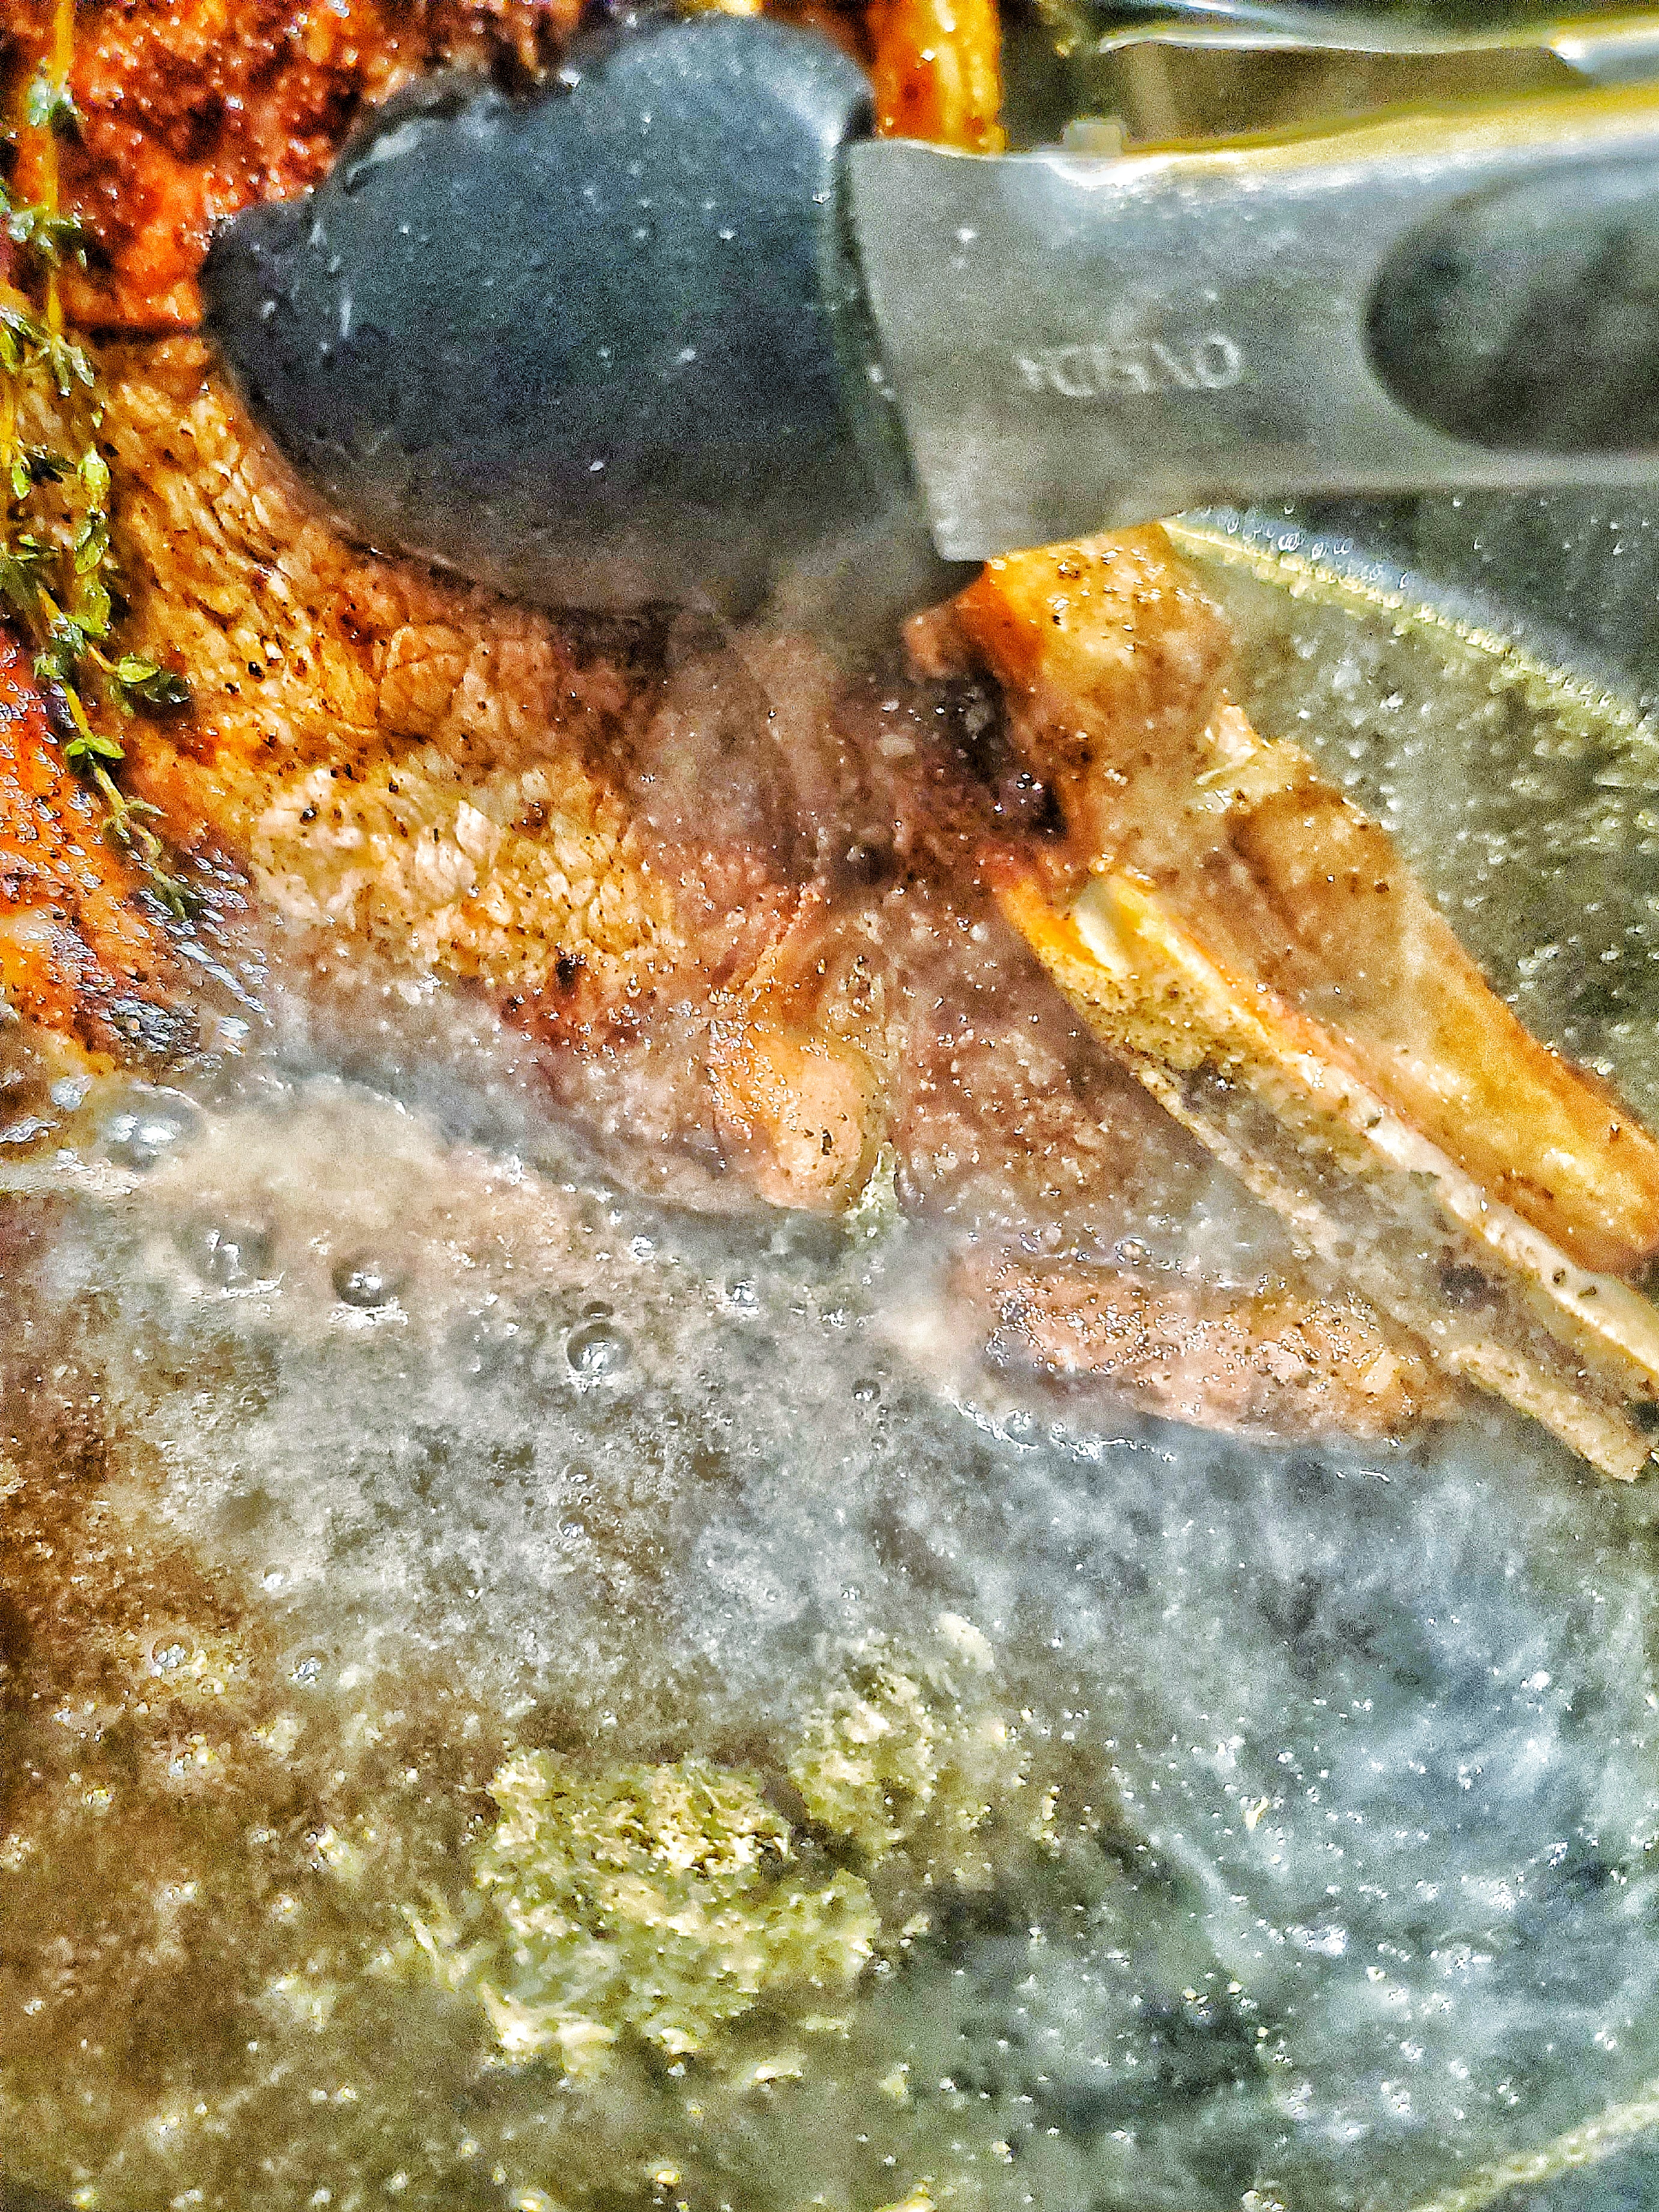
We don’t want to chew on that raw fat! So grab your tongs, hold that steak on its side, and let the fat cap sit in that garlicky herb butter for 20-30 seconds. If your steak does not have a fat cap, you will skip this step.

Ribeye being seared in a cast iron pan
Sear the fat cap by holding it sideways in the pan

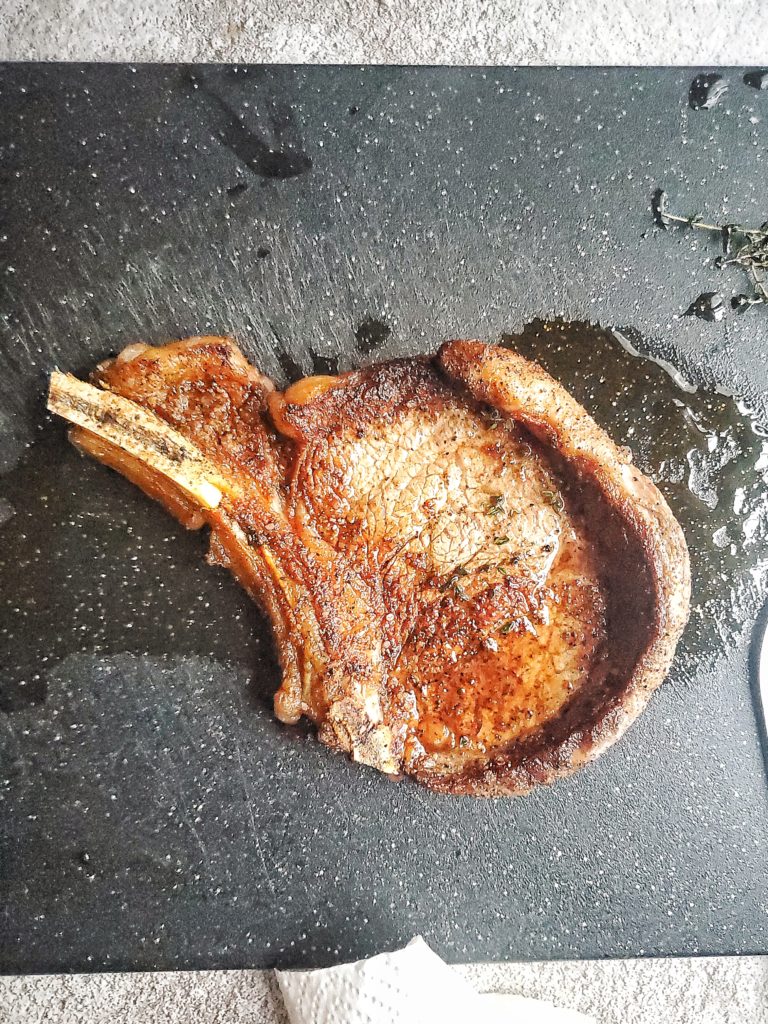
Rest for 3-5 minutes before slicing 

After you pan sear steak, please don’t cut into your steak right away. I know you’re tempted to with the work you put into it, but just wait. 

There’s some more science-y sh*t happening where the moisture in the steak is still moving around from cooking (think boiling water, but in the steak). Cutting the steak right when you remove it from the heat will cause the moisture to immediately seap out. That’ll then cause your steak to dry out, which would make all that hard (but still easy) work a waste of time. So let that steak sit on a cutting board or plate for at least 2 minutes, a couple more minutes if you can. 

The thicker the steak, the longer the wait. Best number to set as your rest time is the amount of time you let your steak cook on 1 side. This is the absolute minimum amount of time (like if you’re rushing and hangry.) After it’s rested, you’re safe to stab it with a thermometer to make sure it’s doneness is to your liking before slicing.

Ribeye steak on a cutting board
Rest your cooked steak before slicing
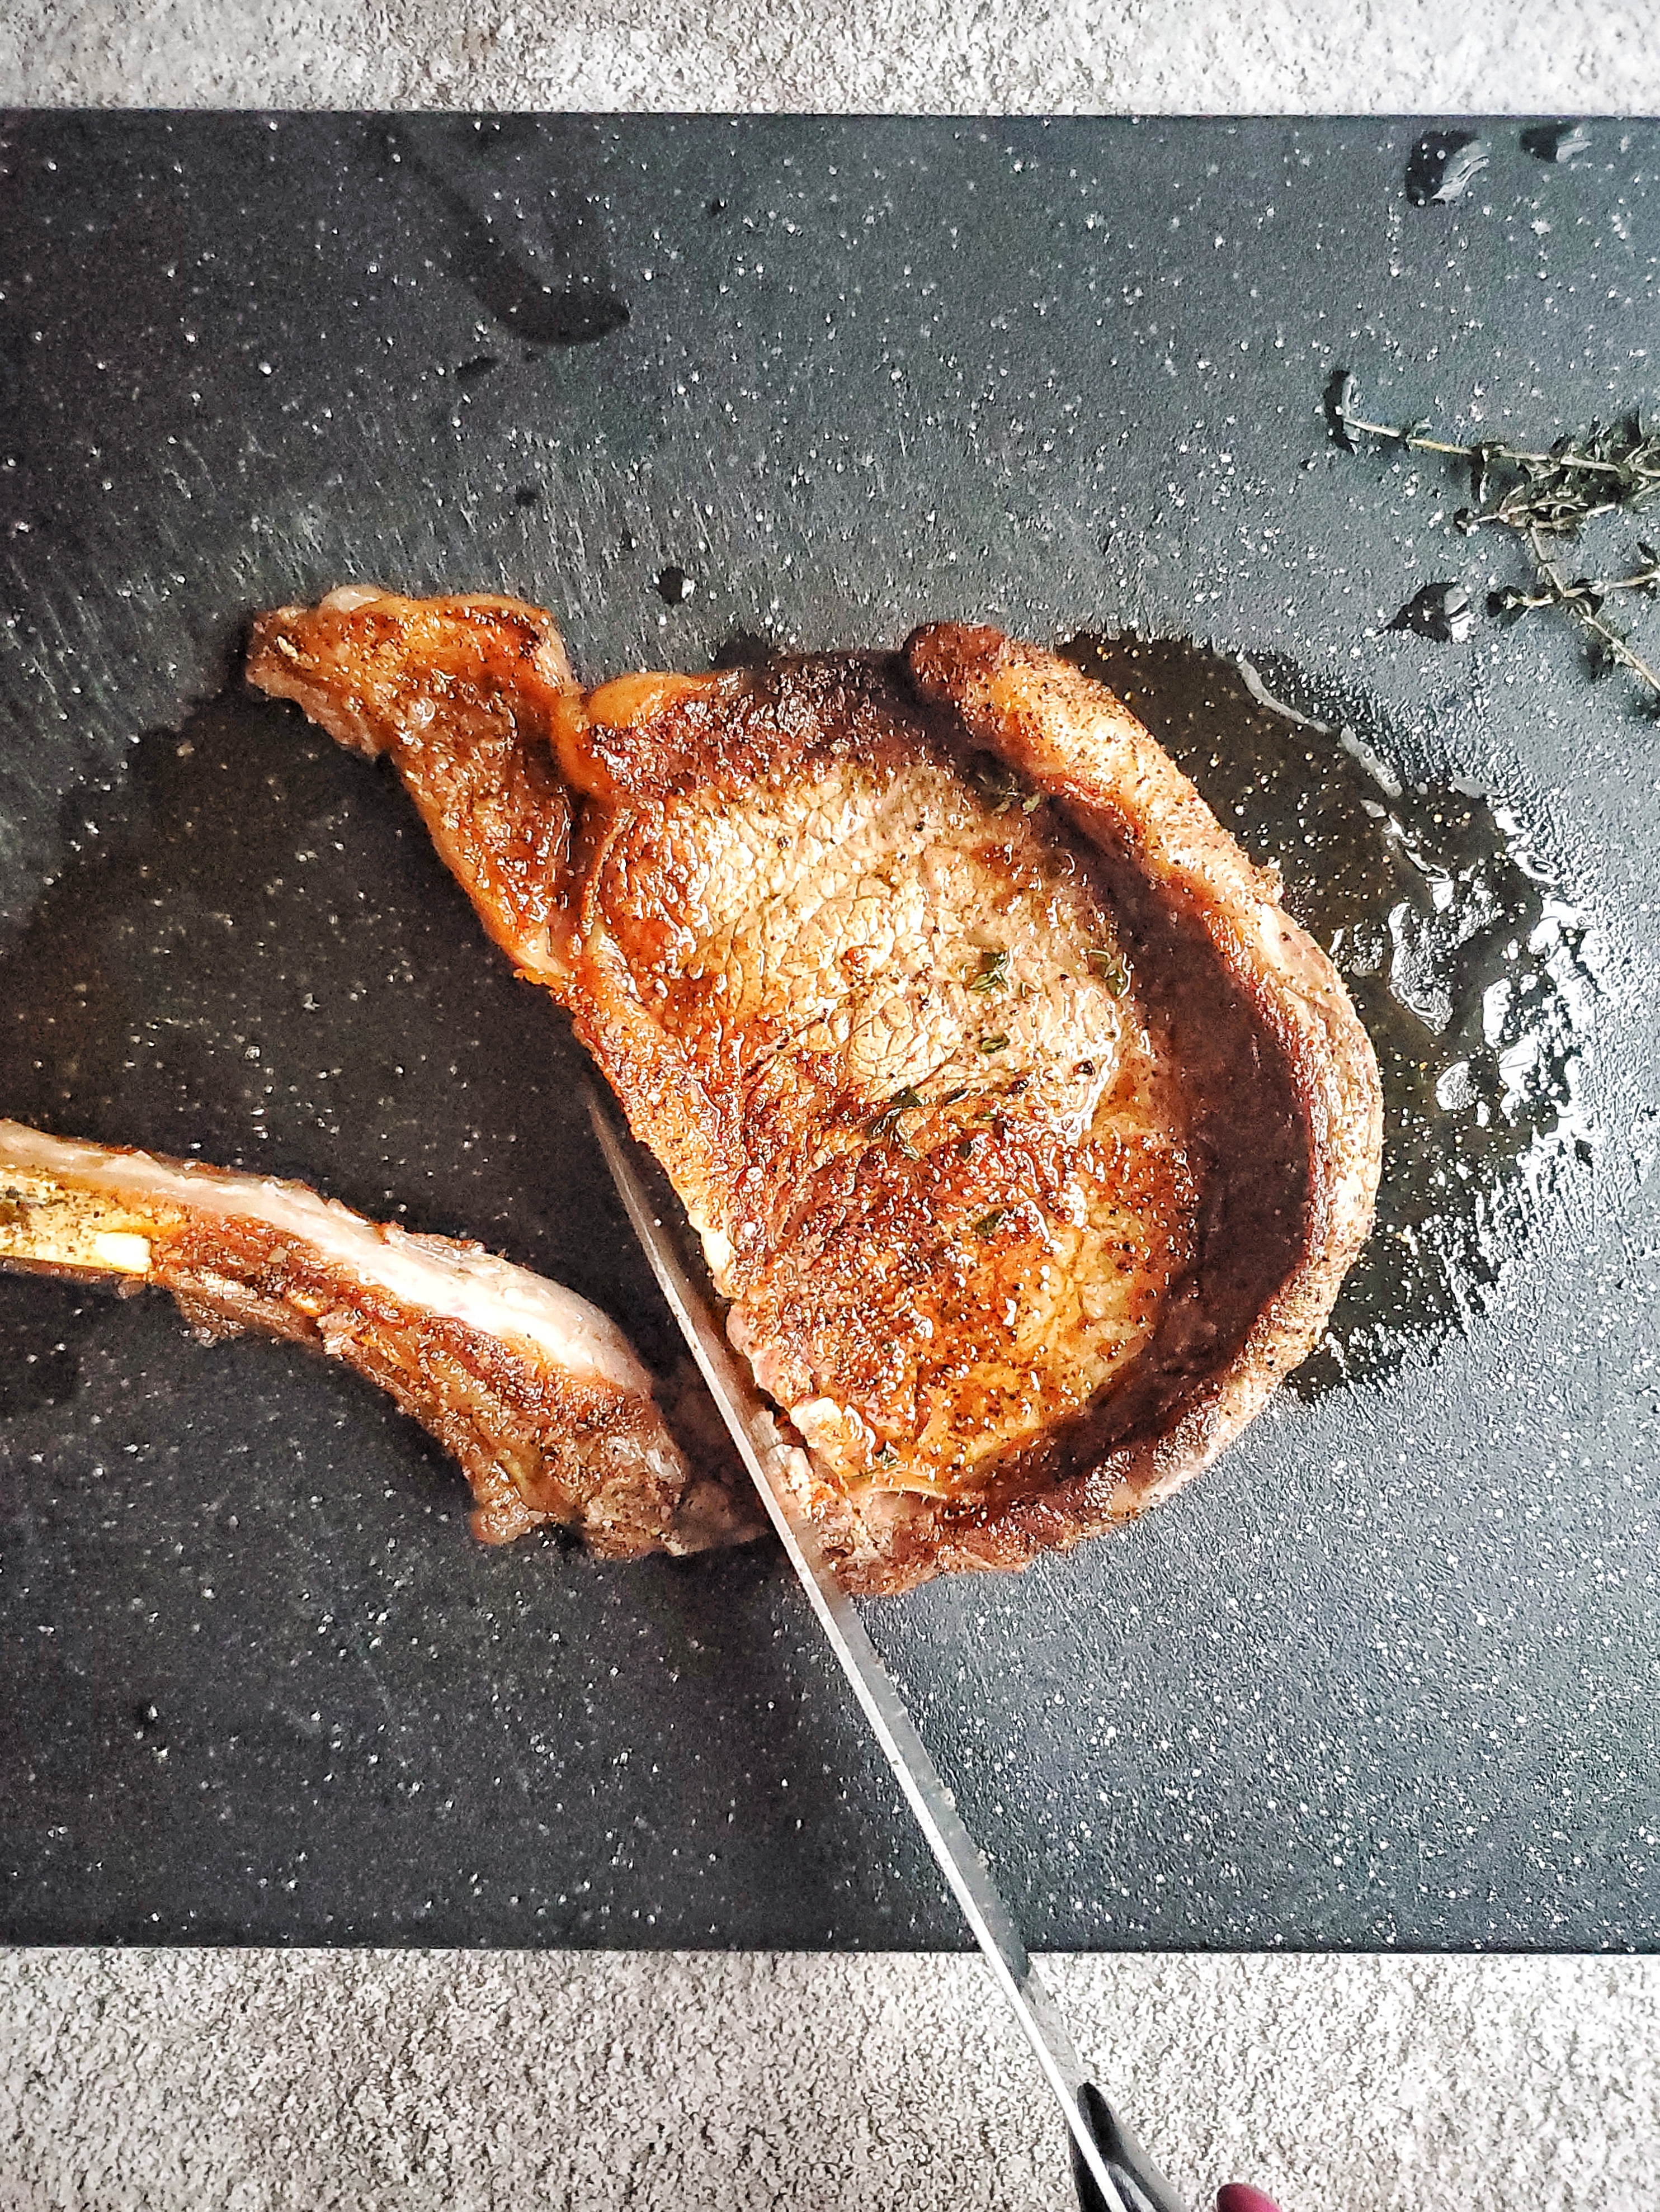
Bone being sliced off of a cooked ribeye steak
After the she steak has rested, slice around the bone

Cut against the grain 

This is a very important step. Probably more important than everything else I’ve mentioned. Cutting a steak against the grain helps to make the bite of steak less chewy.  

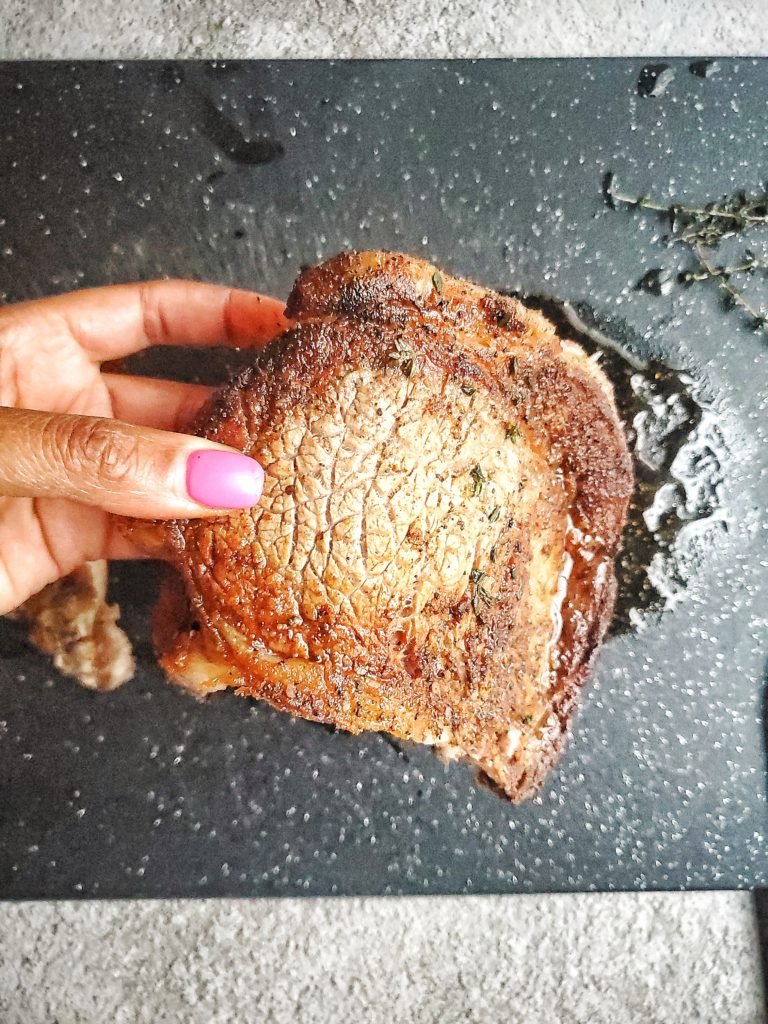
The grain of a steak are those natural lines you see. You can also see this when the steak is raw. Best way to find the grain is to hold up one end so the steak kinda bends. There, you’ll see lines where it looks like the steak separates a little bit.

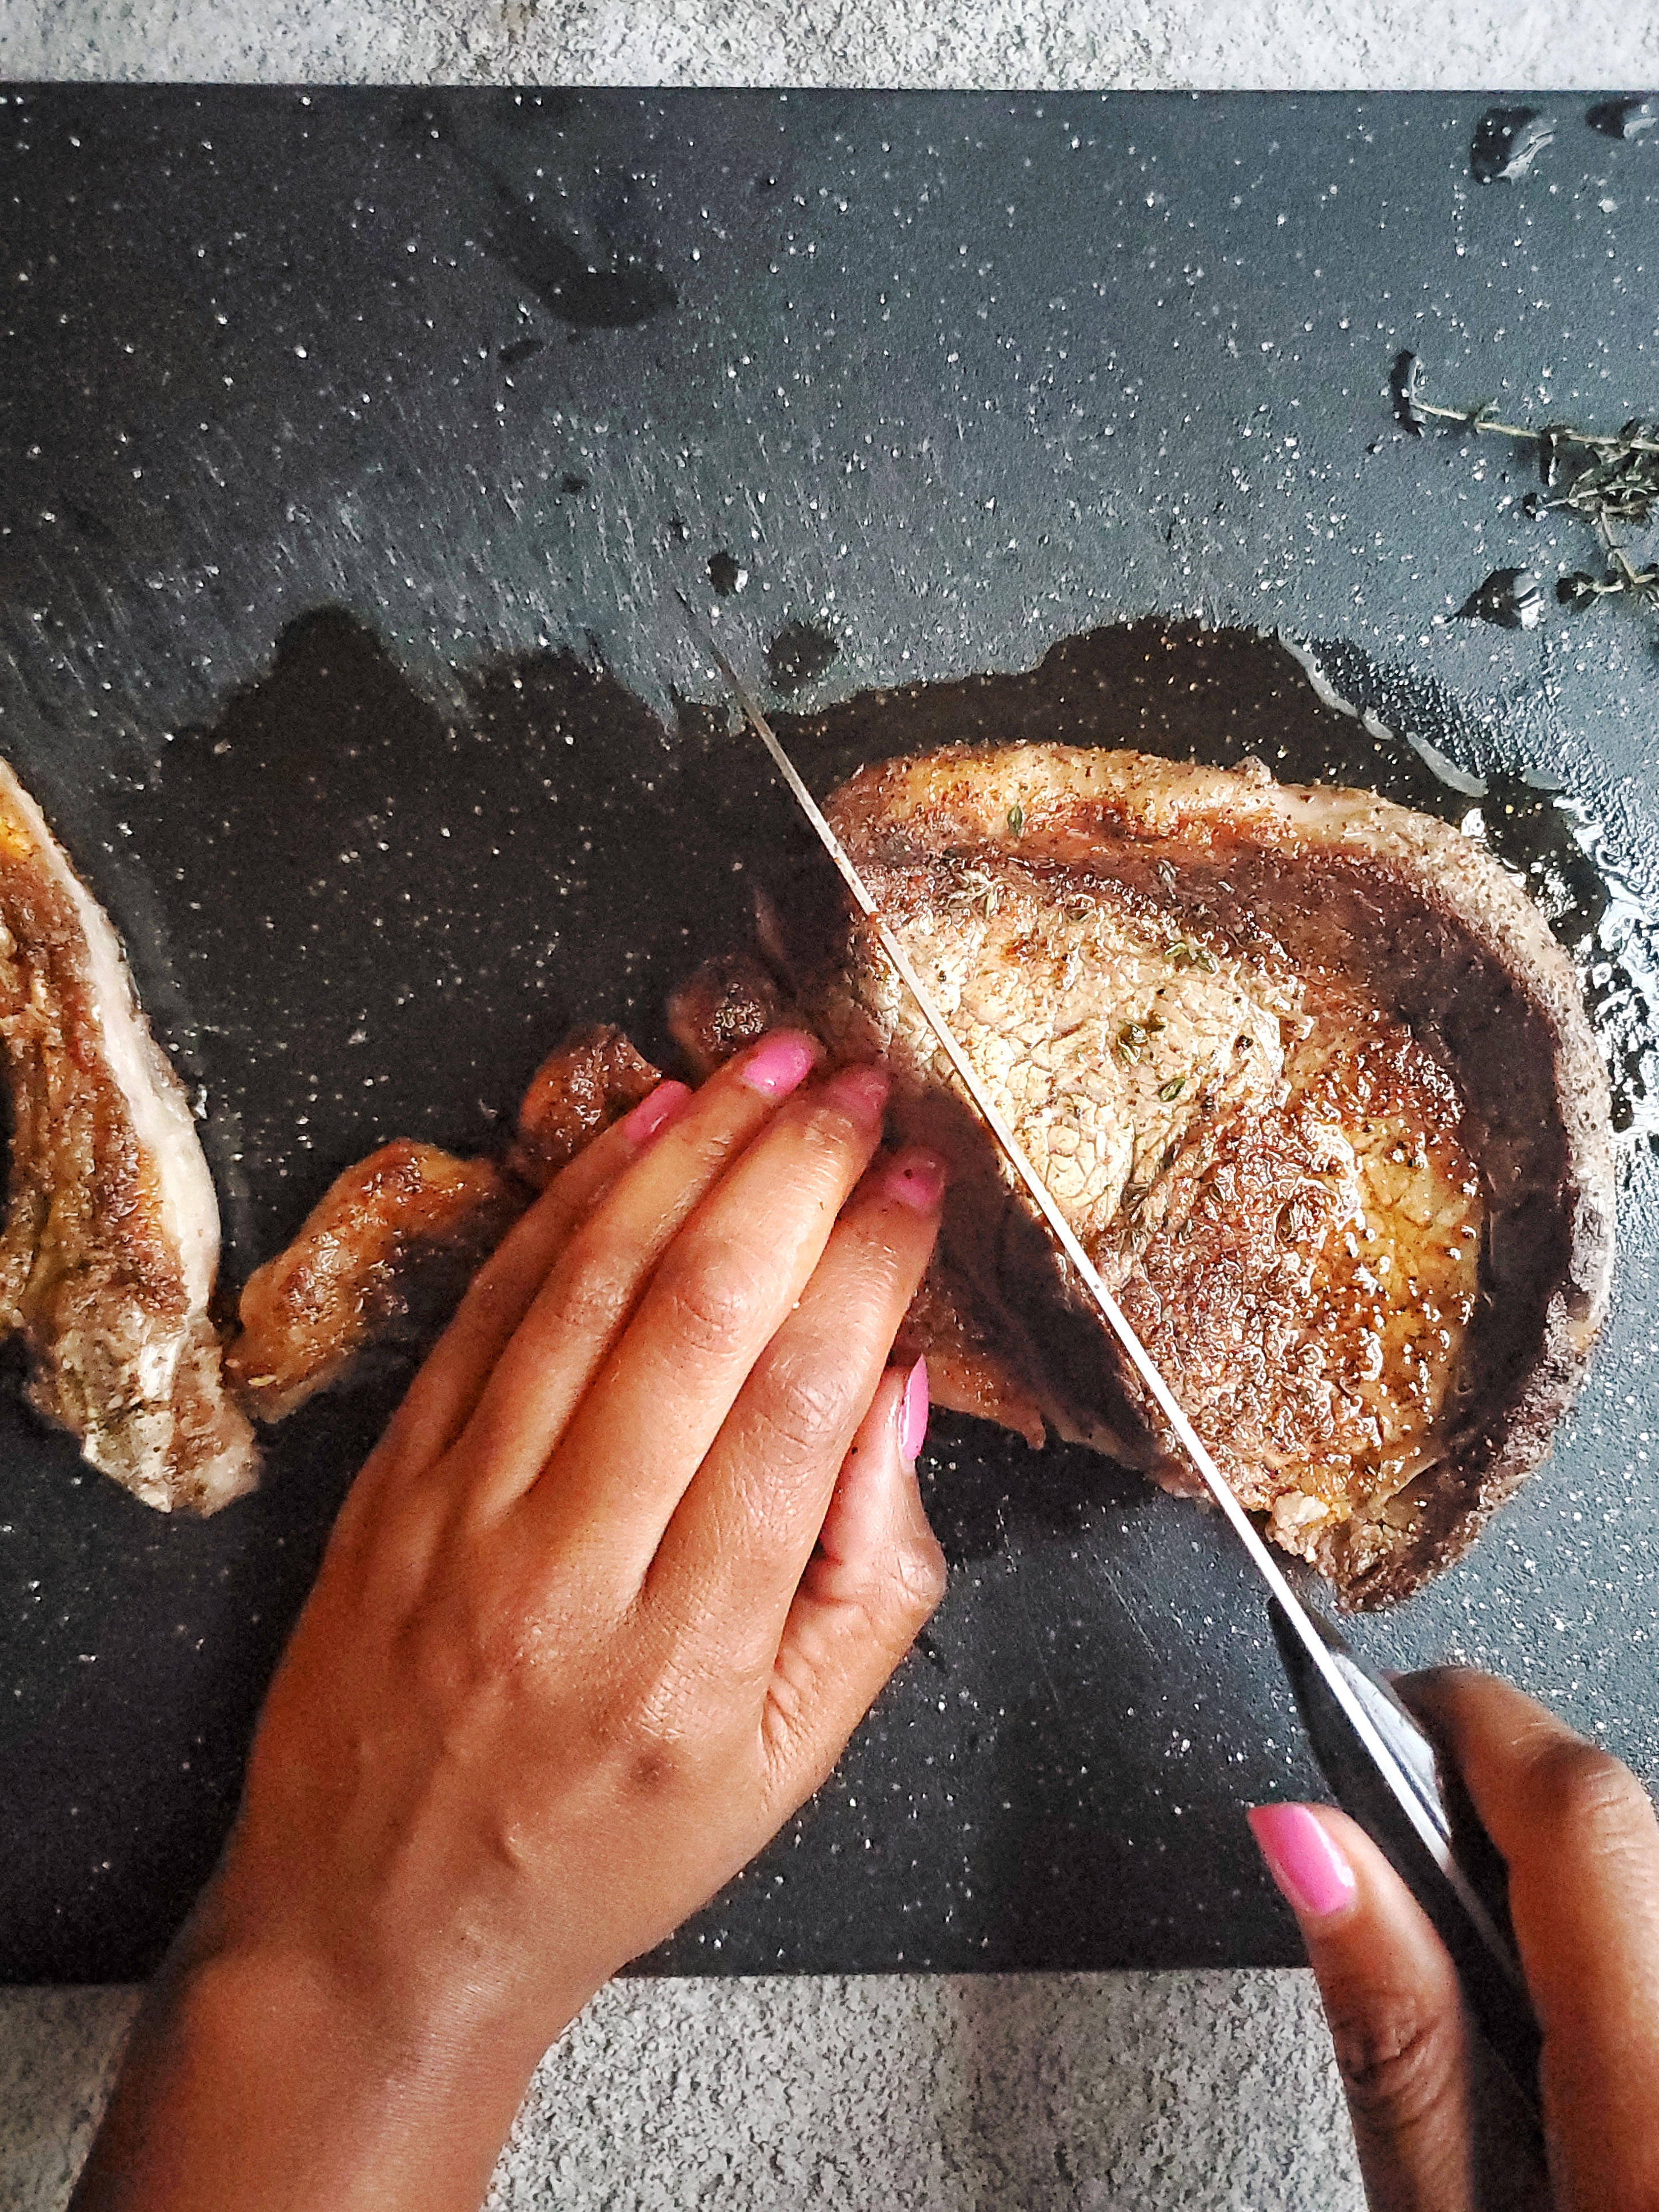
Now that you’ve found the grain, you want to slice your steak in a different direction from it. You want to place your knife so that it makes an X with the grain that you found. Make sure that this grain-knife X you’re making doesn’t look like a plus symbol or a lowercase t. 

If you cut along the grain vs against it, that perfectly cooked steak will be tougher to chew. It’ll still be edible, but it won’t be as fun to eat compared to it being sliced properly.

Close up of a cooked ribeye steak
The grain is the natural lines you see before slicing. Place you knife so the grain and your knife form the shape of an “X”

Slice, don’t saw! 

What am I talking about? Well, when you’re slicing your steak, move the knife in one direction. Don’t move it back and forth while pressing down to cut the steak. It’s best to slice downward in one direction so that you aren’t shredding this perfect steak you just cooked. Now, this is clearly for presentation purposes. But, you’ve made it this far, so you should go all the way in!

Ribeye steak being sliced thin
When slicing against the grain, and slice in on motion. Slice, don’t saw!

One last seasoning!!!

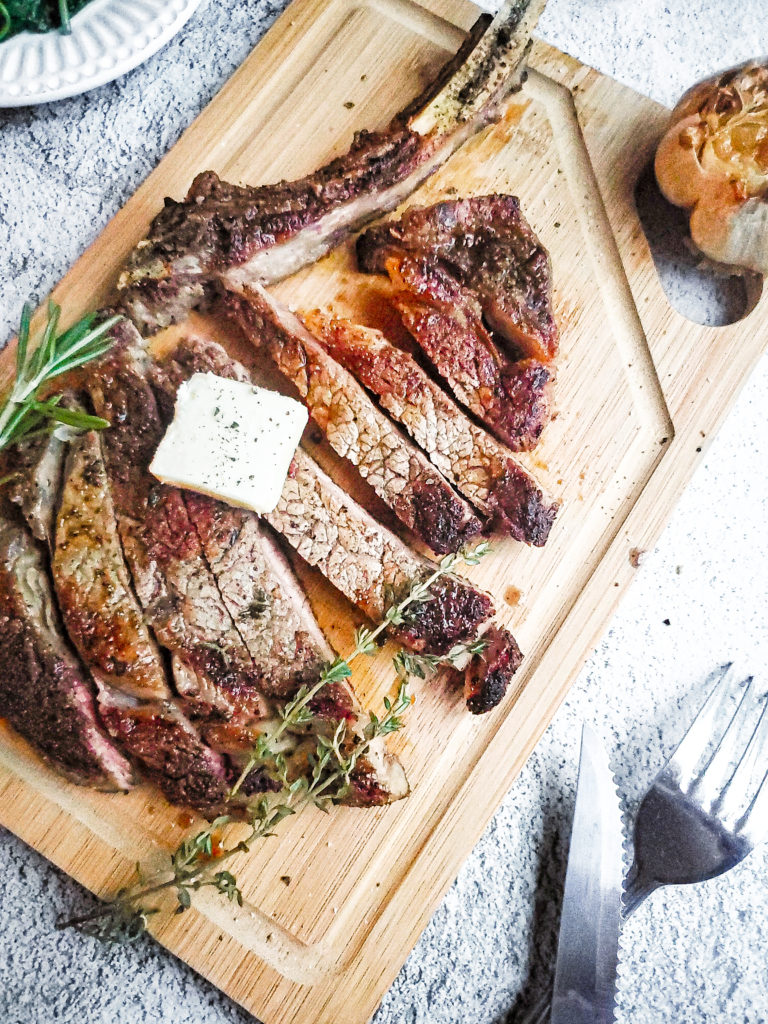
If you have an herb butter or herb sauce this is the perfect time to use it. Put a dollop of the butter or sauce on your steak to be super fancy. I will say though that if you follow the steps above, it will not be a big deal if you don’t have either of these. 

A light sprinkle of fresh ground pepper and sea salt is also the perfect addition once your steak has been sliced!

Now that you have the rundown on prepping and cooking the perfect steak, it’s time for you to execute it! If you use my tips, make sure to tag me on Instagram so I can see the awesomeness!

Overhead shot of a sliced ribeye steak with butter and herbs
Sexy steak!!!!!

If you’re looking for sides to go with your sexy steak, check out my herb garlic roasted potatoes. I’ve got a yummy creamed spinach recipe coming soon!

Pin It on Pinterest