Blueberry Lemon Poppyseed Corn Muffins with Vanilla Honey Butter

Close up shot of blueberry lemon poppyseed corn muffins

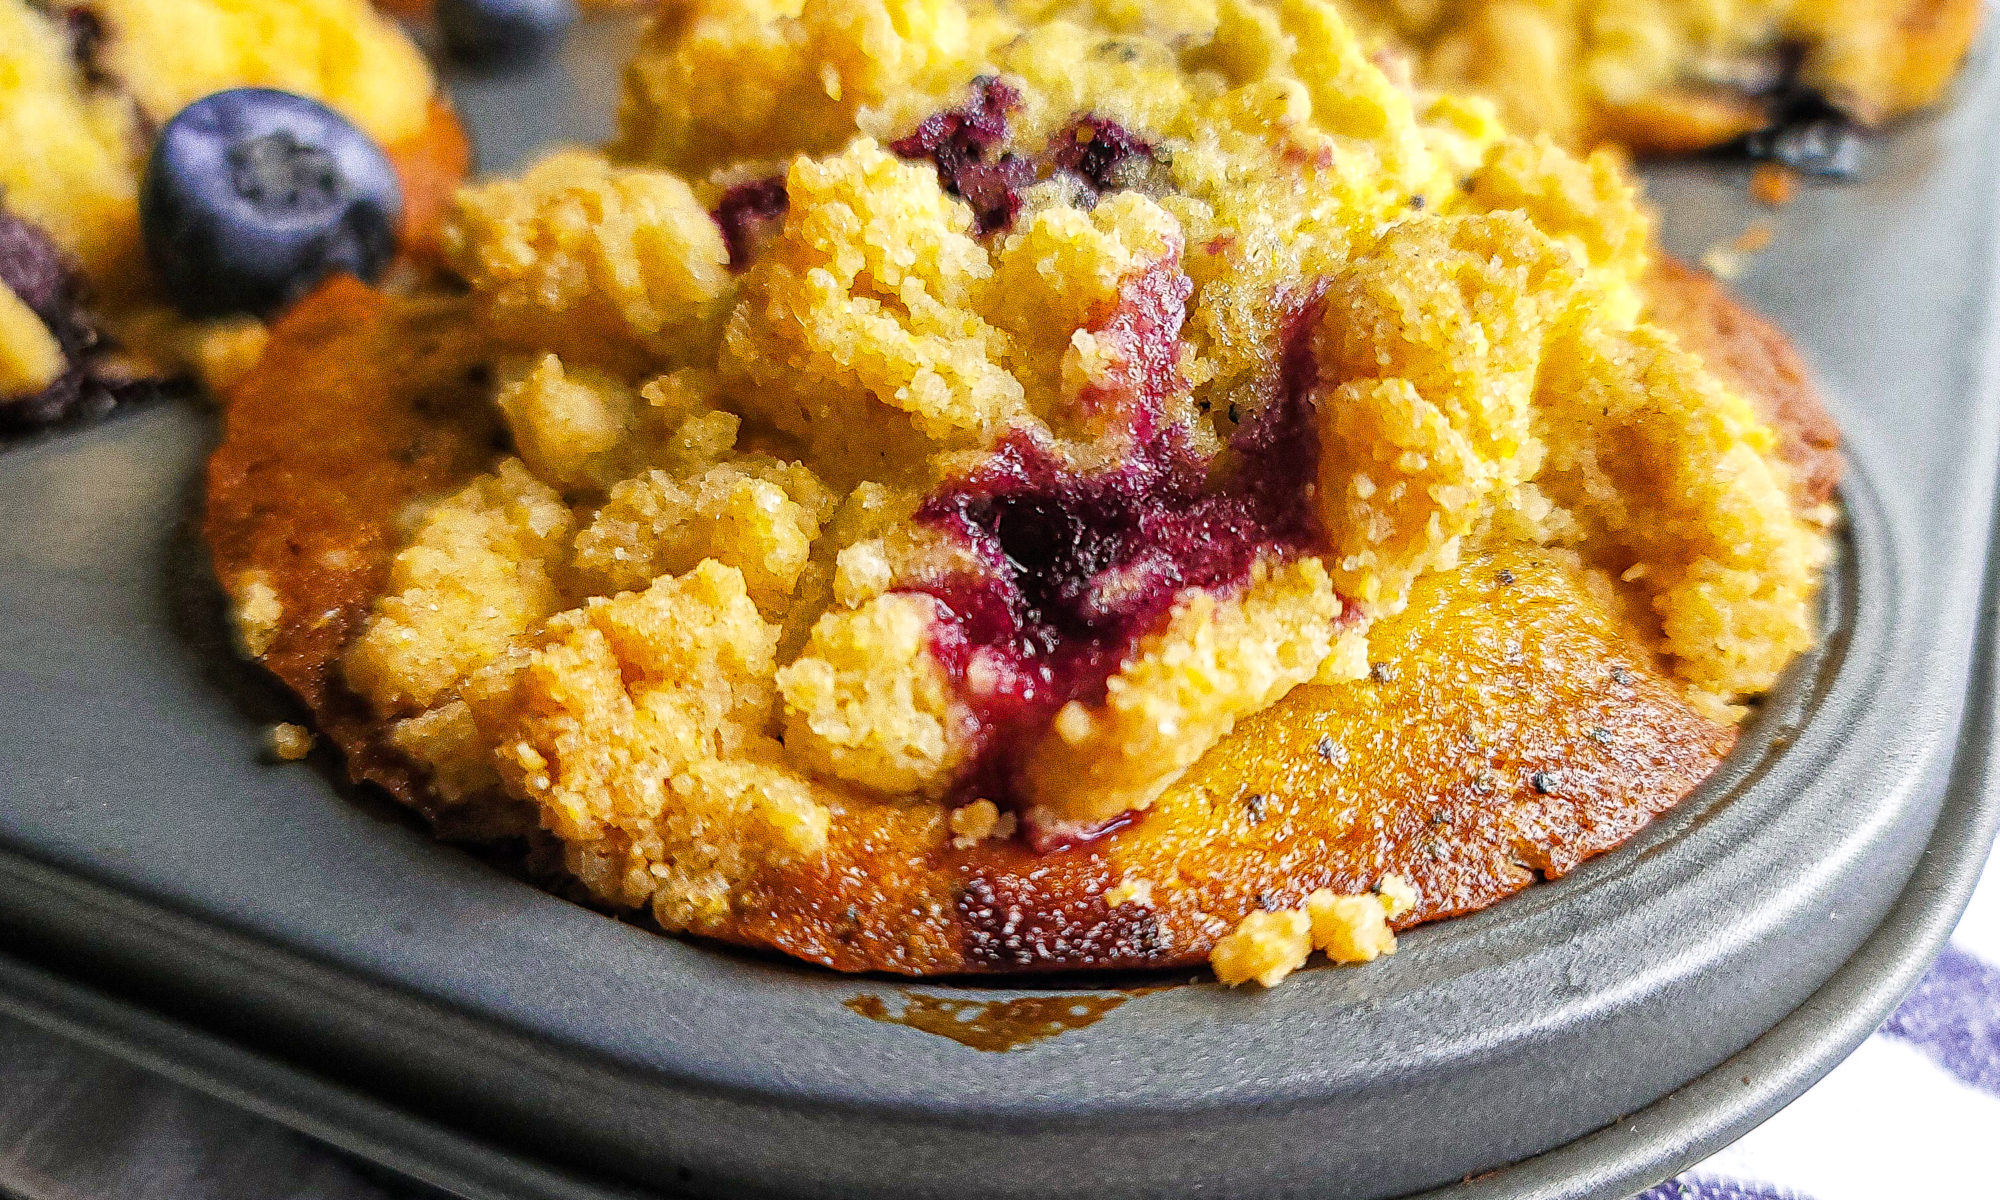
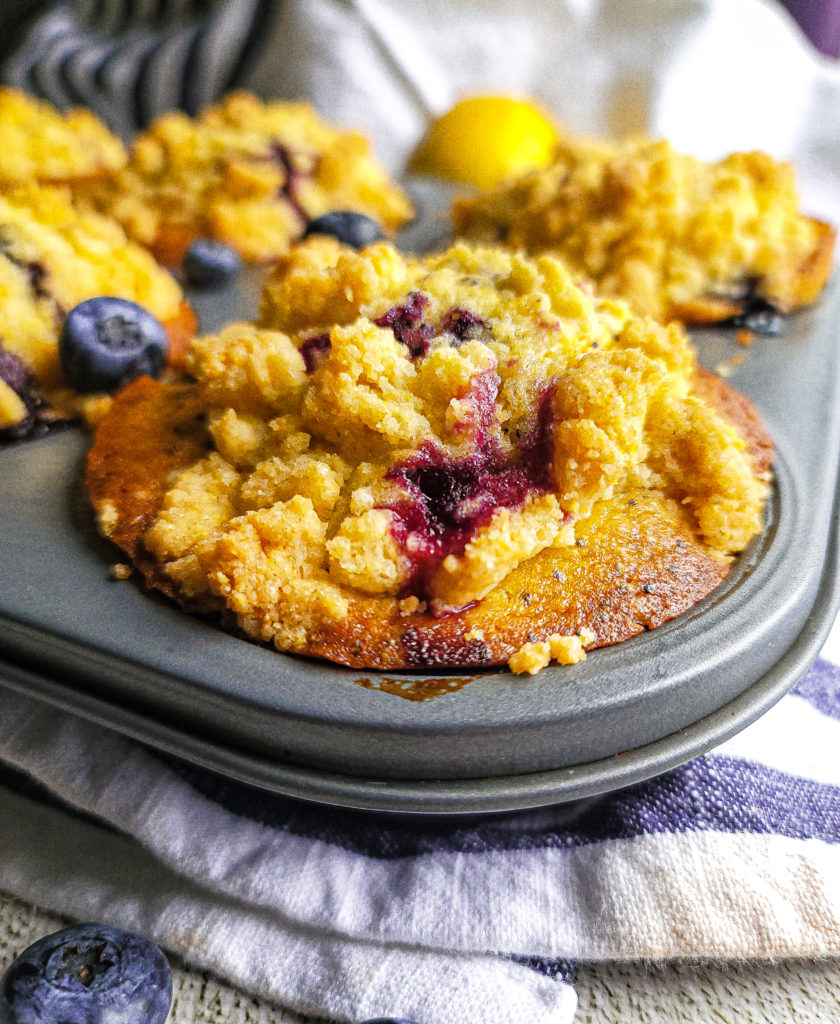
Warm blueberry lemon poppyseed corn muffins with a crumbly topping are the perfect addition for your breakfast and brunch meal. Add a schmear of lightly sweetened vanilla honey butter for a real treat!

Overhead shot of blueberry lemon poppyseed corn muffins  with a smear of vanilla honey butter

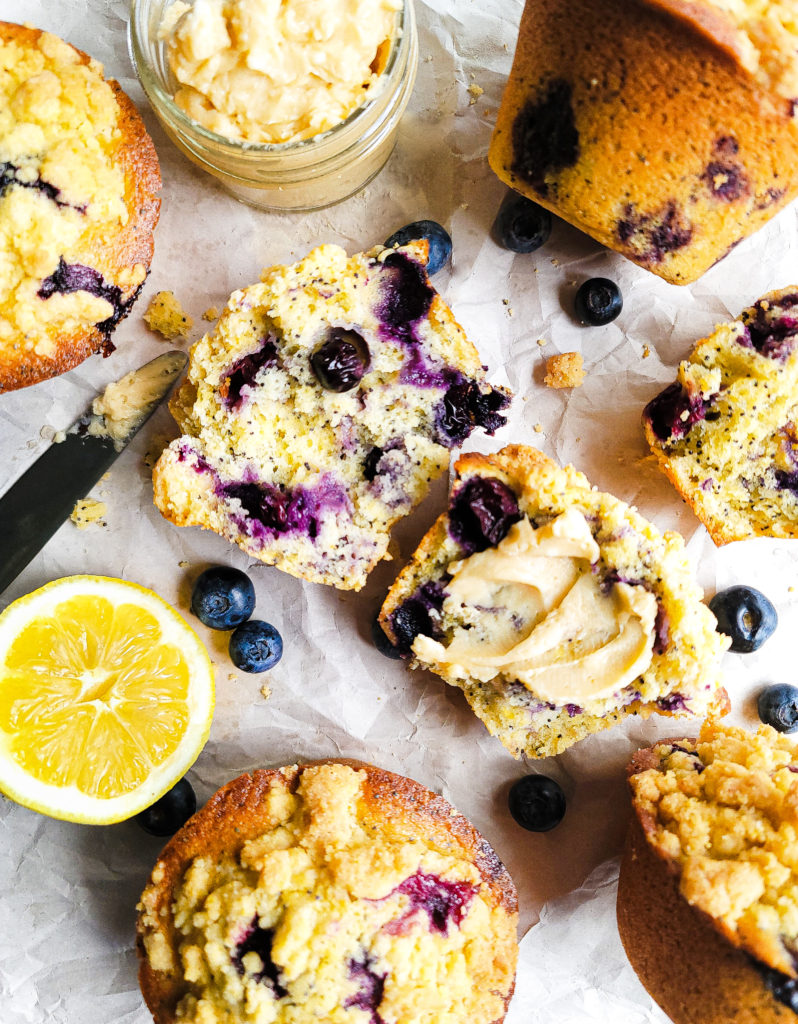
Cornmeal muffins are`a standard breakfast and brunch item. But these are something that deserves to be fancied up. My corn muffins are gently mixed with poppy seeds and fresh blueberries. Fresh lemon juice and its zest brighten the flavor. The streusel topping adds a bit of a crunch, and the muffins get a bit more sweetness from the smooth vanilla honey butter. You and the fam will thoroughly enjoy this one!

How to make cornmeal muffins

These blueberry lemon poppyseed corn muffins are sooooo easy to execute! Just mix your dry ingredients, add in the wet ingredients, and mix in blueberries.  Once the batter is portioned, top with the cornmeal streusel and bake. The vanilla honey butter can be made while the muffins are baking. After 45 minutes, you’ll have the perfect addition to your breakfast spread!

Cornmeal vs Cornmeal Flour

If you look at the ingredients, you’ll notice that I use cornmeal flour instead of regular ground cornmeal. While these are interchangeable, I prefer to use cornmeal flour when baking.

Cornmeal flour and cornmeal have the same exact ingredient: ground cornmeal. The main difference is how fine the cornmeal has been ground up. Regular cornmeal is a bit more gritty. Cornmeal flour is its finely ground version, but with a fluffier and smoother consistency. 

Fresh blueberries vs frozen blueberries

My recipe uses fresh blueberries. I prefer to use fruit for baked goods while they’re in season. But these corn muffins can be made year round.

Frozen blueberries can replace fresh blueberries. I’d recommend letting the blueberries thaw out a bit before adding to the batter. The batter will turn a shade of purple once the frozen berries are added, but it’s nothing to be afraid of. 

What do I use if I don’t have lemons for the corn muffins?

This recipe calls for lemon zest, as well as fresh lemon juice. It’s a much more natural lemon flavor using lemon in this fashion.

However, if you do not have fresh lemons on hand, you can substitute the juice and zest with a tablespoon of lemon extract. 

Additionally, fresh lemon juice can be swapped for bottled lemon juice if that’s what you have on hand. The lemon zest can then be omitted. 

Can I make this recipe into mini corn muffins?

My recipe yields 6 large muffins. You are welcome to make this into smaller muffins! This will yield 12 cupcake-sized muffins. 

Portion and top the muffins with the streusel, and bake for about 20 minutes, or until a toothpick comes out clean when inserted into the center. 

What is streusel?

Streusel is a crumbly mixture that goes on top, and sometimes inside, of baked good before it goes in the oven. This adds texture to pastry that is usually super soft. Think of coffee cakes. The fluffy cake is topped with that sweet slightly crunch crumble, making a party in your mouth. 

I decided to add a streusel topping to my corn muffins for that additional crunch, commonly found on breakfast pastries. It also adds a little sweetness.

Portioned muffin batter in muffin tins
Portion the muffin batter into a muffin tin
Portioned muffin batter being topped with a streusel crumble
Sprinkle the streusel crumble on top of each muffin

If you aren’t a fan of streusel topping, it can be omitted. I’d suggest sprinkling the portioned muffin matter with coarse white sugar, which will also add a little of that crunch. 

How to make the whipped vanilla honey butter

Making whipped butter is also very simple!

Add your room temperature butter into a bowl. With a handheld mixer, whip it on the highest speed to make the butter smooth. This takes about 30 seconds. After that, add the honey and vanilla extract and whip for a few more seconds until incorporated. This can also be done in a stand mixer. 

Softened, room temperature butter is important when making any whipped butter. If the butter is hard, it’ll be harder to whip with a mixer, and also harder for the additional ingredients to incorporate. The butter will also be chunky, instead of smooth and velvety. 

Close up shot of blueberry lemon poppyseed corn muffins

Other corn muffin variations

If you aren’t a fan of blueberries, it can be replaced with your berry of choice! 

A raspberry orange corn muffin is a great variation! Replace the lemon juice with orange, and use the zest of one orange for the batter. The poppy seeds can be omitted if you’d like. 

Also, the fruit can be completely omitted! Ain’t nothing wrong with some classic lemon poppyseed corn muffins!

I hope you get to try and love these blueberry lemon poppyseed corn muffins, especially with the vanilla honey butter! If you’re looking for other easy breakfast ideas, give my Fluffy Lemon Ricotta Pancakes a try! Don’t forget to also leave a review, and share your creations by tagging me on Instagram and Twitter, cuz I love stuff like that!

Blueberry Lemon Poppyseed Corn Muffins with Whipped Vanilla Honey Butter

A warm blueberry lemon poppyseed corn muffin with crumbly topping and vanilla honey butter is the perfect addition for your breakfast and brunch meal.
Prep Time10 minutes
Cook Time35 minutes
Course: Breakfast
Cuisine: American
Keyword: blueberry lemon muffin, blueberry lemon poppyseed muffin, blueberry muffin, breakfast, brunch, corn muffin, corn muffins, lemon poppyseed, lemon poppyseed muffin, muffin, muffins, poppyseed, poppyseed muffins
Servings: 6 muffins
Author: Crystal

Equipment

  • 2 Mixing bowls
  • 1 Whisk
  • 1 muffin pan, for 6 muffins
  • 1 Rubber spatula
  • 1 handheld mixer

Ingredients

For the streusel topping

  • ¼ cup granulated sugar
  • 3 tablespoons unsalted butter melted
  • 2 tablespoons cornmeal flour
  • 7 tablespoons all purpose flour

For the muffins

  • ¾ cup granulated sugar
  • 1 ½ cup all purpose flour
  • ½ cup yellow cornmeal flour
  • ½ tablespoon kosher salt
  • 1 teaspoon baking powder
  • 2 tablespoon poppyseeds
  • ¾ cup milk
  • 5 ounces canola oil
  • 2 tablespoons unsalted butter melted
  • 2 eggs beaten
  • Zest of 3 lemons
  • 2 tablespoons lemon juice
  • ½ pint fresh blueberries

Vanilla honey butter

  • 8 ounces unsalted butter room temperature
  • 1 tablespoon honey
  • 1 tablespoon vanilla extract

Instructions

Muffins

  • Preheat oven to 350 degrees.
  • To make the streusel topping: Mix all the streusel ingredients in a small bowl. The mixture should be crumbly. If not, sprinkle with a little bit of flour and mix. Once mixed, set aside.
  • In a large bowl, mix sugar, flour, cornmeal, salt, baking powder and poppy seeds with a large whisk, making sure all the dry ingredients are thoroughly mixed.
  • In the middle of the dry ingredients, add milk, oil, butter, eggs, lemon juice, and lemon zest. Use the whisk to mix the wet and dry ingredients together. Be sure to scrap the sides of the bowl to make sure all of the dry ingredients have been mixed in.
  • Add the blueberries to the batter and gently mix in with a rubber spatula.
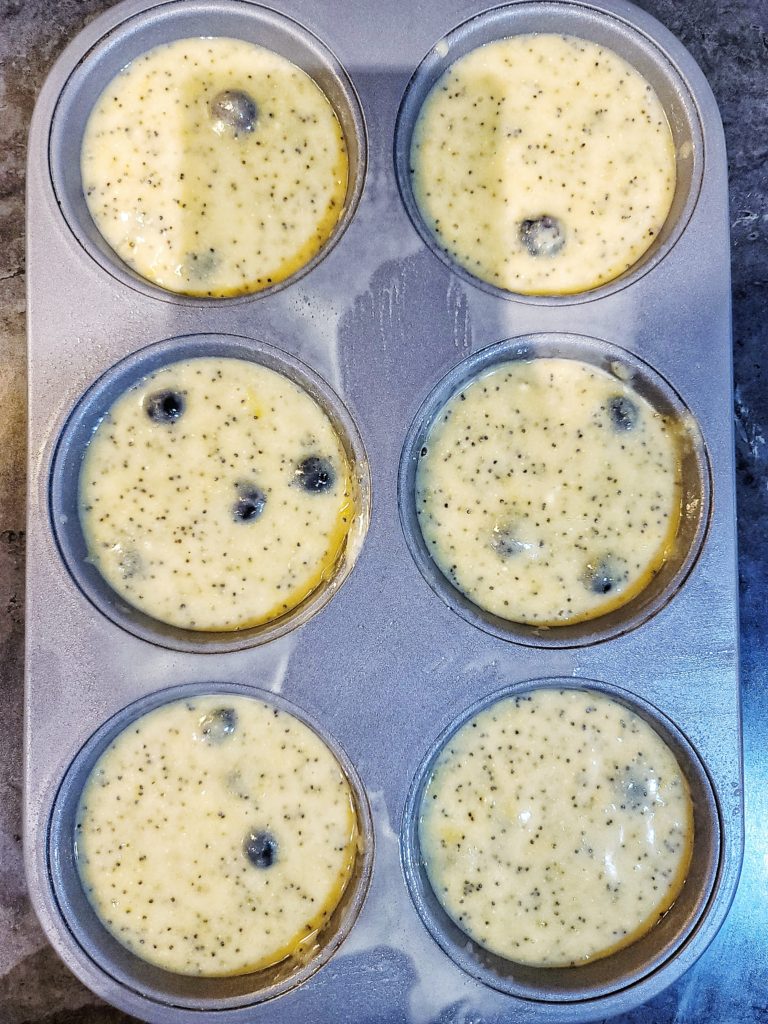
  • Spray muffin tins, or line them with large cupcake liners. Evenly pour batter into each muffin tin, a little over a half a cup.
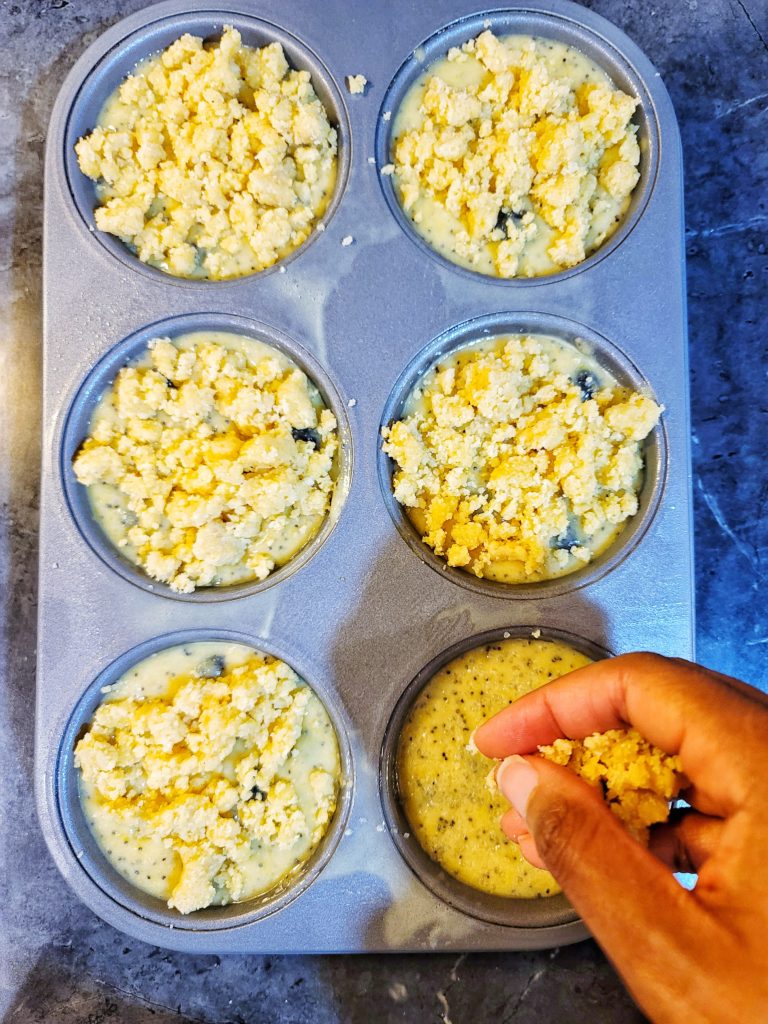
  • Sprinkle the tops of each muffin with the streusel mixture, about 2 tablespoons per muffin.
  • Bake for 30-35 minutes, rotating once. Muffins are ready when a knife or toothpick comes out clean when inserted into the center of a muffin.
  • Let cool for 5 minutes before devouring.

Vanilla Honey Butter

  • Place the room temperature butter into a small bowl. With an electric hand mixer, whip the butter on high for 30 seconds, or until smooth.
  • Add the vanilla extract and honey, and whip on high for 30 more seconds.
  • Can be used immediately, or stored in an airtight container in the fridge.

Quick Cookie Butter Tiramisu with Kahlua Liqueur

Lotus Biscoff Cookie Butter Tiramisu

Hi. In 15 minutes, I made tiramisu with Lotus Biscoff cookies , cookie butter, and some Kahlua. ⠀⠀⠀⠀⠀⠀⠀⠀⠀⠀⠀⠀⠀

Lotus Biscoff Cookie Butter Tiramisu

This Biscoff Tiramisu came out better than I expected! I pretty much always have Biscoff cookies in my house, and have been trying to figure out different desserts to make with. I came across a pic of tiramisu, and knew I had to make it.

How to make tiramisu in a short amount of time

Traditional tiramisu requires egg yolks that are slowly cooked over the stove, then mixed with whipped cream. While I’m fully capable of executing that, I ain’t want to. Plus, I also wanted to make this easier for everyone to execute, so here we are!⠀⠀⠀⠀⠀⠀⠀⠀⠀

The only “difficult” part of this recipe is making whipped cream from scratch. If you don’t wanna go that route, you could simply buy it premade. The whipped cream gets mixed with mascarpone and cookie butter.

What type of cookies should I use for tiramisu?

Instead of ladyfingers, I layered this with Biscoff cookies that’s soaked in espresso and Kahlua. If you can’t get your hands on Biscoff cookies, ladyfingers work too, and is also more traditional.

Alcohol-free tiramisu

To make this alcohol free, you can most certainly replace the Kahlua with additional espresso.

Caffeine-free tiramisu

This is made with espresso, but can most certainly be made with decaf espresso to make this caffeine free.

I don’t suggest making this with coffee, whether caffeinated or decaf. With tiramisu, you want the strong coffee flavor, so espresso is best for this.

Tiramisu single servings

This recipe can also be made into individual servings as well! Do the layers of the soaked cookies with the whipped cream mixture in single serving ramekins or bowls, and refrigerate for a couple of hours.

How long does it take for tiramusu to set?

If you can, please let the tiramisu set overnight before serving. It tastes sooo much better…for reals. But if you’re in an absolute rush and can’t wait to dive into this dessert, this does need to sit in the fridge for 2 hours minimum.

Tiramisu usually takes 6 hours to set. Since mine isn’t traditional, let it set for 4 hours minimum.

How to store tiramisu

The tiramisu can be stored in the fridge for up to a week……if it lasts that long without being consumed.

Make sure the pan it’s stored in is covered tightly with plastic wrap.

Lotus Biscoff Cookie Butter Tiramisu serving

The best way to portion tiramisu servings

You can either slice into the tiramisu like a lasagna, or scoop into it with a spoon like a casserole.

What’s most important is that whether you go the knife or spoon route, the utensil should be ran under warm water before each slice or scoop. It’s almost like you have to treat this like an ice cream cake. A clean utensil makes for cleaner and neater servings.

Biscoff Cookie Butter Tiramisu

Prep Time20 hours
Chill Time4 hours
Total Time4 hours 20 minutes
Course: Dessert
Cuisine: Italian
Keyword: biscoff, cookie butter, espresso
Author: Crystal

Equipment

  • Square baking dish (8×8 or 9×9)
  • 1 small mixing bowl
  • 1 large mixing bowl
  • Handheld or stand mixer with a whip attachment
  • Plastic wrap
  • Small spatula
  • Small sifter

Ingredients

  • 2 ounces espresso
  • 2 ounces Kahlua
  • 1 ½ cup heavy whipping cream
  • ½ tsp vanilla extract
  • 1 ½ tbsp granulate sugar
  • 8 ounces mascarpone cheese room temperature
  • ½ cup cookie butter
  • 20-24 Biscoff cookies
  • ¼ cup cocoa powder

Instructions

Tiramisu Prep

  • Set aside an 8×8 or 9×9 baking pan or dish.
  • In a separate dish or a bowl, combine espresso and Kahlua, and set aside.
  • In a separate large bowl, pour in heavy cream, vanilla, and sugar. Whip with a handheld mixer on high for 4-5 minutes, until the mixture is fluffy. (Can also be done with a stand mixer.)
  • Add mascarpone cheese and cookie butter to the whipped cream. Whip on high for one minute, mixing thoroughly and scraping the sides of the bowl if needed. Set aside.

Tiramisu Assembly

  • One at a time, quickly dip Biscoff cookies into the espresso mixture for 1 second on each side.
  • Arrange the soaked cookies into one layer in the bottom of the baking dish.
  • Take half of the whipped cream mixture and spread it evenly on top of the soaked cookies.
  • Repeat the 3 steps above to make another layer by soaking cookies, making one layer on top of the whipped cream mixture, and topping with the remaining whipped cream mixture, spreading evenly. (Note – Some cookies can be split in halves to fill any empty spaces.)
  • Refrigerate uncovered for 2 hours.
  • After chilling, dust the top of the tiramisu with cocoa powder. Cover the pan with plastic wrap and refrigerate for at least 2 additional hours.
  • To serve, either cut into the tiramisu with a knife to make slices, or use a spoon to make scoops. Be sure to wipe the knife spoon clean between each serving to make for cleaner cuts/scoops.

Notes

To make this alcohol free, you can most certainly replace the Kahlua with additional espresso.
This is made with espresso, but can most certainly be made with decaf espresso to make this caffeine free. 

If you’re looking for another cookie butter recipe, check out this No Bake Chocolate Cookie Butter Pudding Pie!

Lemon Buttermilk Custard Pie

Close up shot of lemon buttermilk custard pie slice

There are a lot of desserts that I enjoy eating, but anything that’s lemon flavored has a special place in my heart. And this Lemon Buttermilk Custard Pie was my introduction to the awesomeness of lemon desserts.

Overhead shot of lemon buttermilk pie slices

I’m a huge fan of lemon desserts. I also love custards. If you’re like me, you’ll love this one! It’s nice and light, creamy, and tangy, and a fool-proof recipe. ⠀

I used to make this years ago back in culinary school, and my little sister has been bugging me to make it for her since then. After doing some organizing at home, I recently found all of my recipes from college, (finally) made this for her, and now she’s the happiest person in the world! Fingers crossed she stops bugging me about it. Probably not though since it is delicious.

I am NOT good at baking! So you can handle this one!

I am not a fan of measuring stuff and making sure things are a certain temperature to be blended correctly. So, for those of you that don’t like to bake but love to eat baked products, this is an extremely easy recipe for you to follow! Like, too damn easy. So easy that it can be done with your eyes closed if you wanna be that rebellious.

How I got my pie the consistency of a custard without cooking it ahead of time:

To bake, the oven is preheated at a high temperature, then turned down once the pie is placed in the oven. This makes the top half of the pie completely set, like a really soft cake. But as you get near the bottom half, it’s like the texture of lemon curd. And when it’s mixed together it’s magical!!!!

Close up shot of lemon buttermilk custard pie slice

Can the serving size for this recipe be modified in any way?

I also love how light this dessert is. This recipe can be made into 2 thinner pies which sounds like a lot, but is perfect if you’re looking to feed a crowd.

What garnishes should I use for the lemon pie?

Serve this with a dollop of whipped cream to add another layer of creamy-ness and you have a nice refreshing dessert. Or breakfast if you’re like me.

Close up shot of lemon buttermilk custard pie slice
Print Recipe
5 from 9 votes

Lemon Buttermilk Custard Pie

Prep Time10 minutes
Cook Time50 minutes
Rest Time2 hours
Total Time3 hours
Course: Dessert
Cuisine: American
Keyword: lemon, pie
Servings: 8 slices
Author: Crystal

Equipment

  • Large bowl
  • Hand mixer
  • Zester

Ingredients

  • 1 ¼ cup granulated sugar
  • 3 tbsp all purpose flour
  • ¼ teaspoon ground nutmeg
  • ½ cup unsalted butter melted
  • 3 eggs
  • 8 ounces buttermilk
  • 2 tbsp lemon juice
  • zest of a lemon
  • 1 9 inch deep dish pie crust frozen and unbaked

Instructions

  • Preheat oven to 400 degrees.
  • In a medium sized bowl or mixer, mix together the sugar, flour, and nutmeg on the lowest speed.
  • Pour in butter and mix together.
  • Add the eggs and thoroughly mix in, one at a time.
  • Slowly pour in the buttermilk while mixing. Add in the lemon juice and zest, blending for 30 seconds. Scrape down the insides of the bowl for any unmixed batter. Blend for an additional 30 seconds.
  • Evenly pour the mixture into the unbaked pie shells.
  • Put the pies into the oven, and set a timer for 50 minutes. Once the timer is set, turn the oven down to 325 degrees.
  • Once baked, let cool to room temperature before refrigerating.

Notes

Keep the filled pie crust on a pan wider than the side of the pie shell.  This will make it easier to place the pie into the oven, as well as removing it from the oven.
The recipe can be made into 2 smaller pies to yield more servings. Use 2 regular sized 9 inch pie crusts instead of one deep dish pie crust. Split the pie mixture between both pie crusts and bake for 25 minutes. 

Pin It on Pinterest