Buttermilk Cheddar Biscuits with Scallions

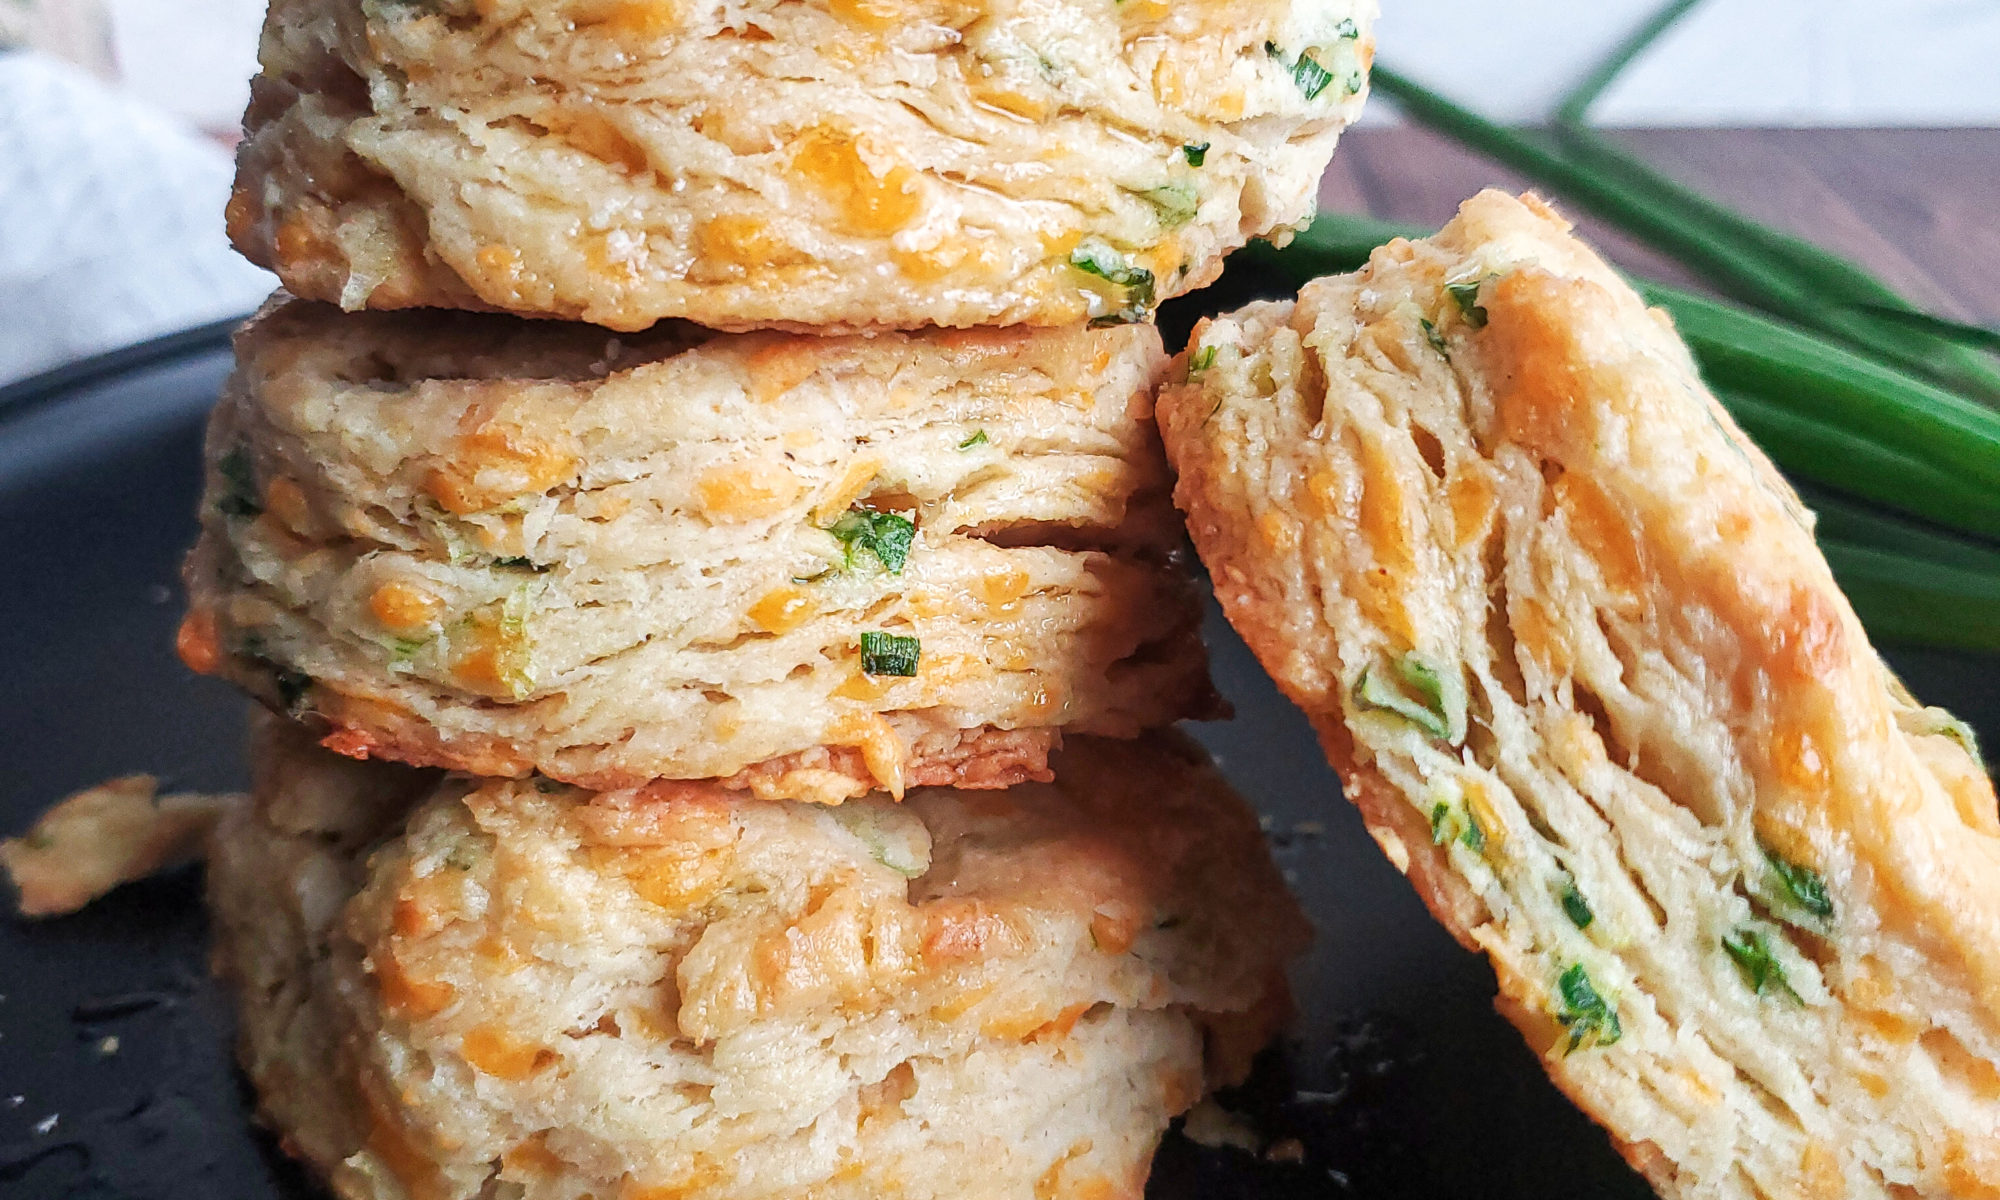
Cheddar scallion biscuits on a plate

If you’re looking for a savory breakfast biscuit, I’ve got you covered. My buttermilk cheddar scallion biscuits are the perfect addition to your breakfast needs!

These cheddar scallion biscuits are something you’ll definitely want to keep in rotation for breakfast or brunch. It’s also a great side dish for dinner! Or, if you’re like me, it’s great to randomly snack on during the day! I’ve also added a hint of garlic to the recipe, because….well, why not???
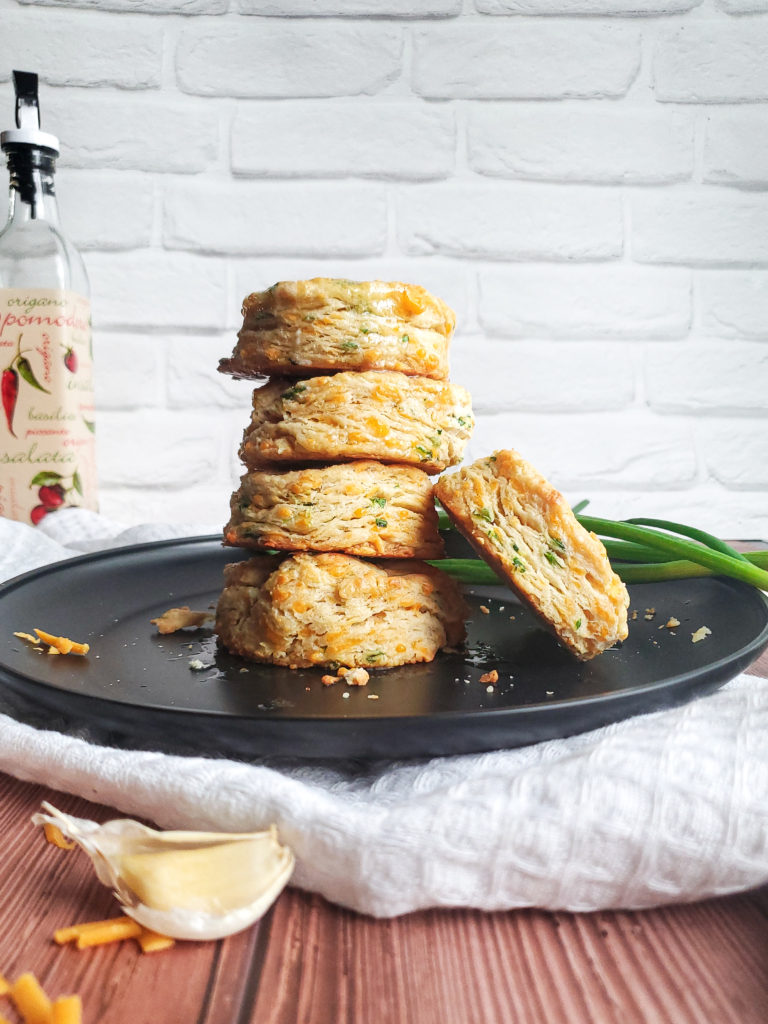
Stack of cheddar scallion biscuits on a plate
Cheddar scallion biscuits

How to make homemade biscuits

Making biscuits from scratch may seem a bit scary in the beginning (talking to myself here). But after learning some simple tricks to making the dough, you’ll want to make a batch of biscuits every day! 

It’s also so so simple to make biscuits from scratch, that it’s actually a bread recipe where your measurements do not have to be exact! Being someone that likes to eyeball their measurements and is also NOT a baker, I love the ease of putting together a biscuit recipe. But, as a guide, I’ve created an actual recipe for ya!

You simply mix chunks of butter with a flour mixture, then add your milk of choice. If there’s additional flavors or seasonings you’d like to add, it’ll get tossed in before the milk.

Tips to making a great batch of biscuits

While biscuits are pretty simple to execute, there are a few small tips to making a batch go from “Mmmmmmm!” to “MMMMMMMMMMMMM!

Keep your cold ingredients cold!

The most important tip when it comes to making a batch of biscuits is to keep all of your refrigerated ingredients in the fridge until it’s ready to be used for the dough. I usually measure out what’s needed, then tuck it back in the fridge. Even if I plan on using it within 5 minutes, I keep it cold until the very last second. 

Using cold ingredients helps to create those layers that we all love biscuits for. You really want to avoid letting your cold ingredients get to room temperature. If this happens, your biscuits will not create those layers, and can also be a bit dense once baked.

Measure out your milk of choice and butter, and keep it in the fridge until ready to use. 

Grate your butter!

If you have time, freeze your butter for about 15 minutes. Then get a grater, and grate the butter like it’s cheese! This is a fun trick to get the butter into small enough pieces without getting the butter too warm with your body heat or having it sit at room temperature.  

If you do not have a grater available, you can cut the butter into a pea size amount with a knife before putting it back in the fridge to chill. 

Another option is to first cut your butter into larger chunks, then use a bladed dough blender to break the butter up into tinier pieces directly into the flour while the bowl. It’s a pretty cool tool to use too!

There’s also the option to cut and break the butter up into those smaller pieces with your fingers. But again, since we want to keep the cold ingredients cold, this should be a last resort. So the previous options are the better way to go.

Create even more layers in your biscuits!

Another trick to getting those flaky layers in biscuits is to create them!

To do this, you’ll flatten the mixed dough onto a floured surface to an inch thick with a rolling pin, forming a rectangle. Next, you’ll fold that rectangle in half on top of itself, like folding a book together. Rotate that folded dough a quarter of a turn, flatten the dough out again, and repeat the folding process 4 additional times (5 folds in total.) Using a bench scraper is very helpful with getting the dough off the counter to be folded. 

Do this quickly though, since you do want to keep the ingredients in the dough as cold as you can before baking. This will take about 3 minutes to do.

What to serve with cheddar scallion biscuits

These cheddar scallion biscuits are delicious on their own! I love to slice one open and spread some butter onto it. Sooo good!

It’s also perfect for making breakfast sandwiches, or even to accompany a sausage gravy to make the ultimate biscuits and gravy brunch meal! (recipe coming soon for the sausage gravy!)

I hope you have as much fun making (and eating) my cheddar scallion biscuits like I did!

Cheddar scallion biscuits on a plate
Print Recipe
5 from 9 votes

Buttermilk Cheddar Scallion Biscuits

My flaky cheddar scallion biscuits are the perfect addition to your breakfast needs!
Prep Time5 minutes
Cook Time30 minutes
Total Time35 minutes
Course: Appetizer, Side Dish, Snack
Cuisine: American
Keyword: bay biscuits, biscuit, biscuits, cheddar bay biscuits, cheddar biscuit, cheddar biscuits, red lobster biscuits
Servings: 8 biscuits
Author: Crystal

Equipment

  • sheet pan
  • parchment paper
  • Mixing bowl
  • wooden spoon
  • Rolling Pin
  • Bench scraper
  • Bladed dough cutter or grater
  • pastry brush

Ingredients

  • 2 ¾ cup all purpose flour plus extra for dusting
  • 1 tablespoon baking powder
  • 1 tablespoon garlic powder
  • 1 teaspoon salt
  • 4 scallions sliced thin
  • ½ cup shredded cheddar cheese
  • ½ cup unsalted butter kept cold
  • 1 cup buttermilk kept cold
  • 2 tablespoons melted butter

Instructions

  • Preheat the oven to 400 degrees. Line a small sheet pan with parchment paper. Spray the parchment with pan spray and set aside.
  • In a large mixing bowl, thoroughly whisk together the flour, baking powder, garlic powder, and salt.
  • Toss in the scallions and shredded cheese and coat with the flour mixture.
  • Grate the cold butter into the flour, and coat with the flour mixture with a wooden spoon.
  • Pour the milk into the center of the flour mixture. Slowly mix in the flour with the wooden spoon to incorporate. Then use your hands to thoroughly mix until the dough is formed. Dough may be slightly wet.
  • Take a couple of spoonfuls of flour and dust onto the countertop. Dump the dough onto the flour. Dust a little more flour on top of the dough. Roll the dough out to an inch thick.
  • Fold the rolled out dough in half like a book. Rotate the folded dough a quarter of a turn, and roll the dough to an inch thick. Fold and rotate the dough a total of 5 times, flouring the counter top as needed.
  • After folding the dough one last time, roll out to 1 inch thick and cut into desired biscuit sizes. Place biscuits onto the parchment lined sheet pan.
  • Bake for 15 minutes, rotating halfway through baking.
  • Remove from the oven. Brush with melted butter and serve.
Classic Buttermilk Pancakes

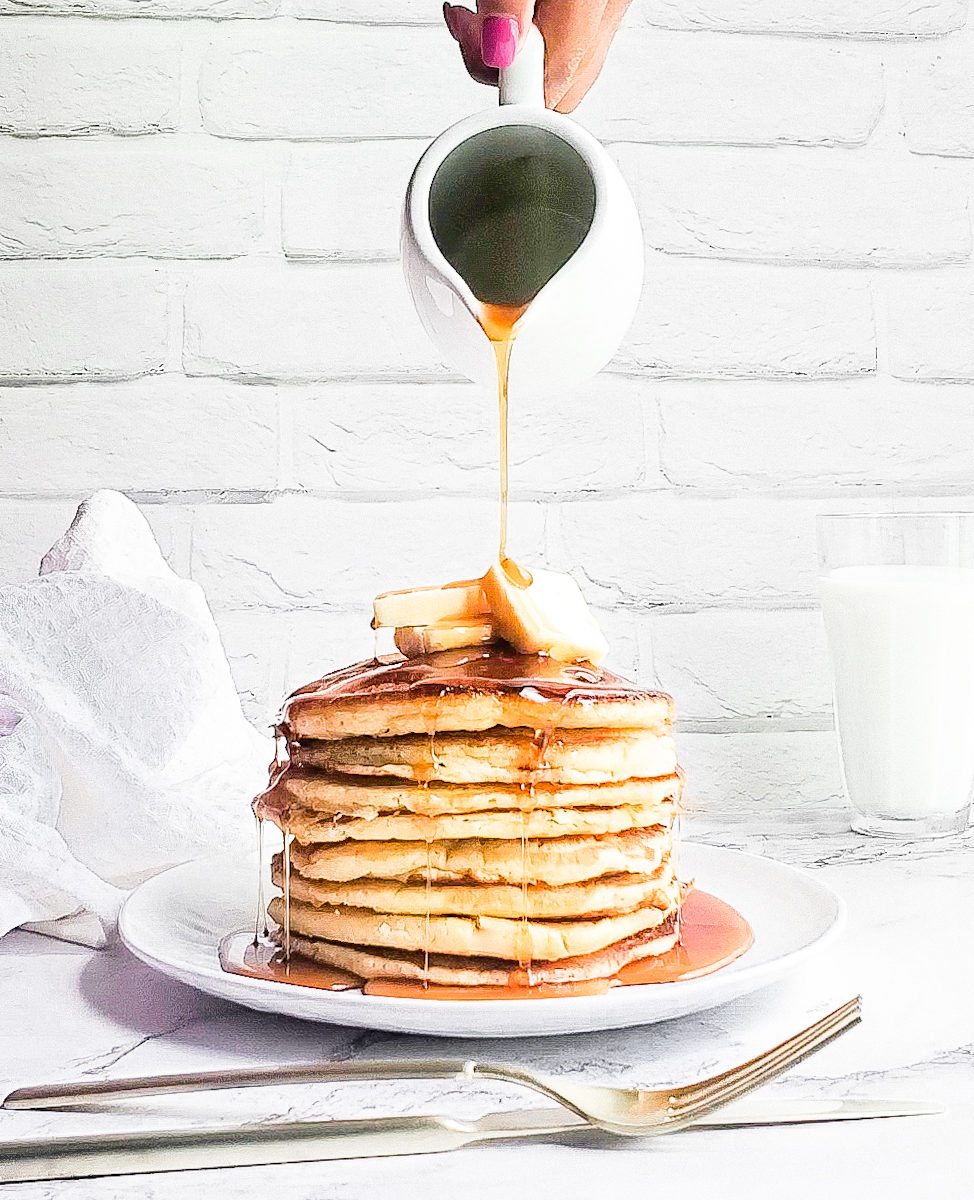
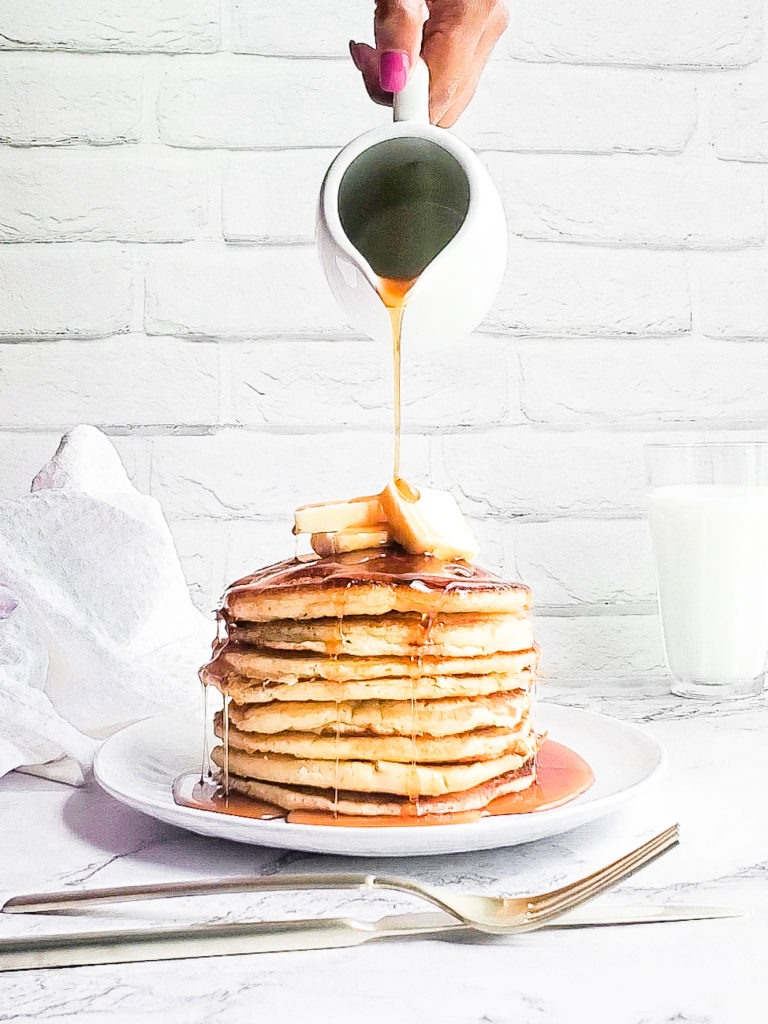
Stack of pancakes with butter being drizzled with syrup

Can never go wrong with a nice fluffy stack of some classic buttermilk pancakes. Amiright? I am right. Keep it classy, not trashy.

Stack of buttermilk pancakes with butter being drizzled with syrup

How do I make classic buttermilk pancakes?

Cooking pancakes definitely seems intimidating at first. But please don’t freak out with this recipe. It really is sooooo simple to do. As a quick summary:

  1. Mix your batter, and let it sit for a few minutes before cooking
  2. Preheat your griddle or cast iron skillet
  3. Add a thin layer of your fat of choice
  4. Pour in the desired amount of batter
  5. Cook one side of the pancake for a few minutes, then flip to cook the other side for one more minute. 

I’ve created a much more detailed breakdown of the pinpoints listed above, which can be found here, along with pictures! You’ll also find a really yummy red velvet pancake recipe there too!

What toppings can I add to my pancake batter?

What I love about this recipe is that you can jazz up the batter with additional toppings! 

I love to add a couple of handfuls of chocolate chips to satisfy that chocolate craving that I pretty much always have. To make the batter itself a little sweeter, add a half a teaspoon of vanilla extract.

You can also throw in some sprinkles to serve these to the little ones, or yourself if you’re in the mood to be a big kid. I would add a half teaspoon to this batter for this modification as well.

Adding a cup or two of berries are a great addition too if you’re looking to be fake healthy! Either fresh or thawed frozen berries will do. 

But sometimes, it’s cool to  keep it classy and not trashy. Go ahead and test this recipe out the traditional way. I ain’t gonna be mad at ya!

What should I put on top of my buttermilk pancakes?

Honestly, the best way to serve these yummy buttermilk pancakes with a slice of butter and warm maple syrup!

Similar to adding your fav berries into the batter itself, it can be added as a garnish when serving the pancakes too. 

How to store cooked pancakes

I like to make a few batches of pancakes to freeze for later. When reheated, it’ll taste just as good as it did when serving it on the day off. To do this:

  • Completely cool your pancakes to room temperature.
  • Place the pancakes into a freezer safe ziploc bag. 
  • Optional: if you have deli or parchment paper, it can be placed between each pancake before freezing
  • Write a date onto the bag and freeze.

When you’re ready to serve the frozen pancakes, you’ll do the following:

  • Place frozen pancakes into one layer on a microwave safe dish.
  • Place a damp paper towel over the frozen pancakes. 
  • Microwave for 45 seconds for a single pancake, or 1 minute for multiple pancakes at once. Microwave for an additional 15 seconds if needed.

The steam created from the damp paper towel will help to add some moisture into the pancake while it’s warming up. 

I hope you get a chance to test out my classic buttermilk pancakes! If you do, I’d love it if you left a review. Also be sure to tag me on Instagram!

If you’re looking for more breakfast inspo, check out my lemon ricotta pancakes!

Classic Buttermilk Pancakes

Can never go wrong with a nice fluffy classic buttermilk pancake. Amiright? I am right.
Cook Time30 minutes
Course: Breakfast
Cuisine: American
Keyword: breakfast, brunch, buttermilkpancake, pancake, pancakes
Servings: 4 servings
Author: Crystal

Equipment

  • Mixing bowls
  • Whisk
  • Cast iron skillet or griddle
  • spatula
  • pastry brush

Ingredients

  • 1 cup all purpose flour
  • ½ tsp kosher salt
  • 2 tbsp granulated sugar
  • 1 tsp baking powder
  • 1 cup buttermilk
  • 1 eggs
  • 3 tbsp melted butter
  • olive oil for cooking the pancakes

Instructions

  • Preheat a griddle or cast iron pan on a stove to the setting above it’s lowest setting.
  • While the griddle is heating, In a large bowl, whisk together the flour, salt, sugar, baking powder, and baking soda. Set aside.
  • In a small bowl, whisk together the egg and milk.
  • Pour the milk mixture in with the flour mixture. Gently whisk for about a minute to combine.
  • Add the melted butter to the mixture. Stir to incorporate. Batter should be slightly lumpy and thick.
  • Spread small amount of olive oil in the griddle with a pasty brush, just enough to coat the surface.
  • Pour a quarter cup of the pancake mixture onto the griddle. Spread out the mixture to make pancakes a little thinner and rounder. If cooking multiple pancakes at a time, be sure to keep them at least an inch apart.
  • Cook pancakes for 4-5 minutes on it’s first side. The uncooked side will create little holes and look a little dry. Once it’s at that point, flip and cook for 1 more minute.
  • Serve with melted butter and maple syrup. Enjoy!

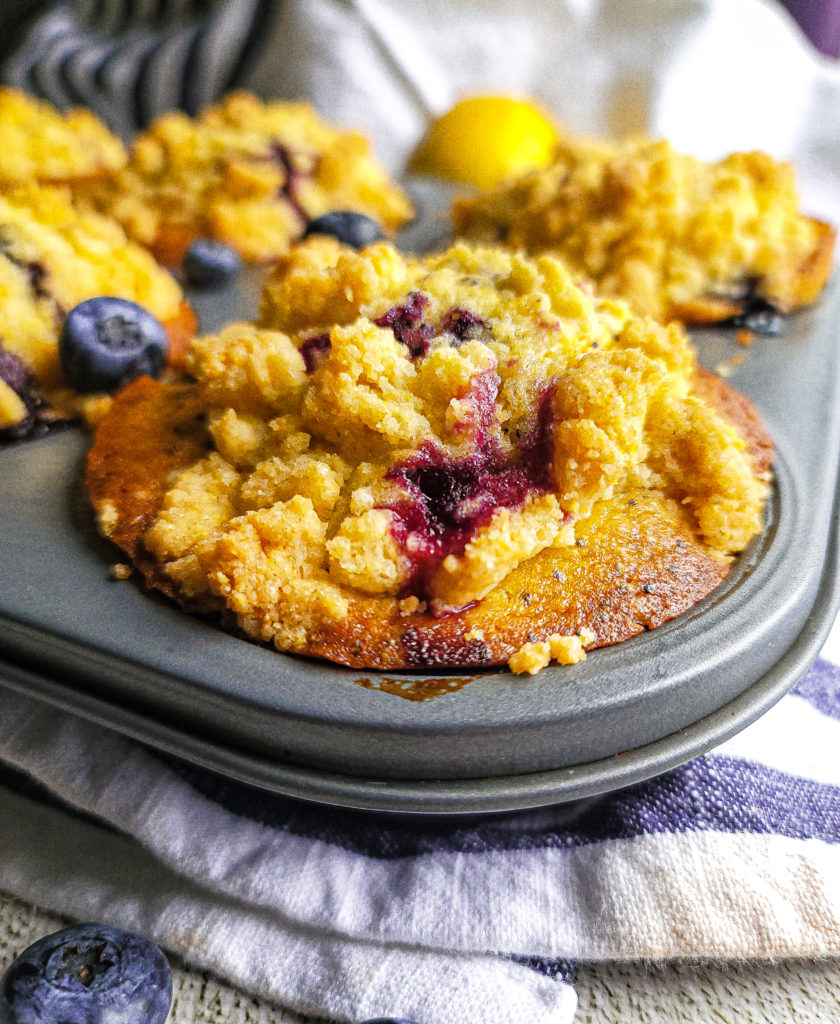
Blueberry Lemon Poppyseed Corn Muffins with Vanilla Honey Butter

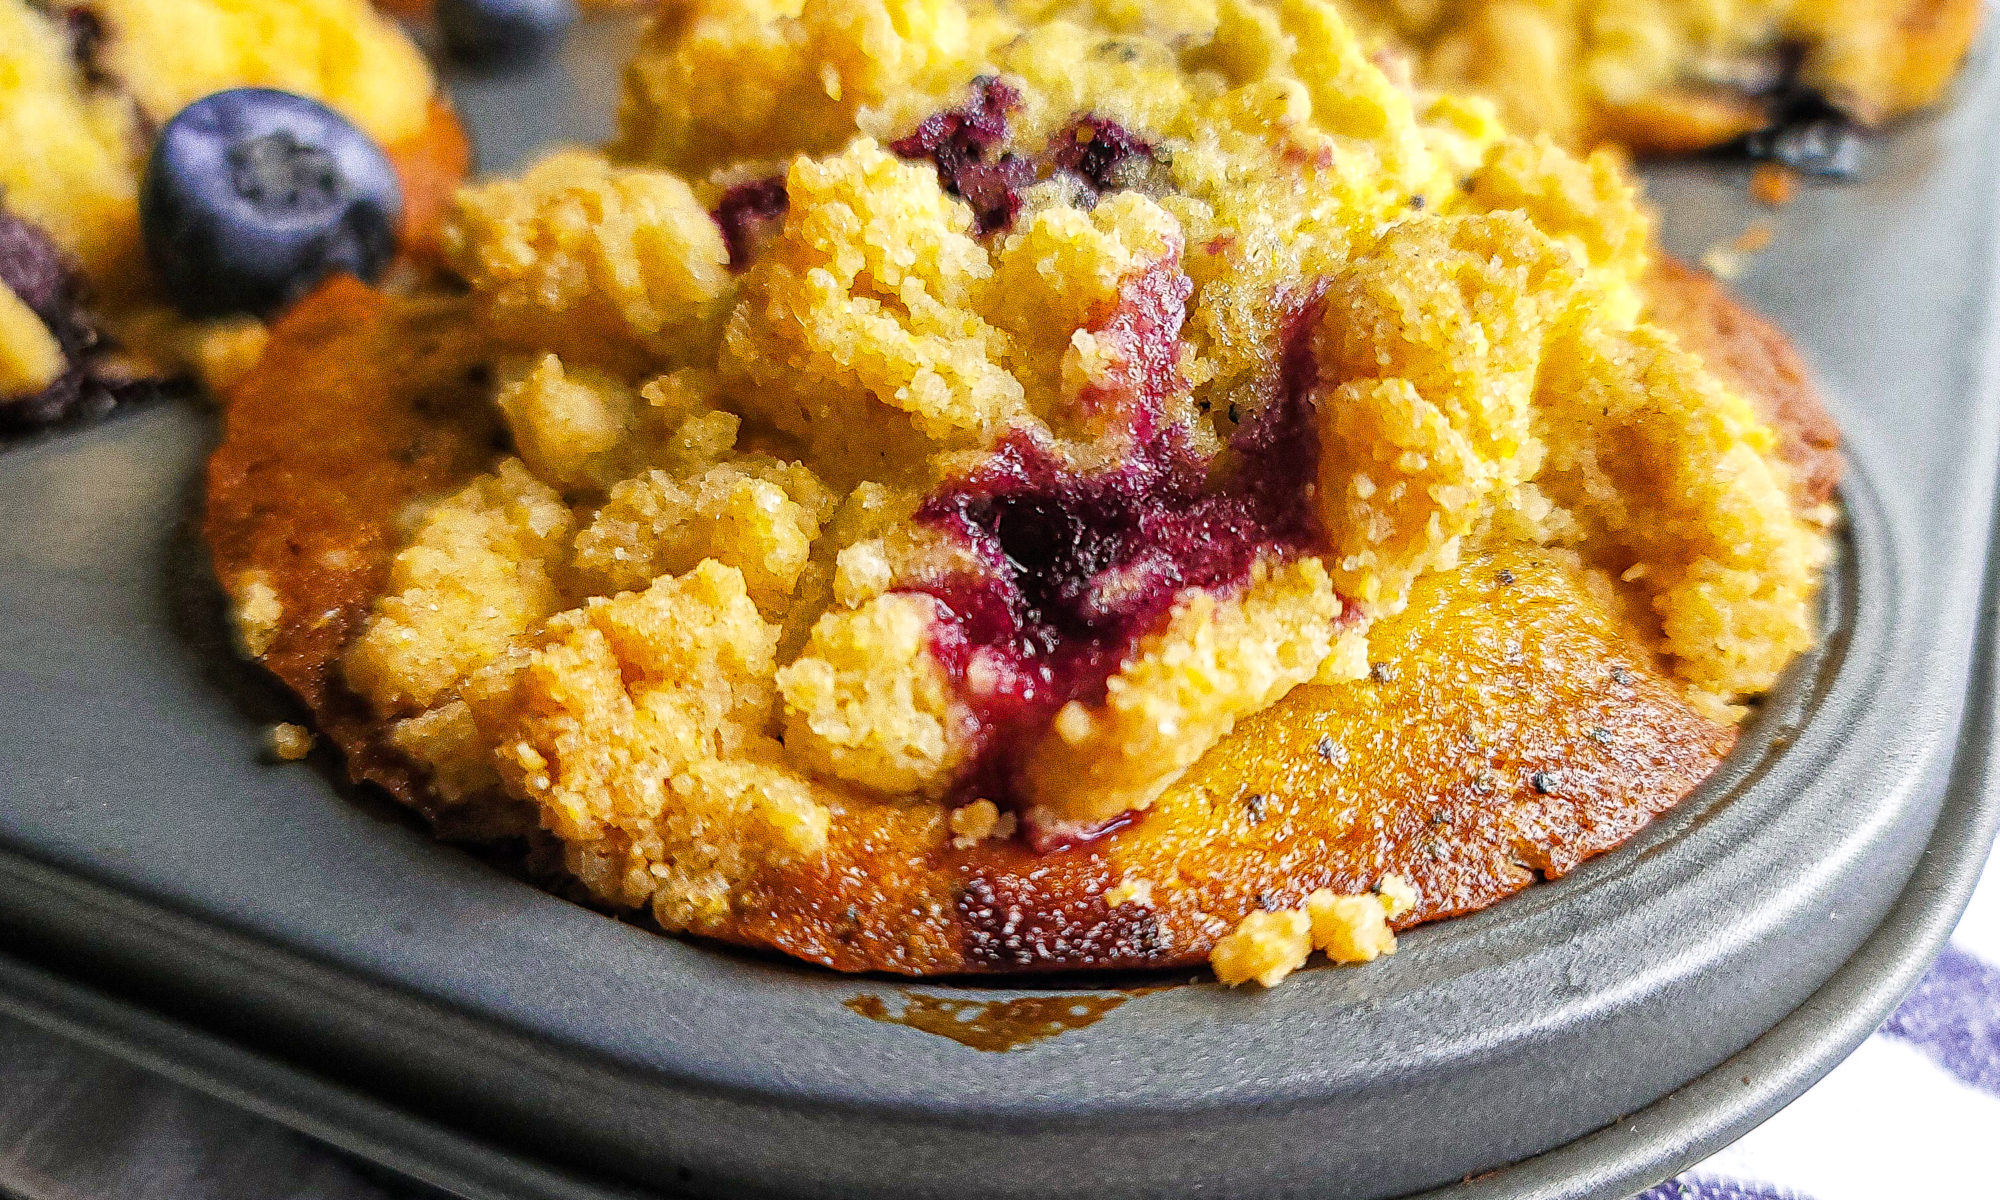
Close up shot of blueberry lemon poppyseed corn muffins

Warm blueberry lemon poppyseed corn muffins with a crumbly topping are the perfect addition for your breakfast and brunch meal. Add a schmear of lightly sweetened vanilla honey butter for a real treat!

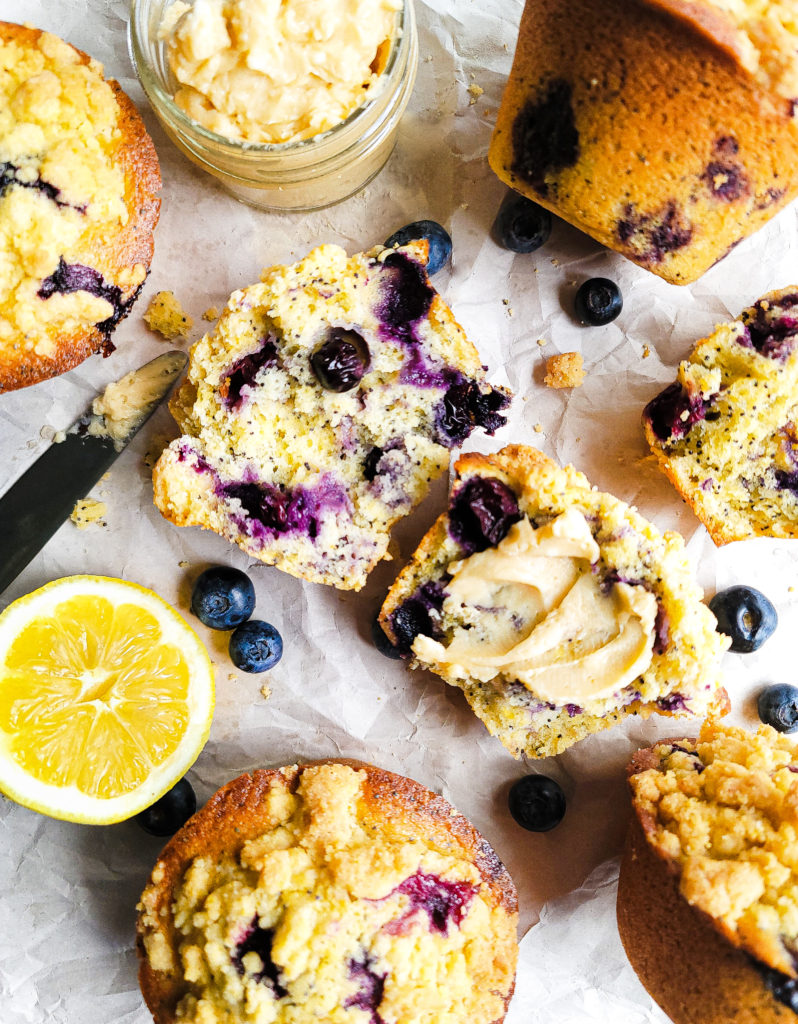
Overhead shot of blueberry lemon poppyseed corn muffins  with a smear of vanilla honey butter

Cornmeal muffins are`a standard breakfast and brunch item. But these are something that deserves to be fancied up. My corn muffins are gently mixed with poppy seeds and fresh blueberries. Fresh lemon juice and its zest brighten the flavor. The streusel topping adds a bit of a crunch, and the muffins get a bit more sweetness from the smooth vanilla honey butter. You and the fam will thoroughly enjoy this one!

How to make cornmeal muffins

These blueberry lemon poppyseed corn muffins are sooooo easy to execute! Just mix your dry ingredients, add in the wet ingredients, and mix in blueberries.  Once the batter is portioned, top with the cornmeal streusel and bake. The vanilla honey butter can be made while the muffins are baking. After 45 minutes, you’ll have the perfect addition to your breakfast spread!

Cornmeal vs Cornmeal Flour

If you look at the ingredients, you’ll notice that I use cornmeal flour instead of regular ground cornmeal. While these are interchangeable, I prefer to use cornmeal flour when baking.

Cornmeal flour and cornmeal have the same exact ingredient: ground cornmeal. The main difference is how fine the cornmeal has been ground up. Regular cornmeal is a bit more gritty. Cornmeal flour is its finely ground version, but with a fluffier and smoother consistency. 

Fresh blueberries vs frozen blueberries

My recipe uses fresh blueberries. I prefer to use fruit for baked goods while they’re in season. But these corn muffins can be made year round.

Frozen blueberries can replace fresh blueberries. I’d recommend letting the blueberries thaw out a bit before adding to the batter. The batter will turn a shade of purple once the frozen berries are added, but it’s nothing to be afraid of. 

What do I use if I don’t have lemons for the corn muffins?

This recipe calls for lemon zest, as well as fresh lemon juice. It’s a much more natural lemon flavor using lemon in this fashion.

However, if you do not have fresh lemons on hand, you can substitute the juice and zest with a tablespoon of lemon extract. 

Additionally, fresh lemon juice can be swapped for bottled lemon juice if that’s what you have on hand. The lemon zest can then be omitted. 

Can I make this recipe into mini corn muffins?

My recipe yields 6 large muffins. You are welcome to make this into smaller muffins! This will yield 12 cupcake-sized muffins. 

Portion and top the muffins with the streusel, and bake for about 20 minutes, or until a toothpick comes out clean when inserted into the center. 

What is streusel?

Streusel is a crumbly mixture that goes on top, and sometimes inside, of baked good before it goes in the oven. This adds texture to pastry that is usually super soft. Think of coffee cakes. The fluffy cake is topped with that sweet slightly crunch crumble, making a party in your mouth. 

I decided to add a streusel topping to my corn muffins for that additional crunch, commonly found on breakfast pastries. It also adds a little sweetness.

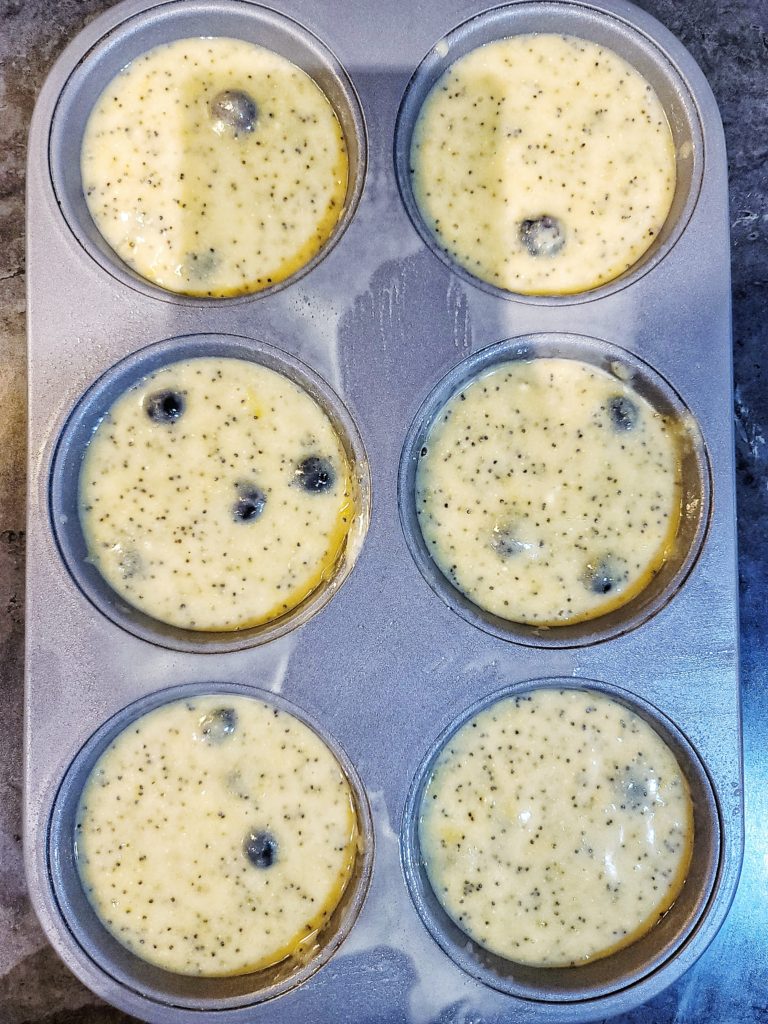
Portioned muffin batter in muffin tins
Portion the muffin batter into a muffin tin
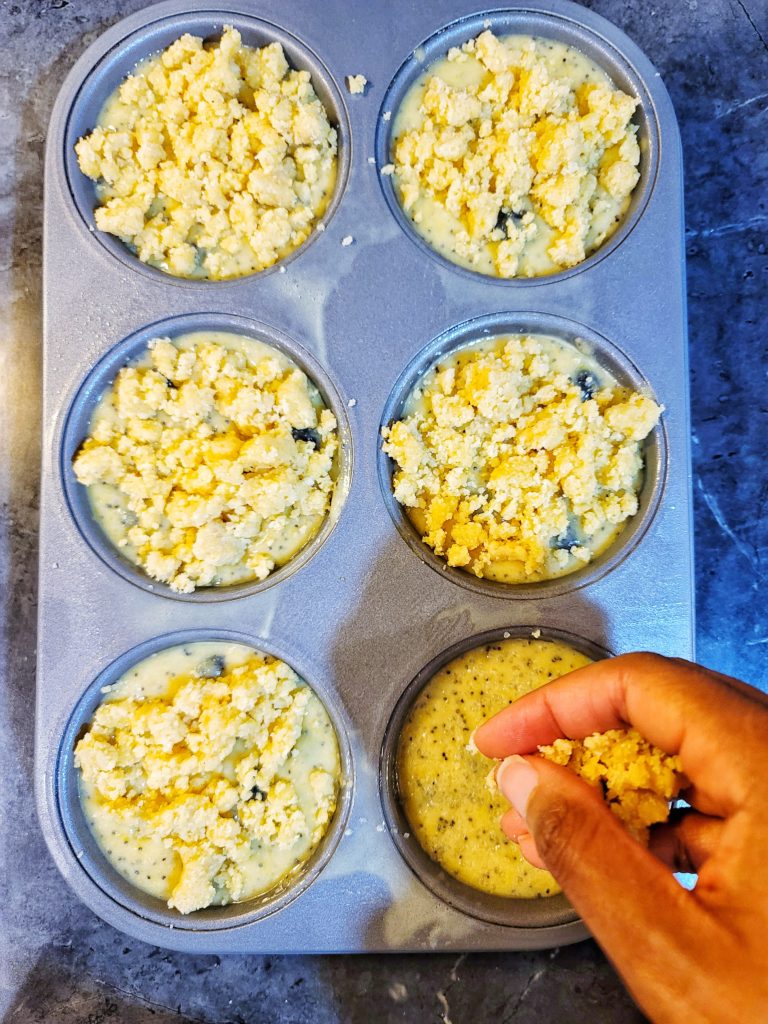
Portioned muffin batter being topped with a streusel crumble
Sprinkle the streusel crumble on top of each muffin

If you aren’t a fan of streusel topping, it can be omitted. I’d suggest sprinkling the portioned muffin matter with coarse white sugar, which will also add a little of that crunch. 

How to make the whipped vanilla honey butter

Making whipped butter is also very simple!

Add your room temperature butter into a bowl. With a handheld mixer, whip it on the highest speed to make the butter smooth. This takes about 30 seconds. After that, add the honey and vanilla extract and whip for a few more seconds until incorporated. This can also be done in a stand mixer. 

Softened, room temperature butter is important when making any whipped butter. If the butter is hard, it’ll be harder to whip with a mixer, and also harder for the additional ingredients to incorporate. The butter will also be chunky, instead of smooth and velvety. 

Close up shot of blueberry lemon poppyseed corn muffins

Other corn muffin variations

If you aren’t a fan of blueberries, it can be replaced with your berry of choice! 

A raspberry orange corn muffin is a great variation! Replace the lemon juice with orange, and use the zest of one orange for the batter. The poppy seeds can be omitted if you’d like. 

Also, the fruit can be completely omitted! Ain’t nothing wrong with some classic lemon poppyseed corn muffins!

I hope you get to try and love these blueberry lemon poppyseed corn muffins, especially with the vanilla honey butter! If you’re looking for other easy breakfast ideas, give my Fluffy Lemon Ricotta Pancakes a try! Don’t forget to also leave a review, and share your creations by tagging me on Instagram and Twitter, cuz I love stuff like that!

Blueberry Lemon Poppyseed Corn Muffins with Whipped Vanilla Honey Butter

A warm blueberry lemon poppyseed corn muffin with crumbly topping and vanilla honey butter is the perfect addition for your breakfast and brunch meal.
Prep Time10 minutes
Cook Time35 minutes
Course: Breakfast
Cuisine: American
Keyword: blueberry lemon muffin, blueberry lemon poppyseed muffin, blueberry muffin, breakfast, brunch, corn muffin, corn muffins, lemon poppyseed, lemon poppyseed muffin, muffin, muffins, poppyseed, poppyseed muffins
Servings: 6 muffins
Author: Crystal

Equipment

  • 2 Mixing bowls
  • 1 Whisk
  • 1 muffin pan, for 6 muffins
  • 1 Rubber spatula
  • 1 handheld mixer

Ingredients

For the streusel topping

  • ¼ cup granulated sugar
  • 3 tablespoons unsalted butter melted
  • 2 tablespoons cornmeal flour
  • 7 tablespoons all purpose flour

For the muffins

  • ¾ cup granulated sugar
  • 1 ½ cup all purpose flour
  • ½ cup yellow cornmeal flour
  • ½ tablespoon kosher salt
  • 1 teaspoon baking powder
  • 2 tablespoon poppyseeds
  • ¾ cup milk
  • 5 ounces canola oil
  • 2 tablespoons unsalted butter melted
  • 2 eggs beaten
  • Zest of 3 lemons
  • 2 tablespoons lemon juice
  • ½ pint fresh blueberries

Vanilla honey butter

  • 8 ounces unsalted butter room temperature
  • 1 tablespoon honey
  • 1 tablespoon vanilla extract

Instructions

Muffins

  • Preheat oven to 350 degrees.
  • To make the streusel topping: Mix all the streusel ingredients in a small bowl. The mixture should be crumbly. If not, sprinkle with a little bit of flour and mix. Once mixed, set aside.
  • In a large bowl, mix sugar, flour, cornmeal, salt, baking powder and poppy seeds with a large whisk, making sure all the dry ingredients are thoroughly mixed.
  • In the middle of the dry ingredients, add milk, oil, butter, eggs, lemon juice, and lemon zest. Use the whisk to mix the wet and dry ingredients together. Be sure to scrap the sides of the bowl to make sure all of the dry ingredients have been mixed in.
  • Add the blueberries to the batter and gently mix in with a rubber spatula.
  • Spray muffin tins, or line them with large cupcake liners. Evenly pour batter into each muffin tin, a little over a half a cup.
  • Sprinkle the tops of each muffin with the streusel mixture, about 2 tablespoons per muffin.
  • Bake for 30-35 minutes, rotating once. Muffins are ready when a knife or toothpick comes out clean when inserted into the center of a muffin.
  • Let cool for 5 minutes before devouring.

Vanilla Honey Butter

  • Place the room temperature butter into a small bowl. With an electric hand mixer, whip the butter on high for 30 seconds, or until smooth.
  • Add the vanilla extract and honey, and whip on high for 30 more seconds.
  • Can be used immediately, or stored in an airtight container in the fridge.

Pin It on Pinterest